Best Steel Stud Framing Screws: Sizes, Types & Pro Guide
Master steel stud framing screws with our complete guide. Compare self-drilling vs. self-piercing, choose the right sizes, and avoid common framing failures.

The Anatomy of Steel Stud Framing Screws
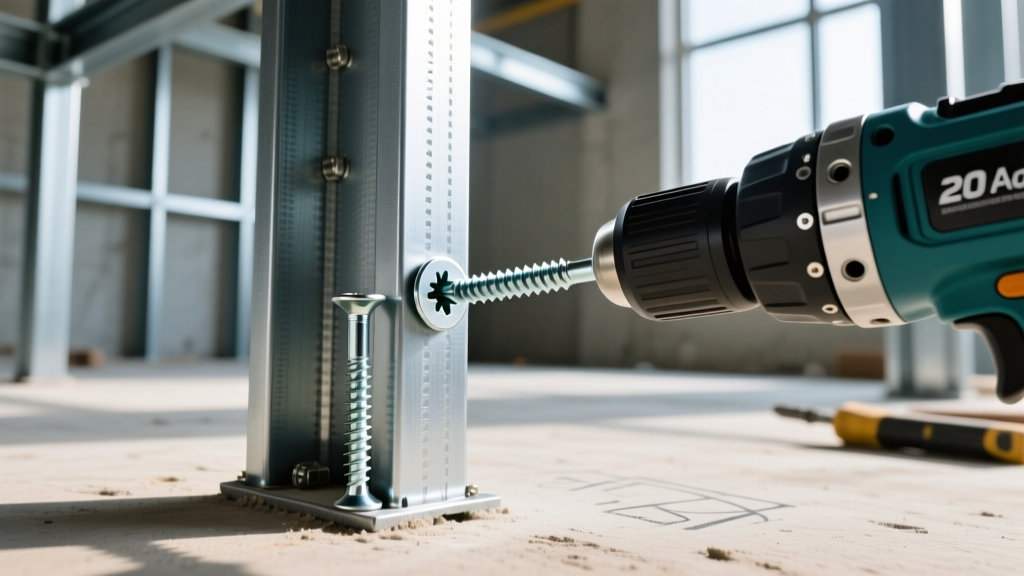
Selecting the correct fastener for cold-formed steel (CFS) framing goes far beyond grabbing a box of standard drywall screws. Steel stud framing screws are engineered with specific metallurgy, thread pitches, and point geometries to handle the shear strength and galvanized zinc coatings of modern CFS. Using the wrong fastener leads to stripped holes, snapped drill points, and compromised structural integrity.
Every steel framing screw consists of four critical zones that dictate its performance:
- Head Style: Dictates material clamping force and drywall clearance. Modified Truss (low-profile) heads are the industry standard for drywall-bearing studs because they minimize dimpling in 1/2-inch gypsum. Pan Heads offer wider bearing surfaces for track-to-concrete connections, while Hex Washer Heads (HWH) are reserved for structural shear walls and heavy-gauge load-bearing assemblies.
- Drive Recess: Phillips #2 is standard, but square (Robertson) or Torx drives are increasingly specified for high-torque structural connections to prevent cam-out.
- Thread Pitch & Shank: Fine-thread screws (typically 12 to 16 threads per inch) are mandatory for steel. Coarse threads designed for wood will strip the thin metal webbing of a steel stud instantly.
- Point Geometry: Determines the maximum steel thickness the screw can penetrate without pre-drilling.
Point Types: Self-Drilling vs. Self-Piercing vs. Sharp
The most common failure on a commercial framing job is a spin-out caused by mismatching the screw point to the steel gauge. Understanding the cutting geometry of the screw tip is non-negotiable for framing contractors.
| Point Type | Best Application | Max Penetration (No Pre-Drill) | Failure Risk if Misused |
|---|---|---|---|
| Sharp Point (Type S) | 25ga to 20ga non-structural studs | 54 mils (approx. 1/16") | Will snap or refuse to bite on thicker steel. |
| Self-Piercing | 20ga to 16ga track and punch-outs | 68 mils | Requires high axial pressure; can buckle thin 25ga studs. |
| Self-Drilling (#2 Point) | 16ga to 12ga structural framing | 118 mils (approx. 1/8") | Overkill for thin steel; the drill flute will tear out 25ga webs. |
| Self-Drilling (#3 Point) | Heavy structural, 1/4" steel plate | 1/4" solid steel | Extremely slow in thin gauge; high burnout risk. |
Never use a #2 or #3 self-drilling screw on 25-gauge (33 mil) steel. The wide drill flute on a structural self-driller will act like a hole-saw on thin metal, completely tearing out the stud web before the threads can engage. This leaves a blown-out hole that compromises fire-stopping and acoustic ratings. Always match the drill point length to the total thickness of the materials being joined.
Sizing Guide by Steel Thickness (Mils & Gauges)
Cold-formed steel is measured in mils (thousandths of an inch) rather than just gauge numbers, as gauge designations can vary between structural and non-structural manufacturers. The American Iron and Steel Institute (AISI) standardizes these thicknesses. Use this matrix to select the exact screw diameter and length required for your framing assembly.
| Steel Thickness | Standard Gauge | Ideal Screw Diameter | Recommended Length (Stud-to-Track) |
|---|---|---|---|
| 33 mils | 25 ga | #8 (0.164") | 1/2" to 5/8" |
| 43 mils | 18 ga (Non-Struct) | #8 or #10 | 5/8" to 3/4" |
| 54 mils | 16 ga (Struct) | #10 (0.190") | 3/4" to 1" |
| 68 mils | 14 ga | #10 or #12 | 1" to 1-1/4" |
| 97 mils | 12 ga | #12 (0.210") | 1-1/4" to 1-5/8" |
Note: Screw length must be sufficient to penetrate the receiving member by at least three full threads past the drill point, typically requiring a minimum 3/8" embedment.
Tool Calibration: RPM and Clutch Settings for Zero Strip-Outs
Even the most expensive ITW Buildex or Grabber fasteners will fail if the screw gun is calibrated incorrectly. Steel framing requires specialized auto-feed or collated screw guns (like the DeWalt DW255 or Makita XSF03) with adjustable RPM and depth-sensitive clutches.
- Set the RPM based on thickness: For thin-gauge steel (33-43 mils), set your gun to high speed (4,000 - 6,000 RPM). The goal is to pierce the zinc coating and steel matrix before the clutch disengages. For heavy structural steel (68-118 mils), drop the speed to 2,000 - 2,500 RPM. High speeds on thick steel generate friction heat, work-hardening the galvanized coating and snapping the screw shank.
- Adjust the axial pressure: Self-drilling screws require firm, continuous forward pressure. If you ease off pressure while the drill point is transitioning from the cutting flute to the threading zone, the screw will spin in the hole and strip the threads.
- Calibrate the depth clutch: For modified truss heads under drywall, the screw head must sit perfectly flush—not proud (which blocks the drywall knife) and not over-driven (which breaks the gypsum paper face). Test on a scrap piece of CFS and adjust the collar until the head sits exactly 1/32" below the stud flange surface.
Common Framing Failures and Troubleshooting
When steel stud framing screws fail, the physical evidence at the joint tells you exactly what went wrong.
Symptom: The Screw Spins Freely (Stripped Hole)
Cause: The clutch engaged before the drill point fully penetrated the receiving steel, or the RPM was too low on thin-gauge metal, allowing the hole to wallow out. Fix: Increase the RPM. If using an auto-feed system, check the collated strip alignment. If the hole is already blown out, abandon it and move 2 inches up the stud flange; do not attempt to force a larger diameter screw into a compromised 25-gauge web.
Symptom: Drill Point Snaps Off Mid-Drive
Cause: Excessive RPM on thick steel causing thermal shock, or the screw was driven at an angle (cam-out), placing lateral shear stress on the hardened drill tip. Fix: Reduce RPM to 2,500. Ensure the gun is held at a perfect 90-degree angle to the stud flange. Use screws with a hardened #3 drill point for anything thicker than 1/8" steel.
Symptom: Screw Head Tears the Drywall Paper
Cause: Using standard Pan Head or Hex Washer screws on drywall-bearing studs, or the gun bit is worn, causing the driver to slip off the Phillips recess and score the gypsum. Fix: Switch exclusively to Modified Truss (bugle or low-profile) heads for any flange that will receive gypsum board. Replace worn #2 Phillips bits every 1,000 screws to maintain a tight fit in the recess.
Code Compliance and Industry Standards
All steel stud framing connections must comply with local building codes, which typically reference the Steel Stud Manufacturers Association (SSMA) technical guidelines and the AISI North American Standard for Cold-Formed Steel Structural Framing.
For load-bearing walls and lateral shear-resisting elements, the screw manufacturer's ICC-ES (International Code Council Evaluation Service) report must be submitted to the structural engineer of record. These reports dictate exact edge distances (typically a minimum of 1.5x the screw diameter from the edge of the stud flange) and minimum spacing requirements. Never substitute a standard drywall screw for a code-specified structural framing screw, as drywall screws are highly brittle and lack the shear ductility required to survive seismic or high-wind lateral loading events.
Written by
Sarah WhitfieldSarah Whitfield is a chartered quantity surveyor (MRICS) and construction cost analyst with 15 years of experience in material pricing, procurement strategy, and project budgeting. She earned her degree in Construction Management from the University of Reading (UK) and has worked on projects ranging from $2M custom homes to $180M mixed-use developments across North America and Europe. Sarah currently leads cost estimating for BuildMat Insight, maintaining a proprietary database of 4,000+ material price points updated quarterly. She is a frequent contributor to RSMeans cost data panels and has presented at the International Cost Engineering Council (ICEC) congress. Based in Denver, CO, Sarah is an avid trail runner and volunteer mentor for Women in Construction.
More from Sarah Whitfield
View all
Wood & Lumber
What Are the Different Types of Wood? A Builder's Guide
Compare structural softwoods, finish hardwoods, and engineered lumber. Analyze Janka ratings, MOE values, and 2026 pricing for construction.
Aug 4, 2026

Walls & Panels
Steel Framing vs Wood Framing: Corrosion and Moisture Defense
Compare steel framing vs wood framing for moisture resistance. Learn about galvanized coatings, condensation risks, and corrosion protection strategies.
Jul 21, 2026

Stone & Masonry
How to Cut Stone Veneer: Wet Saw vs Grinder Comparison
Compare the best tools for cutting stone veneer. We review wet saws, angle grinders, and chop saws to help you achieve clean, chip-free cuts.
Jul 21, 2026