Complete Guide to Steel Studs and Framing: Costs, Specs, and Tips
Master steel studs and framing with our complete guide. Compare 2026 costs, gauge specs, acoustic solutions, and installation tips for commercial builds.

The Anatomy of Light Gauge Steel Framing
Light gauge steel framing (LGSF) has become the backbone of commercial and multi-family residential construction. Unlike hot-rolled structural I-beams, steel studs and framing components are cold-formed from galvanized sheet steel into precise C-shapes and U-shaped tracks. Understanding the anatomy of these components is critical for avoiding structural failures and ensuring seamless mechanical, electrical, and plumbing (MEP) integration.
Every steel stud features a web, two flanges, and two return lips. The lips provide crucial torsional rigidity, preventing the stud from twisting under axial loads. The web is pre-punched with knockouts (typically 1.5 inches in diameter) spaced 48 inches apart, allowing electricians and plumbers to run conduit and piping without drilling, which preserves the structural integrity of the flange.
Decoding Gauge and Mil Thickness Standards
A common pitfall for junior estimators is confusing gauge numbers with actual thickness. In steel framing, a lower gauge number means a thicker, stronger piece of steel. However, the construction industry has largely shifted to specifying mils (thousandths of an inch) to eliminate ambiguity. When ordering steel studs and framing materials, always verify the mil thickness against the structural engineer's specifications.
| Gauge | Minimum Mil Thickness | Inches | Primary Application | Typical Yield Strength |
|---|---|---|---|---|
| 25 Gauge | 27 mils | 0.027' | Non-load-bearing interior partitions | 33 ksi |
| 20 Gauge | 33 mils | 0.033' | Load-bearing interior / Exterior curtain walls | 33 ksi / 50 ksi |
| 18 Gauge | 43 mils | 0.043' | Load-bearing exterior walls, floor joists | 50 ksi |
| 16 Gauge | 54 mils | 0.054' | Heavy load-bearing, shear walls, headers | 50 ksi |
| 14 Gauge | 68 mils | 0.068' | High-load structural columns, trusses | 50 ksi |
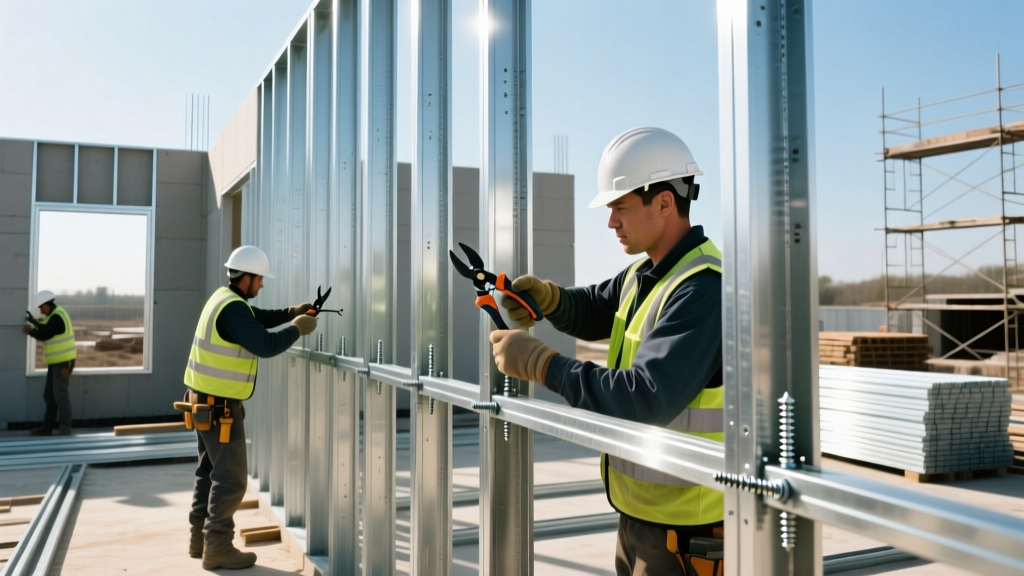
Structural vs. Non-Structural Framing: Critical Distinctions
Not all steel studs and framing tracks are created equal. Non-structural studs (often called 'drywall studs') are designed solely to support the weight of the gypsum board, insulation, and minor wall-mounted fixtures. They feature smaller flanges (typically 1-1/4 inches) and lack the structural lips required for axial load transfer.
Structural studs feature wider flanges (1-5/8 inches to 3 inches) and larger return lips. Furthermore, structural tracks must be anchored to the foundation or slab using powder-actuated fasteners or heavy-duty concrete wedge anchors, whereas non-structural tracks can often be secured with standard concrete screws or even powder pins depending on local codes.
2026 Cost Analysis: Steel Studs and Framing vs. Dimensional Lumber
Material pricing fluctuates, but the long-term installed cost of steel framing offers distinct advantages in commercial environments. Below is a comparative breakdown based on Q1 2026 national averages for a 10,000 sq. ft. commercial interior build-out.
| Cost Factor | Light Gauge Steel (20ga, 3-5/8') | Dimensional Lumber (2x4 SPF) |
|---|---|---|
| Material Cost (per linear ft) | $3.85 - $4.50 | $3.20 - $4.10 |
| Labor Cost (per linear ft) | $5.50 - $7.00 | $4.50 - $6.00 |
| Material Waste Factor | 2% - 4% | 8% - 12% |
| Fastener & Accessory Cost | $0.45 / LF | $0.15 / LF |
| Total Installed Cost (per LF) | $9.80 - $11.95 | $7.85 - $10.25 |
While steel studs and framing carry a higher upfront material and fastener cost, the elimination of framing callbacks (due to warping, shrinking, or twisting of wood) and the 2% waste factor often result in a net-positive ROI for commercial general contractors by the time the drywall phase begins.
Solving the Thermal and Acoustic Bridging Problem
Steel is an exceptional conductor of heat—approximately 300 times more conductive than wood. If steel studs and framing are used in exterior walls without proper thermal breaks, the studs act as 'thermal bridges,' pulling heat out of the building in winter and transferring solar heat inside during summer. This drastically reduces the effective R-value of the wall cavity.
Thermal Mitigation Strategies
- Continuous Insulation (ci): Install rigid XPS or polyiso foam board over the exterior sheathing. A minimum of 1.5 inches of exterior ci is now required by most commercial energy codes to break the thermal bridge.
- Slotted Studs: For high-performance walls, specify slotted steel studs. These feature staggered, horizontal slits cut into the web, which elongates the heat transfer path and reduces thermal conductivity by up to 40%.
- Thermal Break Pads: Apply 1/4-inch closed-cell foam tape to the top and bottom tracks before they contact the concrete slab or roof deck to prevent condensation at the structural boundaries.
Acoustic Isolation in Steel Framed Walls
Steel framing naturally resonates at different frequencies than wood, which can impact Sound Transmission Class (STC) ratings. To achieve an STC 50 or higher in multi-family or commercial office partitions:
- Stagger the studs on a single 6-inch track, or use dual 3-5/8-inch tracks separated by a 1-inch air gap.
- Install sound isolation clips and resilient hat channels on one side of the wall before hanging the drywall.
- Use Gypsum Association approved Type X or Type C gypsum board, ensuring all perimeter edges are sealed with acoustic caulk before installing the finishing trim.
Fastener and Tool Specifications for Flawless Execution
Using the wrong fastener is the most common cause of drywall popping and structural squeaks in steel framing. The self-drilling nature of steel requires specific screw geometries.
- Steel-to-Steel (Framing): #8 x 1/2-inch wafer-head self-drilling screws (commonly called Tek screws). The low-profile wafer head prevents interference when hanging drywall over the joints.
- Steel-to-Steel (Heavy Structural): #10 or #12 hex-washer head self-drilling screws for shear wall and truss connections.
- Gypsum-to-Steel: #6 x 1-inch or 1-1/4-inch S-type (fine thread) bugle-head drywall screws. Coarse-thread screws designed for wood will strip the thin steel flange and fail to hold.
Common Installation Failures and How to Avoid Them
1. Cutting the Flanges for MEP
The Mistake: Electricians cutting out sections of the stud flange to bend large conduit around corners.
The Fix: Never cut the flange. Use the pre-punched knockouts. If a larger hole is absolutely necessary, use a structural stud saver plate or sister a new stud immediately adjacent to the compromised one.
2. Overdriving Drywall Screws
The Mistake: Using high-torque impact drivers to hang drywall on steel studs, breaking the paper face of the gypsum.
The Fix: Use dedicated drywall screw guns with adjustable depth-sensitive collars (like the DeWalt DW255 or Makita DFS452). The collar stops the screw exactly 1/32-inch below the paper surface without tearing it.
3. Ignoring Expansion Joints in Long Runs
The Mistake: Running continuous top and bottom tracks for over 100 feet without a slip joint.
The Fix: Steel expands and contracts with temperature fluctuations. For any wall run exceeding 60 feet, install a proprietary slip track (like the CEMCO Slotted Track) or leave a 1/2-inch gap in the top track and cover it with a steel splice plate that allows lateral movement.
Written by
James ThorntonJames Thornton is a construction industry veteran with 25 years of hands-on experience in wood framing, lumber grading, and residential building codes. He started as a framing carpenter in rural Oregon, earned his ICC Residential Building Inspector certification, and eventually became a senior plan reviewer for the City of Portland Bureau of Development Services. James holds a B.S. in Wood Science & Technology from Oregon State University and is a certified lumber grader through the West Coast Lumber Inspection Bureau (WCLIB). He has inspected over 3,000 residential construction sites and authored the city's internal guide on advanced framing techniques (2x6 at 24" O.C.). James lives in Bend, OR, where he builds custom timber-frame cabins and competes in lumberjack sports.
More from James Thornton
View all
Insulation
Best Home Insulation Materials: Complete 2026 Guide
Compare top home insulation materials for 2026. Find R-values, installed costs per square foot, and best uses for fiberglass, spray foam, and mineral wool.
Aug 4, 2026

Sustainable Building
Certify Your Green Building Material for LEED and WELL
Step-by-step guide to certifying a green building material for LEED v5 and WELL v2. Master EPDs, HPDs, and VOC limits for 2026 project specifications.
Aug 4, 2026

Stone & Masonry
Veneer Stacked Stone Panels: Interior Design & Style Showcase
Discover how veneer stacked stone panels transform interiors. Explore modern design profiles, material pairings, and technical installation specs.
Aug 4, 2026