Best Wood Floor Finish Options for High-Traffic Installations
Compare top wood floor finish options for high-traffic installations. Expert best practices on cure times, VOCs, and application for commercial projects.

The Evolution of Wood Floor Finish Options in Modern Installations
Selecting the correct chemistry from the available wood floor finish options is the single most critical decision in a high-traffic flooring installation. The industry has largely transitioned away from traditional oil-modified polyurethanes (OMU) due to stringent VOC regulations and extended cure times. Today, professional installers rely primarily on two-component (2K) waterborne polyurethanes and advanced hardwax oils. These modern formulations offer superior abrasion resistance, rapid return-to-service timelines, and non-yellowing clarity, making them the definitive standard for commercial spaces, active households, and high-wear residential zones.
According to the National Wood Flooring Association (NWFA), improper finish selection and inadequate substrate preparation account for over 70% of post-installation finish failures. Understanding the exact mechanical and chemical properties of your chosen finish is mandatory for a durable installation.
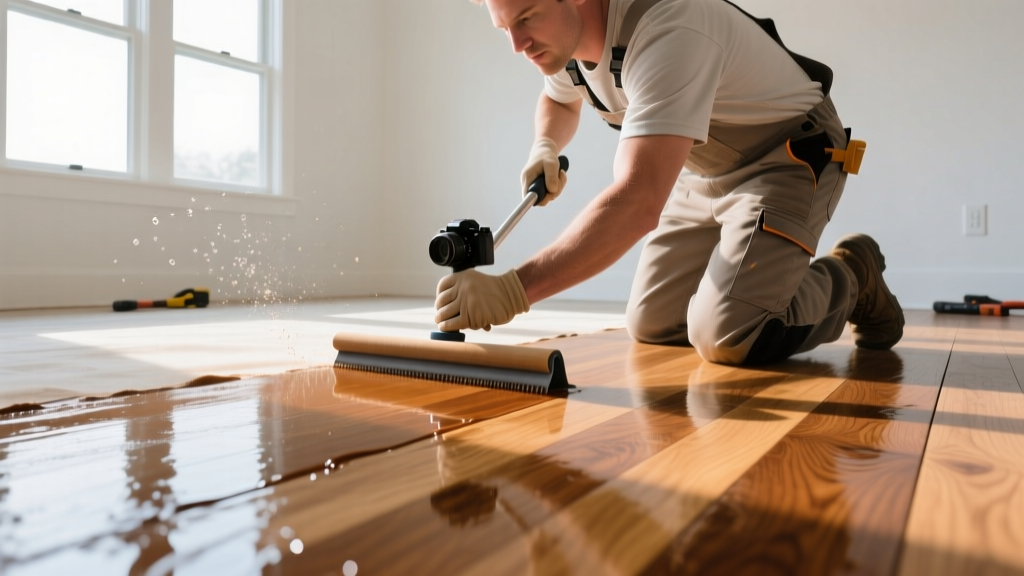
Comparison Matrix: Top Wood Floor Finish Options for Heavy Use
The following matrix breaks down the industry-leading finishes based on real-world installation metrics, coverage rates, and chemical resistance. Pricing reflects average professional distributor rates.
| Product | Chemistry Type | Coverage (per gallon) | Pot Life | Full Cure Time | Approx. Cost |
|---|---|---|---|---|---|
| Bona Traffic HD | 2K Waterborne Poly | 350 - 400 sq ft | 4 Hours | 72 Hours | $185 / gal |
| Pallmann Pall-X 98 | 2K Waterborne Poly | 400 - 450 sq ft | 45 Minutes | 5 - 7 Days | $160 / gal |
| Rubio Monocoat 2C | Hardwax Oil | 400 sq ft / 1.3L | 30 - 45 Minutes | 5 Days (Water) | $195 / 1.3L |
| Loba WS 2K Supra | 2K Waterborne Poly | 400 - 500 sq ft | 2 Hours | 7 Days | $175 / gal |
Substrate Preparation and Climate Acclimation
No finish will adhere properly to a poorly prepared substrate. The sanding sequence directly dictates the mechanical tooth required for the finish to grip the wood fibers. For raw hardwood installations, a standard progression of 36-grit, 60-grit, 80-grit, and a final screen of 100-grit or 120-grit is required. Skipping grits leaves deep scratches that will telegraph through thin waterborne finishes.
Wood flooring must be acclimated to the interior environment before finishing. Use a pinless moisture meter (such as the Wagner Orion 950) to verify that the wood's moisture content (MC) is within 2% to 4% of the subfloor's MC. The ambient environment must be strictly maintained between 60°F and 80°F, with a relative humidity (RH) of 30% to 50%. Applying a 2K waterborne finish in RH levels above 65% will trap moisture in the film, resulting in a permanent milky or cloudy appearance.
Sanding Grit Progression and Water-Popping
When installing waterborne polyurethanes over stained floors, or when seeking a richer color on tight-grained species like maple, 'water-popping' is a mandatory best practice. Water-popping involves lightly misting the sanded, bare wood with distilled water using a spray bottle and a microfiber mop. This process raises the wood grain and opens the cellular structure, ensuring uniform stain penetration and providing a superior mechanical profile for the finish to adhere to. Allow the floor to dry completely (typically 2 to 4 hours) before applying the first coat of finish.
Application Best Practices by Finish Chemistry
Each category of wood floor finish options requires a distinct application methodology. Applying a hardwax oil with the tools meant for a waterborne polyurethane will result in catastrophic failure.
2K Waterborne Polyurethanes: The T-Bar Method
Waterborne finishes dry exceptionally fast. Maintaining a 'wet edge' is the primary challenge for installers.
- Mixing: Combine Part A (polyurethane) and Part B (hardener) strictly according to the manufacturer's ratio. Stir gently for 3 minutes to avoid introducing micro-bubbles. Note the exact time; the pot life for products like Pall-X 98 is only 45 minutes.
- Cut-In: Use a high-quality synthetic brush (e.g., 2.5-inch angled sash brush) to apply the finish along the perimeter of the room.
- T-Bar Application: Pour a continuous bead of finish parallel to the wood grain. Pull a synthetic T-bar applicator through the bead, spreading it evenly. Always keep the leading edge wet.
- Back-Rolling (Optional but Recommended): For ultra-smooth commercial finishes, a second installer should immediately follow the T-bar with a microfiber roller to lay off the finish and eliminate lap marks.
- Abrasion Between Coats: Once the first coat is dry (typically 3-4 hours), abrade the entire floor with a Bona Scrad pad or a 150-grit maroon buffer screen. This removes raised grain and dust nibs, providing the chemical and mechanical link for the topcoat.
Hardwax Oils: Molecular Bonding and Buffing
Hardwax oils, such as Rubio Monocoat, operate on a completely different chemical principle. They form a molecular bond with the topmost cellulose fibers of the wood. Because they do not build a surface film, they cannot be applied with a T-bar.
- Application: Apply the oil sparingly using a red or white buffing pad on a low-speed rotary buffer (175 RPM). Work in small, manageable zones (150-200 sq ft at a time).
- Dwell Time: Allow the oil to penetrate for exactly 3 to 5 minutes. Do not let it dry on the surface.
- Removal of Excess: This is the most critical step. Because the molecular bonding capacity of the wood is saturated within minutes, any excess oil left on the surface will dry into a sticky, uneven residue. Buff the floor aggressively with clean, dry microfiber pads until the surface is completely dry to the touch and exhibits a uniform sheen.
Troubleshooting Common Finish Failures
Even with premium wood floor finish options, environmental and procedural errors lead to distinct failure modes. Identifying the root cause prevents costly full-floor sanding redo's.
Fisheyes and Cratering
Symptom: Small, circular depressions in the finish film that resemble craters. Cause: Surface contamination from silicone-based furniture polishes, wax residues, or airborne aerosols (like hairspray or cooking oils). Fix: If caught while wet, wipe the area with a clean, damp cloth and reapply. If dry, the affected area must be sanded down to bare wood, cleaned with a dedicated wax and silicone remover, and recoated.
Peeling and Delamination
Symptom: The finish flakes or peels off in sheets, particularly between coats. Cause: Failure to adequately abrade the previous coat before applying the next, or exceeding the manufacturer's maximum recoat window (usually 24-48 hours) without sanding. Fix: Complete mechanical removal of the delaminated finish. The intercoat adhesion was compromised, meaning the entire top layer must be screened or sanded off.
Cloudy or Milky Finish (Blushing)
Symptom: A white, opaque haze trapped within the clear finish film. Cause: High ambient humidity or applying finish to a floor with elevated moisture content. The water in the emulsion is trapped and cannot evaporate properly. Fix: Lower the room's RH using commercial dehumidifiers. In severe cases, the finish must be sanded off and reapplied under strictly controlled climate conditions. The Environmental Protection Agency (EPA) notes that proper ventilation and climate control not only prevent finish failures but are critical for managing indoor VOC concentrations during the curing process.
Curing Timelines and Post-Installation Protection
Installers must clearly communicate the difference between 'dry time' and 'cure time' to the client. While a 2K waterborne polyurethane may be dry to the touch in 2 hours and safe for light sock-foot traffic in 12 hours, the chemical cross-linking process takes up to 7 days to reach maximum hardness.
During the first 72 hours, do not place area rugs on the floor; the finish needs to off-gas and breathe. Furniture should only be reintroduced after the full cure time has elapsed, and all contact points must be fitted with high-density felt pads. Rubber-backed mats must be strictly prohibited, as the plasticizers in the rubber will chemically react with the polyurethane, causing permanent discoloration and softening of the finish film.
Written by
Marcus ChenMarcus Chen is a licensed structural engineer (PE) and building materials analyst with over 12 years of experience across residential, commercial, and industrial construction. He holds a Master of Science in Civil Engineering from UC Berkeley and spent six years at Thornton Tomasetti before transitioning to independent consulting and technical writing. Marcus specializes in material selection for seismic-prone regions, concrete reinforcement strategies, and lifecycle cost analysis. His work has been cited by the American Concrete Institute (ACI) and the Structural Engineers Association of California (SEAOC). When he is not on a job site or at his desk, you will find him hiking the Sierra Nevada or restoring a 1920s craftsman bungalow in Oakland, CA.
More from Marcus Chen
View all
Construction Cost
How Much Did the Eiffel Tower Cost to Build?
How much did the Eiffel Tower cost to build in 1889? We adjust for inflation and compare its budget to modern skyscraper construction.
Aug 4, 2026

Fire Resistance
What Is a Fire Resistant Material? Testing & Certification Guide
Discover what is a fire resistant material through ASTM and UL testing. Learn how fire ratings, certifications, and assemblies work in construction.
Aug 4, 2026

Construction Cost
How Much Did the Burj Khalifa Cost to Build?
How much did the Burj Khalifa cost to build? We break down the $1.5B project and extract 5 money-saving strategies for your next build.
Jul 30, 2026