How to Identify Type of Wood: Method Comparison & Accuracy Guide
Compare visual, microscopic, and digital methods on how to identify type of wood. Learn which technique offers the best accuracy for construction lumber.

The Financial Cost of Misidentified Lumber
Misidentifying wood species in construction and woodworking is rarely a harmless mistake. Specifying Spruce-Pine-Fir (SPF) when Douglas Fir is required for a load-bearing beam compromises structural integrity. In fine woodworking, applying a dark gel stain to pine without realizing its uneven pore structure will result in a blotchy, ruined finish. Learning how to identify type of wood accurately requires moving beyond superficial color matching and relying on verifiable anatomical and physical properties.
This guide compares the four primary wood identification methods—macroscopic inspection, end-grain microscopy, digital AI analysis, and destructive testing—evaluating their accuracy, cost, and practical application for contractors and builders.
Method 1: Macroscopic Face-Grain Inspection
Macroscopic inspection relies on the naked eye to evaluate face-grain patterns, color, weight, and hardness. While this is the most common method used on job sites, it is also the most prone to error due to environmental variables.
Never use color as a primary identifier. UV exposure darkens woods like American Cherry and Purpleheart, while it lightens Black Walnut. Furthermore, chemical treatments, kiln-drying temperatures, and soil minerals can drastically alter the hue of raw lumber. Always prioritize grain structure and weight over color.
To use macroscopic inspection effectively, evaluate the Janka hardness and specific gravity. For example, if you are trying to distinguish between Hard Maple (Janka: 1,450 lbf) and Soft Maple (Janka: 950 lbf), a simple thumbnail test or a calibrated pocket hardness tester will reveal the denser cellular structure of Hard Maple. According to the USDA Forest Products Laboratory Wood Handbook, specific gravity is one of the most reliable non-destructive indicators of wood species and structural grade.
Method 2: End-Grain Microscopy (The Gold Standard)
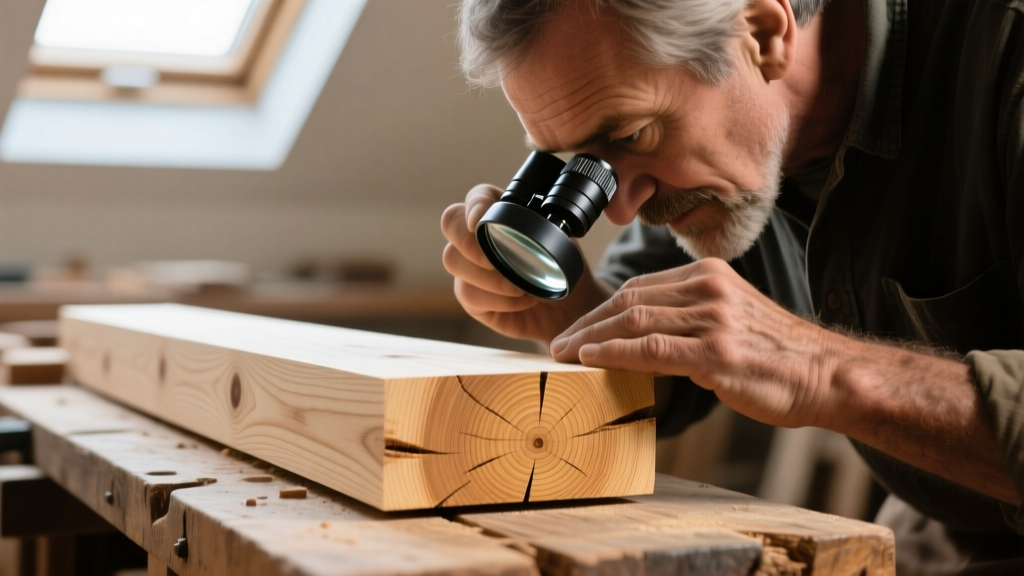
For definitive identification of milled lumber, end-grain microscopy is the undisputed industry standard. By examining the transverse cross-section of a board at 10x to 30x magnification, you can observe the vascular structure (pores, rays, and parenchyma) that is unique to each species.
How to Prepare an End-Grain Sample
- Slice: Use a sharp utility knife or razor blade to slice a perfectly clean, perpendicular cross-section of the wood. Do not use sandpaper initially, as it clogs the pores with dust.
- Sand: If the slice is rough, sand the end-grain progressively from 220-grit up to 600-grit to achieve a glass-like finish.
- Enhance: Apply a single drop of mineral oil, water, or denatured alcohol to the prepared surface. This increases optical contrast and makes the microscopic pores highly visible under a jeweler's loupe.
Pore Arrangement Classification
The arrangement of pores (vessels) in hardwoods is the fastest way to narrow down a species. The Wood Database categorizes hardwoods into three primary pore structures:
| Pore Type | Visual Characteristics | Common Species Examples |
|---|---|---|
| Ring-Porous | Large earlywood pores form a distinct, continuous ring; latewood pores are much smaller. | Oak, Ash, Elm, Hickory |
| Diffuse-Porous | Pores are uniformly sized and evenly distributed across the entire growth ring. | Maple, Birch, Poplar, Cherry |
| Semi-Ring-Porous | Earlywood pores are slightly larger, but the transition to latewood is gradual, not abrupt. | Black Walnut, Butternut |
Method 3: Digital AI and App Identification
As of 2026, AI-powered visual recognition apps (such as Seek by iNaturalist or specialized timber-scanning tools) have improved significantly. However, their application in professional lumber identification remains strictly limited.
These algorithms are predominantly trained on images of tree bark, leaves, and finished, stained furniture. When presented with raw, unfinished, milled dimensional lumber, AI models frequently confuse species with similar face-grain patterns (e.g., misidentifying Ash as Oak, or Poplar as Maple). Digital apps are highly effective for identifying standing timber or rough-sawn slabs with live edges and bark included, but they currently yield a 40% to 60% error rate on standard S4S (surfaced on four sides) construction lumber. Use them as a preliminary hypothesis generator, never as a final verification tool.
Method 4: Destructive Testing (Burn and Odor Profiling)
When visual and microscopic methods yield ambiguous results, destructive testing provides distinct chemical and olfactory data points. This is particularly useful for identifying highly aromatic woods or separating imported tropical species.
- The Odor Test: Re-wet a small, inconspicuous area of the wood or sand it lightly to release trapped volatile organic compounds (VOCs). Eastern Red Cedar has a distinct, sharp pencil-shaving scent; Black Walnut smells faintly of chocolate and tobacco when freshly cut; while Teak emits a leathery, oily aroma.
- The Burn Test: Take a small splinter and burn it with a lighter. Note the flame color, smoke odor, and ash residue. Pine burns rapidly with a sharp, resinous hiss and leaves a fluffy white ash. Oak burns slower with a milder, vinegar-tinged smoke and leaves a dense, dark gray ash.
Method Comparison Matrix
Select your identification strategy based on the required accuracy and the condition of the lumber.
| Method | Accuracy on Milled Lumber | Equipment Cost | Time Required | Destructive? |
|---|---|---|---|---|
| Macroscopic Visual | Moderate (60-75%) | $0 | Seconds | No |
| End-Grain Microscopy | Extremely High (95%+) | $15 - $50 (Loupe & Sandpaper) | 3-5 Minutes | Minimal (End-cut only) |
| Digital AI Apps | Low to Moderate (40-60%) | $0 (Smartphone) | Seconds | No |
| Burn / Odor Testing | Variable (Species dependent) | $0 (Lighter & Knife) | 1-2 Minutes | Yes |
Field Guide: Differentiating Common Construction Look-Alikes
Even with the right method, certain species groups are notorious for causing identification failures. Use these specific anatomical markers to separate them.
Red Oak vs. White Oak
These two species are frequently substituted for one another, but White Oak is rot-resistant and suitable for exterior applications, while Red Oak will rapidly decay outdoors.
- The Tyloses Test: White Oak heartwood contains tyloses—microscopic balloon-like structures that plug the vascular pores, making the wood waterproof. Red Oak lacks these. Cut a 2-inch section of end-grain, submerge one end in water, and blow through the other end like a straw. If bubbles appear, it is Red Oak. If no air passes through, it is White Oak.
- Ray Fleck Length: On quartersawn boards, examine the medullary rays (the fleck pattern). White Oak rays frequently exceed 1 to 2 inches in length. Red Oak rays rarely exceed 1/2 inch.
Deconstructing SPF (Spruce, Pine, Fir)
SPF is sold as a bundled structural grade, but identifying the specific species matters for finish carpentry and gluing properties. Examine the end-grain for resin canals using a 10x loupe:
- Pine: Features large, distinct, and numerous resin canals visible as small white or brown dots on the end-grain. The earlywood-to-latewood transition is gradual.
- Spruce: Completely lacks resin canals. The end-grain will appear uniform and clean without distinct dots. It also has a notably lower specific gravity than Pine or Fir.
- Douglas Fir: Contains very small, barely visible resin canals, but exhibits an extreme, abrupt color contrast between the light earlywood and the dark, dense latewood rings.
Ash vs. Oak
Both are ring-porous hardwoods with similar Janka hardness ratings, making them common substitutes in flooring and cabinetry. Look at the latewood pores. Oak latewood pores are arranged in complex, branching, flame-like patterns. Ash latewood pores are arranged in simple, continuous, wavy tangential bands. Additionally, Ash lacks the prominent medullary ray fleck found in quartersawn Oak.
When verifying structural timber on a job site, always cross-reference your anatomical identification with the grade stamp inked on the board. The wood anatomy resources provided by independent databases confirm that while visual ID verifies the species, only the certified mill grade stamp verifies the structural load capacity and moisture content at the time of surfacing.
Written by
Sarah WhitfieldSarah Whitfield is a chartered quantity surveyor (MRICS) and construction cost analyst with 15 years of experience in material pricing, procurement strategy, and project budgeting. She earned her degree in Construction Management from the University of Reading (UK) and has worked on projects ranging from $2M custom homes to $180M mixed-use developments across North America and Europe. Sarah currently leads cost estimating for BuildMat Insight, maintaining a proprietary database of 4,000+ material price points updated quarterly. She is a frequent contributor to RSMeans cost data panels and has presented at the International Cost Engineering Council (ICEC) congress. Based in Denver, CO, Sarah is an avid trail runner and volunteer mentor for Women in Construction.
More from Sarah Whitfield
View all
Wood & Lumber
What Are the Different Types of Wood? A Builder's Guide
Compare structural softwoods, finish hardwoods, and engineered lumber. Analyze Janka ratings, MOE values, and 2026 pricing for construction.
Aug 4, 2026

Walls & Panels
Steel Framing vs Wood Framing: Corrosion and Moisture Defense
Compare steel framing vs wood framing for moisture resistance. Learn about galvanized coatings, condensation risks, and corrosion protection strategies.
Jul 21, 2026

Stone & Masonry
How to Cut Stone Veneer: Wet Saw vs Grinder Comparison
Compare the best tools for cutting stone veneer. We review wet saws, angle grinders, and chop saws to help you achieve clean, chip-free cuts.
Jul 21, 2026