Choosing the Right Types of Wood Clamps for Timber Glue-Ups
Master the types of wood clamps for structural timber and panel glue-ups. Learn PSI targets, caul techniques, and how to prevent starved joints.

The Physics of Clamping: Why Pressure Distribution Matters
Selecting the correct types of wood clamps is not merely about holding two pieces of timber together; it is an exercise in applied physics. When working with structural timber or large panel glue-ups, the primary objective of clamping is to maintain uniform pressure across the glue line until the polyvinyl acetate (PVA) or polyurethane adhesive achieves initial tack. According to the USDA Forest Products Laboratory Wood Handbook, the ideal glue line thickness for most structural wood adhesives ranges between 0.003 and 0.005 inches. Achieving this microscopic tolerance requires precise clamping pressure—typically 100 to 150 PSI for softwoods and 200 to 250 PSI for dense hardwoods. Too little pressure results in thick, brittle glue lines prone to shear failure; too much pressure squeezes the adhesive out entirely, creating a structurally compromised 'starved joint'.
Core Types of Wood Clamps and Their Installation Roles
Different clamping scenarios demand specific mechanical advantages. Below is a breakdown of the primary types of wood clamps used in professional installation and heavy-duty woodworking.
Parallel Jaw Clamps (The Cabinetmaker's Standard)
Parallel jaw clamps, such as the Bessey K Body Revo series, feature 90-degree jaws that remain perfectly parallel to the workpiece regardless of the clamping pressure applied. This design eliminates the downward bowing commonly caused by traditional bar clamps. With a clamping force of up to 1,500 pounds and deep jaw capacities (often 3.5 to 4 inches), they are the undisputed standard for edge-gluing panels, cabinet assemblies, and architectural millwork. The plastic-infused jaw pads prevent marring and resist glue adhesion, eliminating the need for separate protective pads during installation.
Pipe Clamps (The Heavy-Duty Structural Choice)
For massive structural timber glulam beams or wide slab tables, pipe clamps offer unmatched reach and raw force. Utilizing standard 3/4-inch black iron plumbing pipe, fixtures like the Jorgensen Heavy Duty Pipe Clamp can generate over 1,300 pounds of clamping force. However, installers must account for pipe deflection. Under high torque, the steel pipe will bow away from the workpiece. To counteract this, professionals use heavier schedule 40 pipes or alternate clamp placement above and below the timber to neutralize the bending moment.
F-Style and Bar Clamps (The Versatile Aligners)
F-style clamps are lightweight, quick-adjusting tools ideal for holding components in alignment rather than generating massive structural pressure. They are best utilized during the dry-fit phase or for securing face frames and trim where localized, moderate pressure (around 400-600 lbs maximum) is sufficient. Their sliding clutch mechanism allows for rapid repositioning, making them indispensable for fast-paced site installations where parallel clamps are too cumbersome to deploy.
Strap and Band Clamps (For Curved and Mitered Assemblies)
When installing octagonal timber frames, curved laminations, or large mitered casings, linear clamps fail to provide the necessary geometry. Strap clamps, such as the Bessey GS series, utilize a high-tensile nylon or steel band that wraps around the entire perimeter of the assembly. By applying uniform inward radial pressure, they pull mitered joints tight without the risk of racking the frame out of square.
Clamping Pressure & Application Matrix
| Clamp Type | Max Clamping Force | Max Spread Capacity | Best Installation Application | Risk of Workpiece Bowing |
|---|---|---|---|---|
| Parallel Jaw | 1,500 lbs | Up to 98 inches | Panel glue-ups, cabinet boxes, millwork | Very Low |
| Pipe Clamp (3/4') | 1,300+ lbs | Custom (Pipe length) | Structural timber, heavy slabs, glulams | High (if not alternated) |
| F-Style / Bar | 600 lbs | Up to 48 inches | Face frames, trim alignment, jigs | Moderate |
| Strap / Band | 800 lbs (tension) | Perimeter (up to 23 ft) | Mitered frames, curved laminations | N/A (Radial pressure) |
Installation Best Practices: Avoiding Common Clamping Failures
Even the most expensive clamps will yield poor results if installed incorrectly. The American Wood Council (AWC) emphasizes that proper fastening and gluing protocols are critical for structural timber integrity. Avoid these three common failure modes:
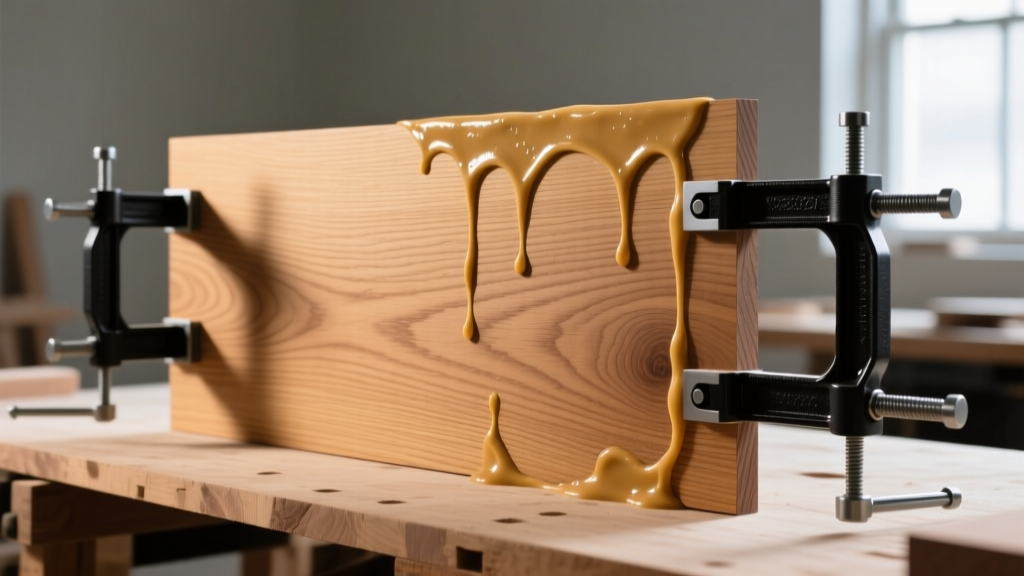
A common misconception is that tighter is always better. Cranking a pipe clamp to its absolute maximum will squeeze the PVA adhesive completely out of the joint, leaving only wood-to-wood contact with a microscopic, brittle film of dried resin. This 'starved joint' has virtually no shear strength. Tighten the clamp only until you see a consistent, fine bead of glue squeeze-out along the entire seam.
1. Alternating Clamp Placement
When edge-gluing boards to form a wide panel, placing all clamps on the top face will force the panel to bow upward like a shallow arch. To maintain a perfectly flat glue-up, alternate your clamps: place the first clamp on top of the panel, the second on the bottom, the third on top, and so on. This balances the vector forces and neutralizes deflection.
2. Utilizing Protective Cauls
Direct metal contact from clamp jaws will dent and mar softwoods like cedar, pine, and fir. Furthermore, clamps placed every 24 inches leave unclamped dead zones in the center of a 6-inch wide board. Installers must use 'cauls'—straight, rigid pieces of hardwood (like hard maple) placed between the clamp jaw and the workpiece. Cauls distribute the localized point-load of the clamp across a wider surface area, ensuring even pressure distribution across the entire glue line.
For panels wider than 12 inches, standard straight cauls will apply pressure only to the edges of the board. Mill your cauls with a slight 'crown'—a convex curve that is exactly 1/32-inch higher in the center than at the ends over a 48-inch span. When clamped, the pressure forces the center of the caul down, distributing perfectly even pressure across the entire width of the timber.
The Professional Clamping Sequence
Execute your timber glue-ups using this strict chronological sequence to ensure structural integrity and minimize installation errors:
- The Dry Fit: Assemble the entire structure with clamps but no glue. Verify that all joints close completely without excessive force. If a joint requires immense pressure to close, recut the joint; clamps are not meant to fix poor carpentry.
- Caul and Pad Prep: Lay out all clamps, cauls, and protective pads within arm's reach. Apply packing tape to the faces of your wooden cauls to prevent them from accidentally gluing to your workpiece.
- Glue Application: Apply a continuous, even bead of adhesive to one mating surface. Use a silicone glue roller to spread it into a uniform film. Do not over-apply; excess glue creates massive cleanup issues and can interfere with subsequent finishing steps.
- Staged Tightening: Assemble the pieces and engage the clamps. Start by tightening the center clamp to 'snug' (not maximum pressure). Then, tighten the outer clamps to snug. Finally, go back down the line and bring all clamps up to final target pressure simultaneously. This prevents the glue from setting unevenly while you struggle with distant clamps.
- Squeeze-Out Management: Wait exactly 15 to 20 minutes for PVA glue to reach a gel-like consistency, then scrape off the squeeze-out with a sharp cabinet scraper. Wiping wet glue with a damp rag merely drives the adhesive deep into the wood pores, causing severe finishing defects later.
Frequently Asked Questions on Clamp Selection
How many clamps do I need for a 48-inch long timber edge-glue-up?
The general rule of thumb for structural edge-gluing is one clamp every 6 to 8 inches. For a 48-inch glue-up, you will need a minimum of 6 to 8 clamps. If you are using wide cauls that distribute pressure effectively, you can reduce this to one clamp every 10 to 12 inches, but never exceed a 12-inch spacing, or the center of the glue line will lack sufficient PSI to bond properly.
Can I use ratchet straps instead of dedicated wood clamps for large frames?
Heavy-duty ratchet straps can generate sufficient tension for large, non-critical timber frames or temporary site hold-downs. However, they lack the rigid, fine-tuned pressure control of a parallel jaw or pipe clamp. For structural glue-ups where precise PSI and squareness are mandated by building codes, ratchet straps are not an acceptable substitute for engineered clamping tools.
Why is my glued timber panel twisting after I remove the clamps?
Twisting occurs due to internal stress imbalances. This is usually caused by three factors: clamping the panel on an uneven workbench (the glue cures in a twisted state), failing to alternate clamps above and below the panel, or gluing boards with opposing grain directions that react differently to ambient humidity changes. Always glue up on a verified flat surface, such as a machined MDF assembly table or precision-leveled steel beams.
Written by
David NakamuraDavid Nakamura is a licensed architect (AIA) and construction technology writer focused on sustainable building methods, mass timber engineering, and high-performance building envelopes. He holds a Master of Architecture from the University of Washington and is a certified Passive House Consultant (CPHC). David spent eight years at the Seattle firm Mithun, where he led the design of three LEED Platinum projects, before founding his own practice specializing in net-zero residential design. He serves on the editorial advisory board of GreenBuilder Magazine and has authored peer-reviewed papers on cross-laminated timber (CLT) connections for the Journal of Structural Engineering. In his spare time, David teaches woodworking at Pratt Fine Arts Center and kayaks the Puget Sound.
More from David Nakamura
View all
Construction Cost
Labor Cost to Build a Deck Per Sq Ft: 2026 Installation Guide
Discover the exact labor cost to build a deck per sq ft in 2026. This installation guide breaks down contractor rates, complexity factors, and hidden fees.
Aug 4, 2026

Construction Cost
How Much Does It Cost to Build a 3 Bedroom House? Financing Guide
Learn exactly how much it costs to build a 3 bedroom house and explore 2026 financing options, construction loan types, and budget frameworks for your build.
Aug 4, 2026

Construction Cost
Cost to Build a Tennis Court: 2026 Guide
How much does it cost to build a tennis court in 2026? Breakdowns for asphalt, concrete, and synthetic surfaces plus fencing and lighting.
Jul 30, 2026