Installation Best Practices for All Types of Wood Tables
Master the installation, assembly, and anchoring of various types of wood tables with expert best practices for wood movement and structural hardware.

The Hidden Complexities of Wood Table Installation
When evaluating different types of wood tables, buyers and contractors often focus exclusively on aesthetics, joinery, and species selection. However, the physical installation, assembly, and anchoring of these pieces dictate their long-term structural integrity. A solid slab dining table, a mechanical drop-leaf console, and a commercial trestle table all demand radically different installation methodologies. Ignoring the specific mechanical and environmental requirements of these pieces leads to cracked slabs, seized extension slides, and dangerous tip-over hazards. This guide details the precise installation best practices for heavy residential, built-in, and commercial wood tables, focusing on acclimatization, hardware selection, and structural anchoring.
Acclimatization: The Critical First Step
Wood is hygroscopic; it continuously exchanges moisture with its environment. Installing or fully assembling a wood table before it reaches Equilibrium Moisture Content (EMC) with the destination space is the leading cause of post-installation joint failure and panel warping.
For climate-controlled residential and commercial interiors (kept between 65°F and 75°F with 30-45% relative humidity), the target moisture content (MC) for wood tables is 6% to 9%. Use a pinless electromagnetic moisture meter (such as the Wagner Meters Orion 910) to scan the underside of the tabletop in at least five locations. Do not proceed with final hardware torquing until the readings stabilize within this range for 48 consecutive hours.
According to the U.S. Forest Products Laboratory Wood Handbook, dimensional changes in wood are most drastic when moisture content fluctuates between 0% and 30% (the fiber saturation point). Unboxing a table and immediately bolting down a rigid steel base restricts natural cross-grain movement, inevitably causing the top to split along the grain as seasonal humidity shifts.
Assembly Best Practices by Table Type
The installation methodology must shift based on the specific architecture of the table. Below are the precise protocols for the most common structural categories.
Live Edge and Solid Slab Tables
Solid slabs (typically 2 to 4 inches thick) exert massive downward force and experience significant lateral expansion.
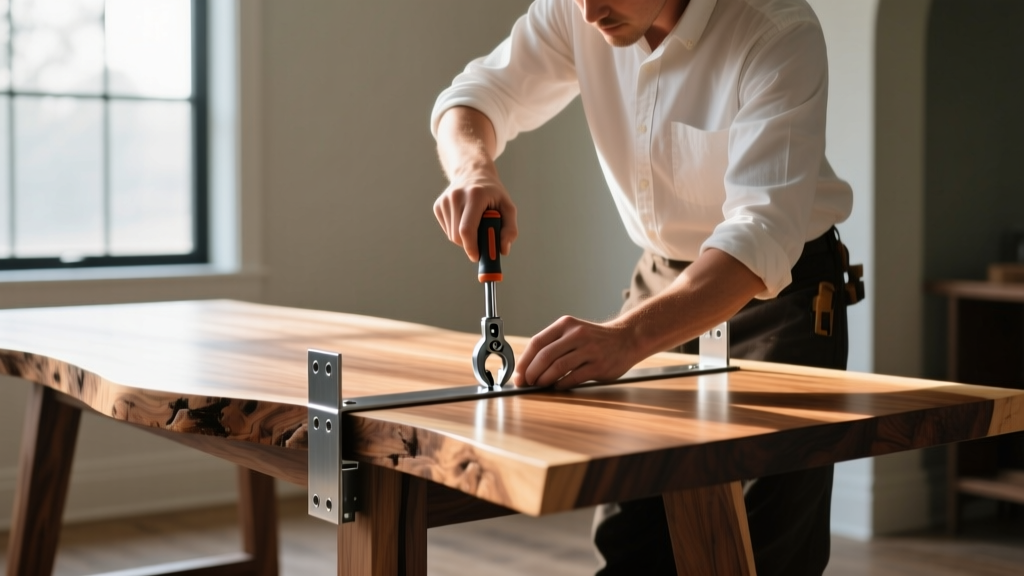
- Sub-Structure Routing: Never bolt a steel base directly through fixed holes in a slab. Instead, route 1/4-inch deep channels into the underside of the wood and install flattened steel C-channels.
- Fastening Protocol: Use 3/8-inch lag bolts through slotted holes in the steel base, not round holes. The slots must run perpendicular to the wood grain to allow lateral expansion. Tighten the bolts to exactly 15-20 ft-lbs—enough to hold the base secure, but loose enough to allow the wood to slide over the steel during seasonal shifts.
Drop-Leaf and Extension Tables
Mechanical tables require precision alignment during installation to prevent binding.
- Slide Lubrication: Never use silicone spray or WD-40 on wooden or metal extension slides. Silicone attracts fine dust and creates an abrasive paste that seizes the mechanism. Instead, apply a thin layer of clear paste wax (like Minwax or SC Johnson) or dry PTFE lubricant to the tracks.
- Leveling: Install the table on a perfectly level surface using a 48-inch machinist level. If the floor is uneven, use adjustable threaded glides on the base legs. An unlevel extension table will cause the sliding rails to rack, permanently damaging the wooden equalizer blocks.
Built-In and Wall-Mounted Console Tables
Fixed installations require integration with the building's framing.
- French Cleat Systems: For wall-mounted wood consoles, install a 3-inch wide aluminum or hardwood French cleat (Z-clip). Secure the wall-side cleat using 3-inch structural screws (such as Simpson Strong-Tie SDWS) driven directly into the wall studs, not just drywall anchors.
- Scribing and Gaps: Leave a strict 1/8-inch expansion gap between the back edge of the wood table and the wall. Caulk this gap with a high-quality, paintable elastomeric sealant (like Big Stretch) that can accommodate up to 50% joint movement without tearing.
Hardware Selection and Wood Movement Matrix
Selecting the correct threaded inserts and fasteners is critical. Driving standard wood screws into end-grain or highly figured woods (like burl or crotch mahogany) results in catastrophic stripping under load. The Woodworkers Source guide on wood movement emphasizes that mechanical fasteners must account for the specific density and Janka hardness of the species.
| Wood Species (Janka Rating) | Recommended Insert Type | Fastener Spec | Installation Note |
|---|---|---|---|
| Hard Maple (1450 lbf) | E-Z Lok Hex Drive (Brass) | 3/8'-16 Machine Bolt | Pre-drill with 1/2' Forstner bit; use beeswax on insert threads to prevent brass shearing. |
| Black Walnut (1010 lbf) | Helical Coil Insert (Steel) | 5/16'-18 Machine Bolt | Steel inserts grip walnut's open pores better than brass; apply CA glue to exterior threads. |
| Teak (1155 lbf) | Stainless Steel Flanged | 1/4'-20 Stainless Bolt | Teak's natural silica dulls tools and corrodes standard steel; use only 316-grade stainless. |
| White Oak (1360 lbf) | E-Z Lok Knife Thread | 3/8'-16 Machine Bolt | Knife threads cut cleanly through dense oak without splitting the surrounding fibers. |
Anchoring and Tip-Over Prevention
Freestanding wood tables, particularly narrow console tables, pedestal desks, and commercial dining setups, pose significant tip-over risks if not properly anchored. The U.S. Consumer Product Safety Commission (CPSC) mandates strict anchoring protocols for furniture in both residential and public spaces to prevent fatal crushing injuries.
In commercial hospitality settings or seismic zones (e.g., California, Pacific Northwest), freestanding heavy wood tables must be anchored. For restaurant tables with cast-iron bases and solid wood tops, use floor-mounted table bases with concealed floor flanges bolted using 3/8-inch concrete wedge anchors. For residential pedestal tables in seismic zones, install a flexible steel cable tether (rated for 300 lbs shear strength) connecting the table's central column to a structural floor joist or wall stud.
Step-by-Step Wall Tether Installation for Console Tables
- Locate Framing: Use a magnetic stud finder to locate the exact center of a wall stud behind the installation site.
- Install Wall Plate: Secure a 2-inch steel D-ring plate to the stud using two 2.5-inch structural wood screws. Do not use drywall anchors.
- Attach Furniture Strap: Secure the corresponding D-ring to the underside of the wood table's rear apron using 1-inch pan-head wood screws, ensuring the screws do not penetrate through the tabletop.
- Connect and Tension: Link the two D-rings with a braided steel cable or heavy-duty nylon furniture strap. Pull the strap taut so there is zero slack, but do not pull the table away from the wall.
FAQ: Troubleshooting Table Installation
Q: The threaded inserts on my oak dining table keep spinning when I try to tighten the base bolts. How do I fix this?
A: This occurs when the insert's exterior threads strip the surrounding wood, usually due to cross-threading during initial assembly. Remove the bolt and insert. Inject a high-viscosity, two-part epoxy (like System Three Gel Magic) into the hole. Coat the exterior threads of a new, slightly larger (oversized) knife-thread insert with the same epoxy, and drive it in. Allow 24 hours to cure before reattaching the base.
Q: My built-in wood breakfast table is pulling away from the wall after six months. What went wrong?
A: The table was likely installed too tightly against the wall without an expansion gap, or the room's humidity dropped significantly (common in winter). As the wood dried, it shrank, but if the fasteners were rigid, the stress caused the joinery to fail. Remove the table, add a 1/8-inch spacer during reinstallation, and switch to slotted mounting holes on the wall cleats to allow the wood to shrink and expand freely.
Proper installation of wood tables transcends basic assembly. By respecting the hygroscopic nature of the material, selecting species-specific hardware, and executing rigorous anchoring protocols, contractors and homeowners can ensure these functional centerpieces remain structurally sound and safe for decades.
Written by
Sarah WhitfieldSarah Whitfield is a chartered quantity surveyor (MRICS) and construction cost analyst with 15 years of experience in material pricing, procurement strategy, and project budgeting. She earned her degree in Construction Management from the University of Reading (UK) and has worked on projects ranging from $2M custom homes to $180M mixed-use developments across North America and Europe. Sarah currently leads cost estimating for BuildMat Insight, maintaining a proprietary database of 4,000+ material price points updated quarterly. She is a frequent contributor to RSMeans cost data panels and has presented at the International Cost Engineering Council (ICEC) congress. Based in Denver, CO, Sarah is an avid trail runner and volunteer mentor for Women in Construction.
More from Sarah Whitfield
View all
Wood & Lumber
What Are the Different Types of Wood? A Builder's Guide
Compare structural softwoods, finish hardwoods, and engineered lumber. Analyze Janka ratings, MOE values, and 2026 pricing for construction.
Aug 4, 2026

Walls & Panels
Steel Framing vs Wood Framing: Corrosion and Moisture Defense
Compare steel framing vs wood framing for moisture resistance. Learn about galvanized coatings, condensation risks, and corrosion protection strategies.
Jul 21, 2026

Stone & Masonry
How to Cut Stone Veneer: Wet Saw vs Grinder Comparison
Compare the best tools for cutting stone veneer. We review wet saws, angle grinders, and chop saws to help you achieve clean, chip-free cuts.
Jul 21, 2026