Best Practices for Installing Different Types of Wood Pine
Master the installation of various types of wood pine. Learn species-specific acclimation, fastening, and finishing techniques for flawless carpentry.

Pine is Not a Monolith: Understanding Species Differences
Treating all pine lumber as a uniform material is the most common error in finish carpentry and flooring installation. The installation techniques required for dense Southern Yellow Pine (SYP) will splinter and ruin delicate Eastern White Pine trim. When evaluating the different types of wood pine for a project, installers must account for vast differences in Janka hardness, cellular density, and resin content. According to the USDA Forest Products Laboratory Wood Handbook, the mechanical properties of pine species vary so drastically that they require entirely different fastening schedules, acclimation timelines, and finishing protocols.
| Pine Species | Janka Hardness (lbf) | Average Dried Weight (lbs/ft³) | Volumetric Shrinkage | Best Installation Application |
|---|---|---|---|---|
| Southern Yellow Pine (SYP) | 870 | 36 | 10.9% | Structural framing, heavy-duty flooring, exterior decking |
| Eastern White Pine | 380 | 25 | 8.2% | Interior trim, wainscoting, cabinetry, carved moldings |
| Ponderosa Pine | 510 | 28 | 9.8% | Window sashes, doors, light framing, painted millwork |
| Sugar Pine | 380 | 25 | 7.9% | Wide plank flooring, pattern-making, intricate interior trim |
Pre-Installation: Acclimation and Moisture Management
Wood is hygroscopic, and pine is particularly reactive to ambient humidity shifts. The target Equilibrium Moisture Content (EMC) for interior pine installations in most of North America is between 6% and 8%. However, the time required to reach this EMC depends heavily on the specific type of wood pine you are installing.
- Southern Yellow Pine: Due to its high density and closed cellular structure, SYP requires 7 to 14 days of acclimation in the installation environment. Sticker the boards with 1-inch spacers to allow cross-ventilation.
- Eastern White & Sugar Pine: These low-density, open-pored species acclimate rapidly. Typically, 3 to 5 days is sufficient. Over-acclimating white pine in a dry, HVAC-heated winter environment can cause it to drop below 5% moisture content, leading to severe checking (end-splitting) before it is even fastened.
Always verify moisture content with a pin-type moisture meter. For accurate readings in dense SYP, drive the pins at least 1/4-inch into the wood, as surface readings will falsely indicate equilibrium while the core remains wet.
Fastening Protocols: Avoiding Splits and Blowouts
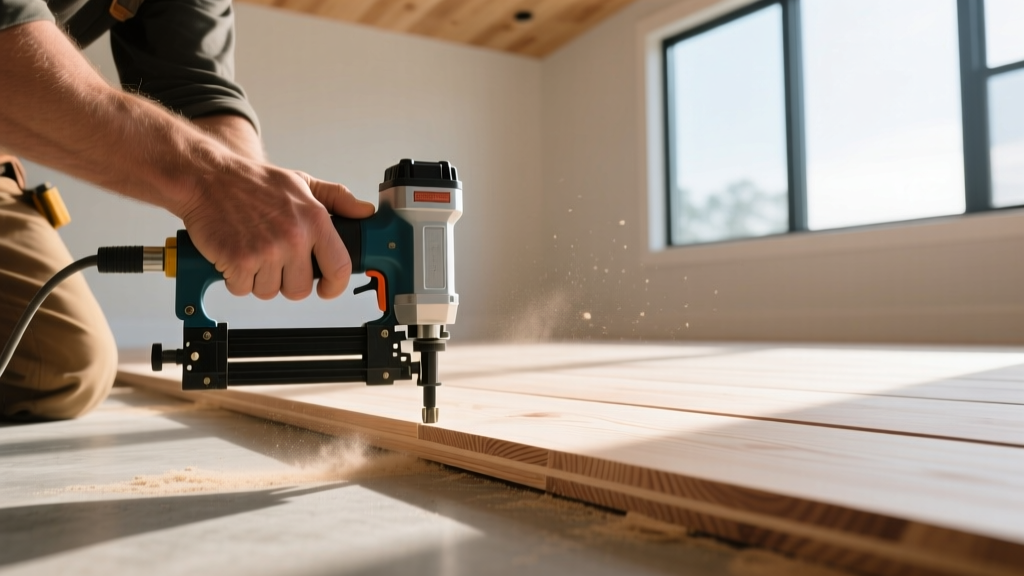
The fastening strategy must be scaled to the Janka hardness of the specific pine species. Using a 15-gauge finish nailer on Eastern White Pine will often cause surface bruising and blowouts, while using an 18-gauge brad on SYP will result in bent fasteners and incomplete countersinking.
Pneumatic Pressure and Fastener Selection
- For Eastern White & Sugar Pine (Soft): Set your air compressor to 70–85 PSI. Use 18-gauge brad nails (1.5 to 2 inches) for trim and casing. The low density allows the wood to compress around the fastener head without pre-drilling, provided you stay at least 1 inch away from board ends.
- For Ponderosa Pine (Medium): Set pressure to 85–100 PSI. A 16-gauge finish nailer is ideal. When nailing within 2 inches of the board end, pre-drill a pilot hole using a 3/32-inch bit to prevent the medullary rays from splitting.
- For Southern Yellow Pine (Hard): Set pressure to 100–120 PSI. Use 15-gauge finish nails for trim, or ring-shank nails for flooring/subflooring. Critical Rule: SYP is highly prone to splitting near the ends due to its interlocked grain. You must pre-drill pilot holes for any fastener placed within 3 inches of the board end. As noted by The Wood Database, the high resin content in SYP can also cause friction burns on fasteners; use lubricated or galvanized nails to prevent binding.
Overcoming the Knot Bleed-Through Challenge
Painting pine presents a unique chemical challenge: resin bleed. Pine knots contain active pitch and sap that will liquefy under the heat of direct sunlight or interior heating, bleeding through standard latex or oil-based primers and leaving yellow-brown halos on your finish coat. This is especially prevalent in Ponderosa and SYP, which feature large, active knots.
The Shellac-Sealing Protocol
To permanently lock in tannins and resin, you must use a shellac-based primer. Do not rely on "stain-blocking" latex primers; they are water-permeable and will eventually fail against active pine pitch.
- Surface Prep: Scrape any loose bark or hardened sap from the knots. Lightly sand the knots with 120-grit paper to open the surface.
- Spot Prime: Apply a shellac-based primer (such as Zinsser B-I-N) directly to the knots using a brush. Allow exactly 45 minutes of dry time.
- Second Spot Coat: Apply a second coat of shellac to the knots. This builds a micro-thick resin barrier.
- Scuff Sand: Once fully dry, scuff sand the primed knots with 220-grit paper. Shellac dries hard and glossy; scuffing provides mechanical tooth for the final topcoat.
- Full Prime & Paint: Prime the entire board with your chosen base primer (water-based is fine at this stage, as the shellac has sealed the knots), followed by two coats of high-quality acrylic or urethane-enamel topcoat.
Expansion Gaps and Seasonal Movement
Pine exhibits significant dimensional movement, particularly in tangential shrinkage (parallel to the growth rings). According to data from The Wood Database, Eastern White Pine has a tangential shrinkage rate of 6.8%, while SYP can reach up to 7.6%. This means a 6-inch wide pine floorboard can expand or contract by nearly 1/8-inch across its width between winter (dry) and summer (humid) seasons.
If you are installing wide-plank pine flooring (boards wider than 5 inches), insist on quarter-sawn or rift-sawn lumber. Quarter-sawn pine boards shrink primarily in thickness rather than width, reducing lateral expansion gaps by up to 50% and virtually eliminating the "cupping" effect common in flat-sawn pine floors during high-humidity months.
For interior trim and casing installations, always leave a 1/16-inch expansion gap at inside corners where two pieces of pine meet, and fill with a high-quality, paintable elastomeric caulk (such as a siliconized acrylic) rather than rigid wood filler, which will crack when the pine inevitably moves.
FAQ: Troubleshooting Pine Installations
Why did my pine baseboard crown and pull away from the wall after installation?
This is caused by installing flat-sawn pine with the bark-side facing the wall. As the wood dries and shrinks, the edges of the board cup toward the bark side. Always inspect the end-grain of your pine trim before installation. Orient the board so the growth rings curve toward the room (smile face-up). When nailed, this forces the edges tight against the drywall and allows the center to bridge naturally.
How do I prevent black stains around nail holes in exterior pine decking?
Black halos around fasteners in exterior pine (especially pressure-treated SYP) are caused by a chemical reaction between the copper-based preservatives (like ACQ or Copper Azole) and standard steel or electro-galvanized nails. You must use hot-dipped galvanized (HDG) or stainless steel fasteners. The zinc coating on electro-galvanized nails is too thin and will react with the copper preservatives within a single season.
Can I install pine flooring directly over a concrete slab?
Direct glue-down installation of solid pine flooring over concrete is highly discouraged due to moisture vapor transmission, which will cause the pine to cup and buckle. If installing over concrete, use a dimpled polyethylene vapor barrier (like Delta-FL) to create a floating subfloor, or install a sleeper system with a 6-mil poly sheeting vapor retarder between the concrete and the pressure-treated SYP sleepers. Engineered pine is a safer alternative for direct glue-down applications over concrete.
Written by
Marcus ChenMarcus Chen is a licensed structural engineer (PE) and building materials analyst with over 12 years of experience across residential, commercial, and industrial construction. He holds a Master of Science in Civil Engineering from UC Berkeley and spent six years at Thornton Tomasetti before transitioning to independent consulting and technical writing. Marcus specializes in material selection for seismic-prone regions, concrete reinforcement strategies, and lifecycle cost analysis. His work has been cited by the American Concrete Institute (ACI) and the Structural Engineers Association of California (SEAOC). When he is not on a job site or at his desk, you will find him hiking the Sierra Nevada or restoring a 1920s craftsman bungalow in Oakland, CA.
More from Marcus Chen
View all
Construction Cost
How Much Did the Eiffel Tower Cost to Build?
How much did the Eiffel Tower cost to build in 1889? We adjust for inflation and compare its budget to modern skyscraper construction.
Aug 4, 2026

Fire Resistance
What Is a Fire Resistant Material? Testing & Certification Guide
Discover what is a fire resistant material through ASTM and UL testing. Learn how fire ratings, certifications, and assemblies work in construction.
Aug 4, 2026

Construction Cost
How Much Did the Burj Khalifa Cost to Build?
How much did the Burj Khalifa cost to build? We break down the $1.5B project and extract 5 money-saving strategies for your next build.
Jul 30, 2026