Installation Best Practices for Various Types of Wood Floor
Master installation best practices for all types of wood floor. Learn acclimation, subfloor prep, and fastening methods for solid and engineered planks.
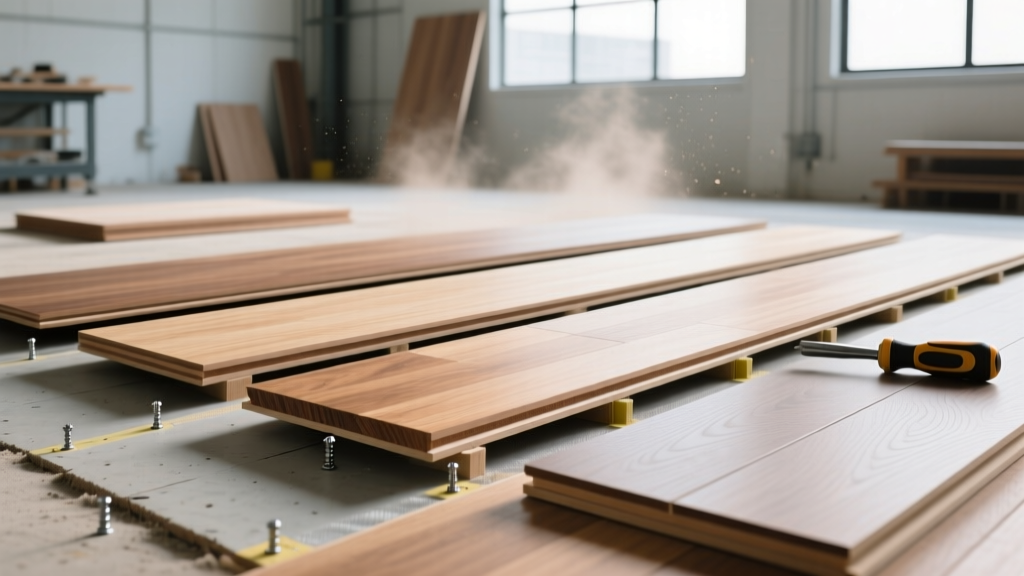
The Critical Role of Subfloor Preparation
The longevity and performance of any wood flooring system are dictated entirely by the substrate beneath it. When installing different types of wood floor, subfloor flatness and moisture content are the two non-negotiable variables. According to the National Wood Flooring Association (NWFA), wood subfloors must be flat to within 3/16 of an inch over a 10-foot radius, or 1/8 of an inch over a 6-foot radius.
Moisture Testing Protocols
Before unloading a single plank, test the subfloor. For concrete slabs, use in-situ relative humidity (RH) testing per ASTM F2170 standards. The acceptable RH limit is typically 75% to 85%, depending on the adhesive manufacturer's specifications. For wood subfloors (such as APA Rated Sheathing), use a pin-type moisture meter. The APA – The Engineered Wood Association mandates that the subfloor moisture content (MC) must not exceed 12%, and the differential between the subfloor and the flooring material must be strictly managed during acclimation.
Acclimation: Solid vs. Engineered Wood
Acclimation is not simply leaving boxes in a room for three days; it is the process of achieving moisture equilibrium between the flooring, the subfloor, and the interior environment. The HVAC system must be operational and maintaining normal living conditions (typically 60°F–80°F and 30%–50% relative humidity) for at least five days prior to delivery.
Solid Hardwood Acclimation
For 3/4-inch solid hardwood, the moisture content of the flooring must be within 2% to 4% of the wood subfloor's MC. If installing over a 7-inch wide plank, the tolerance tightens to within 2%. Cross-stack the lumber with 1/2-inch spacers between layers to allow air circulation on all four sides of every board. Use a pinless or pin-type moisture meter to test at least 40 boards per 1,000 square feet, documenting the readings on a site log.
Engineered Wood Acclimation
Engineered wood is dimensionally stable due to its cross-ply construction, but it still requires acclimation. The MC differential between the engineered planks and a wood subfloor should not exceed 1% to 2%. If installing over concrete using a moisture-cured urethane adhesive, ensure the concrete's pH level is between 7 and 11, as high alkalinity can break down the adhesive bond over time.

Fastening and Adhesive Matrix for Types of Wood Floor
Selecting the correct fastening method depends on the specific types of wood floor being installed, the subfloor material, and the plank dimensions. Below is a decision matrix for professional installers.
| Floor Type | Subfloor | Installation Method | Fastener / Adhesive Specification |
|---|---|---|---|
| 3/4" Solid Hardwood (Standard) | Wood (Plywood/OSB) | Nail-Down | 16-gauge, 2-inch L-cleats or 18-gauge, 1.5-inch staples spaced 8-10 inches apart. |
| 3/4" Solid Wide-Plank (>5") | Wood | Glue-Assist Nail | 16-gauge cleats + serpentine beads of elastomeric wood flooring adhesive (e.g., Bona). |
| Engineered (Tongue & Groove) | Wood or Concrete | Full Glue-Down | Moisture-cured urethane adhesive applied with a 1/8" x 1/4" x 3/16" V-notch trowel. |
| Engineered (Click-Lock) | Any (with underlayment) | Floating | No fasteners; use 100% silicone or PVA seam sealer in wet areas. Perimeter expansion gap required. |
Species-Specific Installation Nuances
Different wood species exhibit unique mechanical properties and hygroscopic behaviors that directly impact installation techniques. Ignoring these nuances is a primary cause of post-installation callbacks.
- Hickory and Hard Maple: These dense domestic species (Janka hardness > 1,800 lbf) are prone to splitting during blind-nailing. Installers must use 18-gauge staples or 16-gauge cleats, and pre-drilling the tongue at a 15-degree angle is highly recommended for the first three starter rows and any end-joints near the wall.
- Exotic Species (Jatoba, Cumaru, Tigerwood): Exotics are highly reactive to moisture fluctuations and possess high tangential shrinkage. When installing these types of wood floor, a full-spread glue-down method using a high-elastomeric adhesive is mandatory to restrict lateral movement. Furthermore, exotic woods often contain natural oils that inhibit adhesive curing; wiping the grooves with a solvent like acetone immediately before gluing is a critical best practice.
- White Oak (Quarter-Sawn vs. Plain-Sawn): Quarter-sawn white oak is exceptionally stable and moves primarily in thickness rather than width. This makes it the premier choice for wide-plank installations (8 to 12 inches) over radiant heating systems. Plain-sawn white oak of the same width will cup without glue-assist fastening and strict humidity controls (40%–50% RH year-round).
Managing Expansion Gaps and Transitions
Wood is a hygroscopic material; it absorbs and releases moisture from the surrounding air. Failure to accommodate this movement results in buckling, tenting, or severe gapping. For solid 3/4-inch hardwood, maintain a minimum 3/4-inch expansion gap around the entire perimeter, including door jambs, pipes, and islands. This gap must remain completely clear of debris, drywall compound, and rigid baseboards.
Pro Tip: When installing types of wood floor in large expanses exceeding 30 feet in width or 60 feet in length, integrate T-molding transitions to break the floor into smaller, manageable sections. This prevents cumulative seasonal movement from overwhelming the perimeter expansion gaps.
For floating engineered floors, the expansion gap is typically smaller (1/4 to 1/2 inch), but it must be maintained rigorously. Never pin a floating floor with heavy cabinetry, kitchen islands, or masonry fireplaces. The floor must be allowed to slide freely beneath these fixed objects, or the weight will lock the floor in place, causing it to tear apart at the joints during seasonal contraction.
Frequently Asked Questions
Can I install solid hardwood below grade?
No. Solid hardwood should never be installed below grade (in basements). Below-grade environments are subject to higher ambient moisture and potential hydrostatic pressure from the surrounding soil, which will cause solid wood to cup and rot. Engineered wood, installed via a full glue-down method over a properly tested and sealed concrete slab, is the only acceptable wood product for below-grade applications.
What is the best underlayment for sound reduction in multi-family buildings?
For floating engineered wood in condos or apartments, specify an acoustic underlayment with a minimum Impact Insulation Class (IIC) and Sound Transmission Class (STC) rating of 50 or higher, as required by most building codes and HOA regulations. Look for 2mm to 3mm cross-linked polypropylene or cork underlayments that feature an attached moisture vapor barrier to protect the wood from minor subfloor off-gassing.
How do I handle radiant heat systems with wood flooring?
Only use engineered wood or quarter-sawn solid wood (maximum 4 inches wide) over radiant heat. The surface temperature of the floor must never exceed 80°F (27°C). Install a floor temperature sensor directly beneath the wood to regulate the heating system. Before installation, run the radiant system at two-thirds capacity for two weeks to drive residual moisture out of the concrete or gypsum pour, then shut it off 24 hours before laying the adhesive.
Written by
Sarah WhitfieldSarah Whitfield is a chartered quantity surveyor (MRICS) and construction cost analyst with 15 years of experience in material pricing, procurement strategy, and project budgeting. She earned her degree in Construction Management from the University of Reading (UK) and has worked on projects ranging from $2M custom homes to $180M mixed-use developments across North America and Europe. Sarah currently leads cost estimating for BuildMat Insight, maintaining a proprietary database of 4,000+ material price points updated quarterly. She is a frequent contributor to RSMeans cost data panels and has presented at the International Cost Engineering Council (ICEC) congress. Based in Denver, CO, Sarah is an avid trail runner and volunteer mentor for Women in Construction.
More from Sarah Whitfield
View all
Wood & Lumber
What Are the Different Types of Wood? A Builder's Guide
Compare structural softwoods, finish hardwoods, and engineered lumber. Analyze Janka ratings, MOE values, and 2026 pricing for construction.
Aug 4, 2026
Walls & Panels
Steel Framing vs Wood Framing: Corrosion and Moisture Defense
Compare steel framing vs wood framing for moisture resistance. Learn about galvanized coatings, condensation risks, and corrosion protection strategies.
Jul 21, 2026

Stone & Masonry
How to Cut Stone Veneer: Wet Saw vs Grinder Comparison
Compare the best tools for cutting stone veneer. We review wet saws, angle grinders, and chop saws to help you achieve clean, chip-free cuts.
Jul 21, 2026