Treating and Preserving Different Types of Wood Working Joints
Learn how moisture affects structural integrity and discover the best methods for treating and preserving different types of wood working joints.

The Vulnerability of Wood Joints to Moisture and Decay
Woodworking joints represent the most vulnerable points in any timber structure. While continuous wood grain naturally sheds moisture and resists fungal ingress, cutting, routing, and shaping wood to create joinery exposes raw end-grain and disrupts the protective outer layers. According to research from the USDA Forest Products Laboratory, end-grain surfaces absorb liquid water and water vapor up to 15 times faster than radial or tangential side-grain surfaces. When you create a mortise, drill a dowel hole, or cut a half-lap, you are essentially creating a high-speed moisture highway directly into the heart of the timber.
Preserving the structural integrity of these connections requires a targeted approach that goes beyond simply painting or sealing the exterior of the assembled piece. Effective preservation of different types of wood working joints demands an understanding of joint geometry, capillary action, and the specific chemical treatments required to halt decay fungi and wood-boring insects before they compromise the mechanical lock of the joinery.
How Joint Geometry Dictates Preservation Strategy
Not all joints fail in the same way. The physical shape of the joint determines where moisture pools, how air circulates, and where mechanical stress concentrates. Understanding these variables is the first step in selecting the right preservative protocol.
End-Grain Exposure in Mortise and Tenon Joints
The mortise and tenon is a cornerstone of heavy timber framing and fine furniture. However, the bottom of the mortise pocket is entirely end-grain. If water breaches the shoulder of the tenon, it pools at the base of the mortise. Because this area is hidden from UV light and airflow, it becomes an ideal incubator for brown rot fungi (Postia placenta). Pre-treating the interior walls and floor of the mortise pocket with a borate-based preservative is mandatory for any exterior or high-humidity application.
Capillary Traps in Lap and Box Joints
Half-lap and box joints rely on large, flat mating surfaces glued or fastened together. While they minimize end-grain exposure compared to mortise joints, they are highly susceptible to capillary action. If the glue line fails or the wood swells and checks, micro-fissures form between the mating faces. These fissures act as capillary tubes, drawing moisture deep into the center of the joint where it cannot evaporate. Flexible elastomeric sealants applied to the seam edges are critical here to bridge the gap as the wood undergoes seasonal dimensional changes.
The Dovetail and Finger Joint Paradox
Dovetails and finger (box) joints offer immense mechanical strength and interlock tightly, leaving little room for moisture ingress when first assembled. However, because they consist of alternating end-grain and side-grain segments, they react differently to humidity fluctuations. This differential movement can cause the end-grain 'pins' to push outward, fracturing surface finishes and exposing untreated wood. Penetrating epoxy stabilizers are highly effective here to harden the end-grain pins and restrict their radial expansion.
When building exterior joints with Alkaline Copper Quaternary (ACQ) or Micronized Copper Azole (MCA) pressure-treated lumber, the high copper content acts as a cathode in the presence of moisture. Standard zinc-plated or electro-galvanized screws and bolts will undergo rapid galvanic corrosion. This leads to 'rust jacking,' where the expanding iron oxide physically splits the wood joint apart from the inside. Always use hot-dipped galvanized fasteners meeting ASTM A153 standards, or Type 316 stainless steel for marine and high-moisture joints.
Treatment Protocols by Joint Type
Selecting the correct chemical or mechanical barrier depends heavily on the specific joint configuration and its intended environment. The following matrix outlines the optimal preservation strategies for common woodworking joints.
| Joint Type | Primary Vulnerability | Pre-Assembly Treatment | Post-Assembly Sealant |
|---|---|---|---|
| Mortise & Tenon | Water pooling at mortise base | Flood with Disodium Octaborate Tetrahydrate (DOT) solution | Polyurethane seam sealer at shoulder |
| Half-Lap / Scarf | Capillary ingress at glue lines | Clear Penetrating Epoxy Sealer (CPES) | Elastomeric polyurethane (e.g., Sikaflex) |
| Dowel / Biscuit | Internal swelling splitting host wood | Use pre-treated compressed wood dowels | Wax-based end-grain sealer on entry holes |
| Dovetail | Differential movement checking | Epoxy consolidation on pin end-grains | Penetrating oil-alkyd exterior finish |
Advanced Chemical Preservatives and Penetrating Epoxies
Surface coatings like varnish and paint are insufficient for joint preservation because they only mask the surface and eventually crack under joint movement. True preservation requires deep cellular penetration.
Borate Treatments for Interior and Protected Joints
Borate salts (such as those found in Bora-Care or Tim-bor) are the gold standard for protecting interior joinery and covered exterior structures against termites, carpenter ants, and decay fungi. Borates are water-soluble, meaning they can be drawn deep into the wood via diffusion.
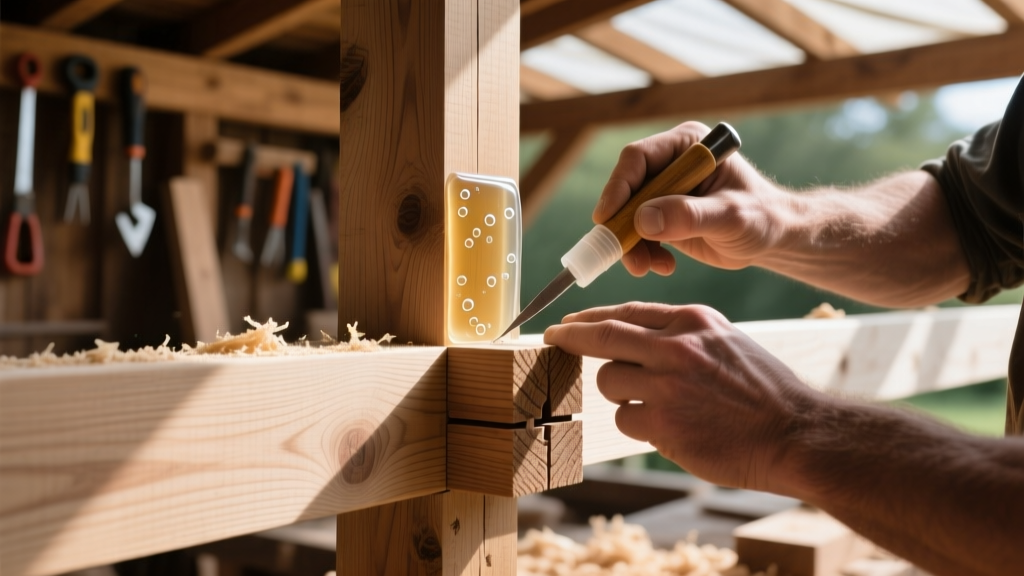
Application Technique: For mortise and tenon joints, mix a 15% borate solution with warm water. Using a syringe or squeeze bottle, flood the interior of the mortise pocket and allow it to sit for 30 minutes before wiping out the excess. As the wood dries, the borate salts crystallize inside the cellular structure, rendering the wood toxic to fungi and insects while remaining completely safe for humans and pets. For maximum efficacy, consult the application guidelines established by the American Wood Protection Association (AWPA).
Clear Penetrating Epoxy Sealer (CPES) for Structural Consolidation
When working with older timber, or when joint surfaces have begun to degrade or check, Clear Penetrating Epoxy Sealer (CPES) is an indispensable tool. Unlike standard hardware-store epoxy, CPES uses a highly volatile solvent carrier that allows the resin to wick deep into the wood fibers before curing.
Application Technique: Apply CPES to the mating surfaces of half-lap joints or the tenons themselves before applying structural wood glue. The epoxy hardens the outer layer of the wood, preventing the wood from absorbing the water content in the PVA or polyurethane glue, which can cause localized swelling and starve the joint of adhesive. Furthermore, CPES creates a rot-proof barrier that remains slightly flexible, accommodating seasonal wood movement without fracturing.
Never attempt to treat a joint after it has been glued and clamped. The glue line acts as an impermeable barrier to liquid preservatives. Always perform a dry-fit of your joinery, mark the exact boundaries of the mating surfaces with a pencil, disassemble, and apply your borate or epoxy treatments to the raw, exposed end-grain within those boundaries. Allow the treatment to fully cure or diffuse before applying adhesive and final assembly.
Troubleshooting Common Joint Failures
Even with careful construction, environmental stressors can overwhelm standard preservation efforts. Recognizing the early signs of joint failure allows for targeted intervention before structural collapse occurs.
- Symptom: Black staining radiating from fastener holes in a lap joint.
Cause: Iron tannate reaction. Standard steel nails or screws are reacting with the natural tannins in woods like oak or cedar, exacerbated by moisture ingress.
Fix: Extract the fasteners. Bore out the stained wood using a Forstner bit. Treat the void with an oxalic acid wood bleach to neutralize the stain, then refill with a thickened epoxy mixed with wood flour. Re-fasten using silicon bronze or 316 stainless steel screws. - Symptom: The tenon is loose within the mortise, and the joint rattles.
Cause: Compression set failure. The wood fibers at the base of the mortise were crushed during initial assembly or impact, and subsequent moisture cycles caused the tenon to shrink away from the crushed fibers.
Fix: Inject a low-viscosity, moisture-curing polyurethane glue into the joint gap. Clamp the joint tightly. The polyurethane will expand into the voids, bonding to both the degraded fibers and the tenon, while simultaneously sealing the gap against future moisture ingress. - Symptom: Surface finish is peeling exclusively at the joint seams.
Cause: End-grain moisture expulsion. The joint is acting as a wick, drawing moisture from the interior of the timber and pushing it out through the end-grain at the seam, breaking the adhesion of the surface film finish.
Fix: Strip the finish 2 inches back from the joint. Seal the exposed end-grain at the seam with a dedicated end-grain sealer (like Anchorseal) or a thinned coat of CPES. Re-apply the topcoat only after the sealer has fully cross-linked.
Long-Term Maintenance of Exterior Joinery
Preservation is not a one-time event for exterior timber structures. Joints exposed to direct weathering require a cyclical maintenance schedule. Every 24 to 36 months, inspect all exterior joints for micro-checking and sealant degradation. Use a moisture meter with deep-penetration probes to check the moisture content (MC) at the joint intersections. If the MC at the joint reads more than 4% higher than the continuous mid-span of the timber, moisture is pooling inside the joinery.
At this stage, apply a localized borate-glycol diffusion treatment. The glycol carrier actively pulls the borate salts deep into the damp wood, effectively halting any fungal spores that have begun to germinate inside the hidden joint cavities. By treating the specific geometry and vulnerability of each joint type, you ensure the timber assembly outlasts the surface finishes and maintains its structural rigidity for decades.
Written by
Marcus ChenMarcus Chen is a licensed structural engineer (PE) and building materials analyst with over 12 years of experience across residential, commercial, and industrial construction. He holds a Master of Science in Civil Engineering from UC Berkeley and spent six years at Thornton Tomasetti before transitioning to independent consulting and technical writing. Marcus specializes in material selection for seismic-prone regions, concrete reinforcement strategies, and lifecycle cost analysis. His work has been cited by the American Concrete Institute (ACI) and the Structural Engineers Association of California (SEAOC). When he is not on a job site or at his desk, you will find him hiking the Sierra Nevada or restoring a 1920s craftsman bungalow in Oakland, CA.
More from Marcus Chen
View all
Construction Cost
How Much Did the Eiffel Tower Cost to Build?
How much did the Eiffel Tower cost to build in 1889? We adjust for inflation and compare its budget to modern skyscraper construction.
Aug 4, 2026

Fire Resistance
What Is a Fire Resistant Material? Testing & Certification Guide
Discover what is a fire resistant material through ASTM and UL testing. Learn how fire ratings, certifications, and assemblies work in construction.
Aug 4, 2026

Construction Cost
How Much Did the Burj Khalifa Cost to Build?
How much did the Burj Khalifa cost to build? We break down the $1.5B project and extract 5 money-saving strategies for your next build.
Jul 30, 2026