Types of Wood Floors Pictures: Visual Installation Guide
Learn to identify types of wood floors from pictures and apply correct installation best practices, fastener specs, and moisture protocols.
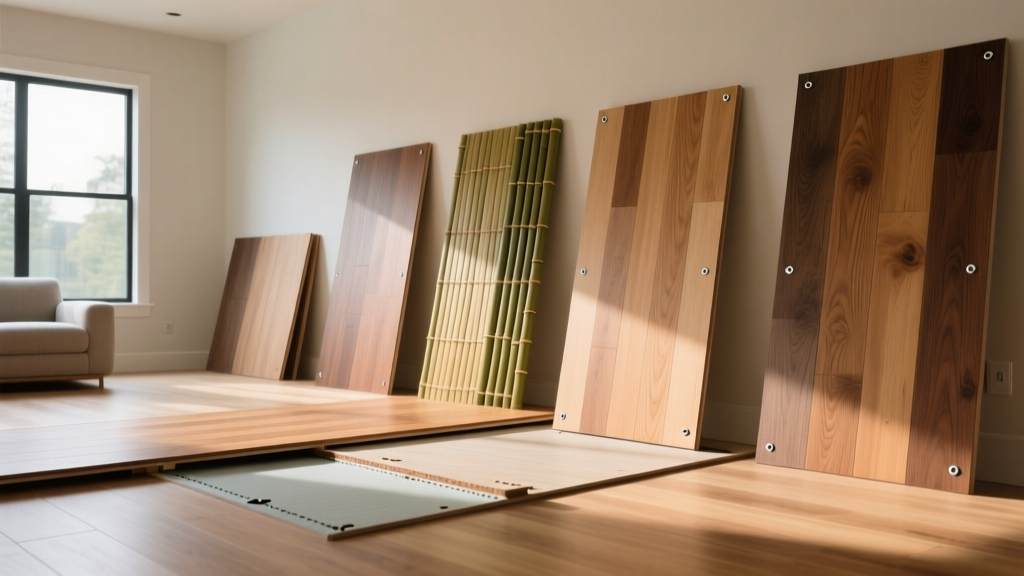
Decoding Visual Cues in Wood Flooring Photos
When clients send types of wood floors pictures scraped from Pinterest, Houzz, or design magazines, they see aesthetics. As an installation professional, you must see structural realities. Translating a two-dimensional image into a three-dimensional installation protocol requires identifying the floor's construction, species, saw cut, and dimensional profile. Misinterpreting these visual cues leads to catastrophic failures like cupping, gapping, or adhesive delamination. This guide breaks down how to analyze flooring photos to dictate exact subfloor prep, fastener selection, and moisture management strategies.
The End-Grain Tell: Solid vs. Engineered Construction
The most critical installation variable is whether the floor is solid or engineered. If the pictures include an end-grain profile or cross-section, look for the lamination lines. Solid hardwood features continuous, uninterrupted grain from top to bottom. Engineered wood reveals a plywood or HDF core with a top veneer layer.
Species Identification and Fastener Selection
Visual grain patterns in pictures dictate the Janka hardness and density of the wood, which directly determines the pneumatic pressure and fastener gauge required to prevent splitting or tongue blowout. According to the National Wood Flooring Association (NWFA), adjusting fastener specifications to the specific species is mandatory for structural integrity.
| Species (Visual Cue) | Janka Hardness | Fastener Specification | Pneumatic PSI Setting |
|---|---|---|---|
| Hickory (Erratic grain, high color contrast) | 1820 lbf | 15.5-ga 1.5" cleats | 70-80 PSI |
| White Oak (Linear grain, visible medullary rays) | 1360 lbf | 16-ga 1.5" staples or cleats | 60-70 PSI |
| Hard Maple (Subtle, uniform grain, light hue) | 1450 lbf | 16-ga 1.5" cleats | 65-75 PSI |
| Black Walnut (Swirling grain, deep chocolate hues) | 1010 lbf | 18-ga 1.5" cleats | 50-60 PSI |
Using a 16-gauge staple on brittle Hickory will often fracture the tongue, creating a squeaky floor and compromising the blind-nail holding power. Conversely, using an 18-gauge cleat on dense Maple may result in the fastener failing to penetrate the subfloor fully, leaving the head proud and preventing the next board from seating tightly.
Saw Cut Patterns: Tangential vs. Radial Movement
The grain pattern visible in top-down pictures reveals the saw cut, which dictates how the wood will move with seasonal humidity fluctuations. This is critical for determining expansion gap allowances and radiant heat compatibility.
- Plain-Sawn (Cathedral Arches): Exhibits tangential shrinkage. These boards are prone to cupping if moisture levels differ between the subfloor and the room. Require standard 3/4-inch expansion gaps at the perimeter.
- Quarter-Sawn (Straight lines, ray fleck): Exhibits radial shrinkage. Highly dimensionally stable. Expands and contracts primarily in thickness rather than width. Quarter-sawn White Oak is the premier choice for installations over radiant heating systems, as it resists the severe drying effects of the heat source.
- Rift-Sawn (Tight, linear grain without fleck): The most stable cut, but yields the highest waste. Treat installation parameters similarly to quarter-sawn, but note that the lack of medullary rays makes it slightly more susceptible to surface checking if installed in low-humidity environments (below 30% RH).
Wide-Plank Engineered Adhesive Protocols
Modern design trends heavily feature wide-plank engineered floors (7 inches to 10 inches wide) in the pictures clients share. According to installation standards detailed by Wood Floor Business, wide planks cannot be reliably secured by perimeter fastening alone due to the sheer surface area and lateral movement forces.
For 7-inch or wider engineered boards over concrete, specify a full-spread moisture-curing urethane adhesive (such as Bona K841T or Mapei Ultrabond ECO 995). Use a 1/4" x 1/4" x 3/8" V-notched trowel to ensure 100% coverage. This adhesive acts as both the bonding agent and the moisture vapor retarder, provided the concrete slab tests below 3 lbs per 1,000 sq ft per 24 hours via an ASTM F1869 calcium chloride test.
Moisture and Acclimation: Beyond the Calendar
Pictures cannot show moisture content (MC), but the visual species and width dictate the acclimation protocol. The outdated practice of 'letting the wood sit for two weeks' is a liability. Acclimation is about achieving equilibrium moisture content (EMC) between the flooring, the subfloor, and the ambient environment.
'Acclimation is not a function of time; it is a function of moisture equilibrium. Installing a floor before the MC delta between the subfloor and the flooring is within 2% to 4% guarantees future dimensional failure.' — APA Engineered Wood Association Guidelines
Use a pinless moisture meter (like the Wagner Meters Orion 910) to scan the flooring bundles. For solid 3/4-inch Oak, the subfloor (typically 3/4-inch CDX plywood) must read within 4% of the flooring's average MC. For engineered or narrow solid strips (2-1/4 inches), the delta must be within 2%. If the pictures show the floor is destined for a below-grade basement, mandate an epoxy-based concrete sealer prior to any glue-down installation, regardless of the floor's visual finish.

Troubleshooting: Misdiagnosed Failures in Photos
When reviewing pictures of existing floors for repair or replacement bids, visual anomalies indicate specific installation errors:
- Cupping (Edges higher than the center): Indicates a moisture source below the floor. Often caused by skipping the vapor retarder (e.g., Aquabar B or 6-mil poly) over a crawl space, or a plumbing leak. Do not attempt to sand a cupped floor flat until the moisture source is eliminated and the wood returns to its normal MC, or you will create severe crowning.
- Crowning (Center higher than the edges): Usually the result of a previous contractor sanding a cupped floor before it fully dried, or excessive surface moisture (e.g., wet-mopping the floor repeatedly).
- End-Joint Gapping: If the pictures show gaps specifically at the ends of the boards rather than the long edges, the installer likely failed to stagger the joints properly or did not pull the boards tight during blind-nailing, resulting in 'stair-step' tension release.
Mastering the translation of types of wood floors pictures into rigorous, physics-based installation protocols separates premium contractors from order-takers. Always demand the spec sheet, test the subfloor, and match the fastener to the grain.
Written by
Priya KapoorPriya Kapoor is a real estate market analyst and construction economics researcher with expertise in housing affordability, development feasibility, and infrastructure investment. She holds a Master of Regional Planning from Cornell University and previously worked as a senior analyst at CBRE's Investment Properties group, where she modeled returns for $4B in mixed-use development pipelines. Priya now runs an independent research practice advising developers, municipalities, and REITs on construction cost forecasting and market timing. She publishes the quarterly "BuildMat Market Pulse" report tracking material price indices across 12 commodity categories. Based in Austin, TX, Priya serves on the board of Habitat for Humanity Austin and is a marathon runner.
More from Priya Kapoor
View all
Construction Cost
Cost to Build a 1600 Sq Ft Home in 2026: Full Breakdown
Accurate 2026 cost to build a 1600 sq ft home—material, labor, and regional pricing breakdowns included. Plan your budget with real-time estimates.
Aug 11, 2026
Wood & Lumber
Name the Types of Wood for Pressure Treatment and Preservation
Learn how to name the types of wood best suited for pressure treatment. Compare species treatability, chemical retention levels, and 2026 preservation costs.
Aug 4, 2026
Stone & Masonry
Stone Veneer Suppliers Lindenhurst: 2026 Cost Analysis
Analyze 2026 stone veneer costs in Lindenhurst, NY. Compare local supplier pricing, delivery fees, and Suffolk County installation labor rates.
Aug 4, 2026