Brick vs Concrete Driveway: Installation & Base Prep Guide
Compare brick vs concrete driveway installation. Learn base prep, pouring vs paver laying steps, ASTM specs, and costs to choose the right surface.

The Foundation Reality: Base Preparation for Both Materials
The most critical phase of any driveway installation happens before the surface material is ever laid. Whether you are comparing a monolithic poured slab or a flexible segmental paver system, 90% of structural failures originate in the subgrade and aggregate base. According to guidelines published by the American Concrete Institute (ACI) and the Interlocking Concrete Pavement Institute (ICPI), skipping proper base compaction guarantees premature cracking or settling.
Standard Base Preparation Steps
- Excavation: Remove 8 to 12 inches of native soil. For clay-heavy soils, increase excavation to 14 inches and lay a non-woven geotextile fabric to prevent clay migration into the aggregate.
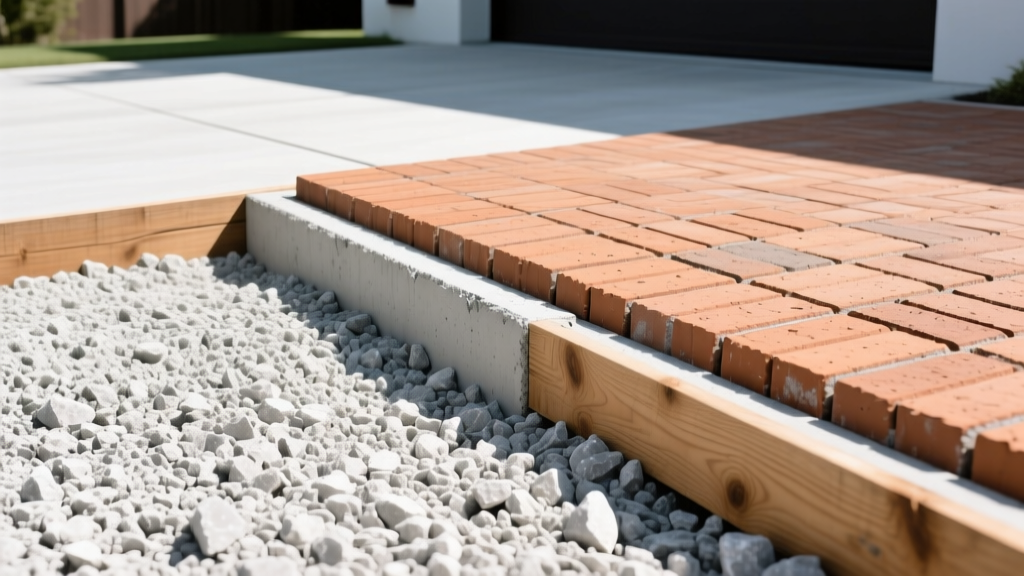
- Aggregate Layering: Fill the trench with 6 to 8 inches of 3/4-inch minus crushed stone (ASTM D2940). This material contains fine dust that locks together when compacted.
- Compaction: Use a vibratory roller or heavy plate compactor to achieve 98% Standard Proctor Density. Compact in 2-inch lifts (layers) rather than all at once to ensure deep stabilization.
- Sloping: Grade the base to a minimum 2% slope (1/4 inch per foot) away from the garage or foundation to manage hydrostatic pressure and runoff.
Installing a Poured Concrete Driveway: Formwork to Finish
A concrete driveway is a rigid pavement system. It relies on its own tensile and compressive strength to bridge minor subgrade imperfections. The National Ready Mixed Concrete Association (NRMCA) recommends specific mix designs to withstand vehicular loads and environmental stress.
The Concrete Mix Specification
Do not accept standard 3000 PSI sidewalk mix for a driveway. Specify a 4000 PSI compressive strength mix with a 3/4-inch maximum aggregate size. If you live in a climate with freeze-thaw cycles, the mix must include 5% to 7% air entrainment. These microscopic bubbles give expanding ice room to push into, preventing surface spalling.
Pouring and Finishing Sequence
- Forming: Use straight 2x4 or 2x6 lumber staked every 3 feet. Apply a form-release oil to ensure clean stripping.
- Reinforcement: Elevate W1.4xW1.4 welded wire mesh (WWF) or #3 rebar tied on 24-inch centers using plastic chairs. The steel must sit in the upper third of the slab to resist tensile cracking.
- Pouring & Screeding: Pour the concrete continuously to avoid cold joints. Strike off the surface with a straight aluminum screed.
- Finishing: Float the surface, then apply a medium-broom finish for traction. Avoid over-troweling, which pulls excessive 'cream' (cement and water) to the top and causes the surface to flake off in winter.
- Control Joints: Sawcut joints to a depth of 1/4 the slab thickness within 12 hours of pouring. Space joints every 10 feet to control where shrinkage cracks occur.
Installing a Brick Paver Driveway: Sand Bed to Polymeric Lock
Brick pavers create a flexible pavement system. Instead of resisting movement like concrete, pavers shift slightly with frost heave and settle back into place. For driveways, you must use high-density concrete pavers manufactured to ASTM C936 standards, which require a minimum compressive strength of 8,000 PSI and maximum water absorption of 5%.
Segmental Installation Steps
- Edge Restraints: Install rigid plastic edge restraints (like SnapEdge) or pour a concrete curb around the entire perimeter. Without lateral restraint, vehicular turning forces will push the pavers outward, destroying the interlock.
- Bedding Sand: Spread exactly 1 inch of coarse, sharp concrete sand (ASTM C33). Do not use masonry sand; it is too fine and will wash out. Screed the sand perfectly level using steel pipes as rails.
- Laying Pattern: Lay the pavers in a 45-degree or 90-degree herringbone pattern. This is non-negotiable for driveways. Herringbone distributes the shear forces of braking and turning tires across multiple adjacent pavers, whereas running bond patterns will rut under traffic.
- Compaction: Run a low-amplitude plate compactor over the entire surface with a urethane pad attached to prevent scratching the paver faces. This vibrates the pavers down into the bedding sand.
- Jointing: Sweep polymeric sand into the joints. Mist the surface with a fine water spray to activate the polymers, which harden to lock the pavers together and prevent weed growth.
Installation Cost & Timeline Matrix
The financial and temporal investments for these two materials differ significantly. The data below reflects 2026 national averages for professional installation, including base preparation.
| Metric | Poured Concrete Driveway | Brick Paver Driveway |
|---|---|---|
| Material Cost (per sq ft) | $3.50 - $5.00 | $6.00 - $12.00 |
| Labor & Base Prep (per sq ft) | $5.00 - $9.00 | $10.00 - $16.00 |
| Total Installed Cost (per sq ft) | $8.50 - $14.00 | $16.00 - $28.00 |
| Standard Thickness | 4 inches (6 inches for heavy loads) | 2-3/8 inches (over 1-inch sand bed) |
| Time to Install (1,000 sq ft) | 2 - 3 days | 4 - 6 days |
| Time Until Drivable | 7 days (minimum cure time) | Immediate (once polymeric sand sets) |
Edge Cases & Failure Modes: What Contractors Won't Tell You
Understanding how these materials fail in the real world is essential for making an informed decision based on your specific property conditions.
The Snow Plow Problem
If you live in a heavy snow region and use a plow service, concrete is generally superior. Steel plow blades can easily catch the leading edge of brick pavers, ripping them out of the sand bed and creating a tripping hazard. If you must use pavers in a plow zone, ensure the plow blade is fitted with a polyurethane edge and is raised slightly, or install the pavers so the plow pushes 'with' the grain of the pattern rather than against it.
Tree Root Intrusion
Planting large shade trees near the driveway? Roots will inevitably lift the surface. A concrete slab will crack and heave, requiring expensive mud-jacking or full-panel replacement. A brick paver driveway can be unzipped: the contractor removes the affected pavers, cuts the root, regrades the base, and reinstalls the exact same pavers with zero visual evidence of the repair.
Stain Resistance and Maintenance
Concrete is porous. Motor oil, transmission fluid, and tire marks will penetrate unsealed concrete, leaving permanent stains. You must apply a penetrating silane-siloxane sealer every 2 to 3 years. Brick pavers, while also porous, hide stains better due to their texture and color variations. If a single paver becomes deeply stained by a fluid leak, it can be individually swapped out for a few dollars.
Making the Final Decision Based on Your Site Conditions
Use this framework to finalize your material choice:
- Choose Poured Concrete If: You are on a strict budget, require a low-maintenance surface, use heavy snow plows, or prefer a modern, minimalist aesthetic with exposed aggregate or stamped finishes.
- Choose Brick Pavers If: You have expansive clay soils prone to frost heave, want the ability to easily access underground utilities or repair root damage, prefer a classic architectural look, and have the budget for premium segmental installation.
Expert Insight: Never hire a contractor who suggests laying driveway pavers over an existing cracked concrete slab to 'save money on base prep.' The underlying slab will continue to shift and expand, telegraphing the cracks directly through the flexible paver system above. Always demand full excavation to native soil.
Written by
Sarah WhitfieldSarah Whitfield is a chartered quantity surveyor (MRICS) and construction cost analyst with 15 years of experience in material pricing, procurement strategy, and project budgeting. She earned her degree in Construction Management from the University of Reading (UK) and has worked on projects ranging from $2M custom homes to $180M mixed-use developments across North America and Europe. Sarah currently leads cost estimating for BuildMat Insight, maintaining a proprietary database of 4,000+ material price points updated quarterly. She is a frequent contributor to RSMeans cost data panels and has presented at the International Cost Engineering Council (ICEC) congress. Based in Denver, CO, Sarah is an avid trail runner and volunteer mentor for Women in Construction.
More from Sarah Whitfield
View all
Wood & Lumber
What Are the Different Types of Wood? A Builder's Guide
Compare structural softwoods, finish hardwoods, and engineered lumber. Analyze Janka ratings, MOE values, and 2026 pricing for construction.
Aug 4, 2026

Walls & Panels
Steel Framing vs Wood Framing: Corrosion and Moisture Defense
Compare steel framing vs wood framing for moisture resistance. Learn about galvanized coatings, condensation risks, and corrosion protection strategies.
Jul 21, 2026

Stone & Masonry
How to Cut Stone Veneer: Wet Saw vs Grinder Comparison
Compare the best tools for cutting stone veneer. We review wet saws, angle grinders, and chop saws to help you achieve clean, chip-free cuts.
Jul 21, 2026