Concrete Scaling vs Spalling: An Installer's Prevention Guide
Master the critical differences in concrete scaling vs spalling. Learn mix design, finishing protocols, and remediation to prevent costly callbacks.

The Core Difference: Scaling vs. Spalling in Flatwork
For concrete contractors, surface defects are the primary driver of costly warranty callbacks. While often used interchangeably by laymen, concrete scaling vs spalling represents two distinct failure modes with entirely different root causes, depths, and remediation strategies. Understanding the mechanical difference between the two is the first step in engineering them out of your installation process.
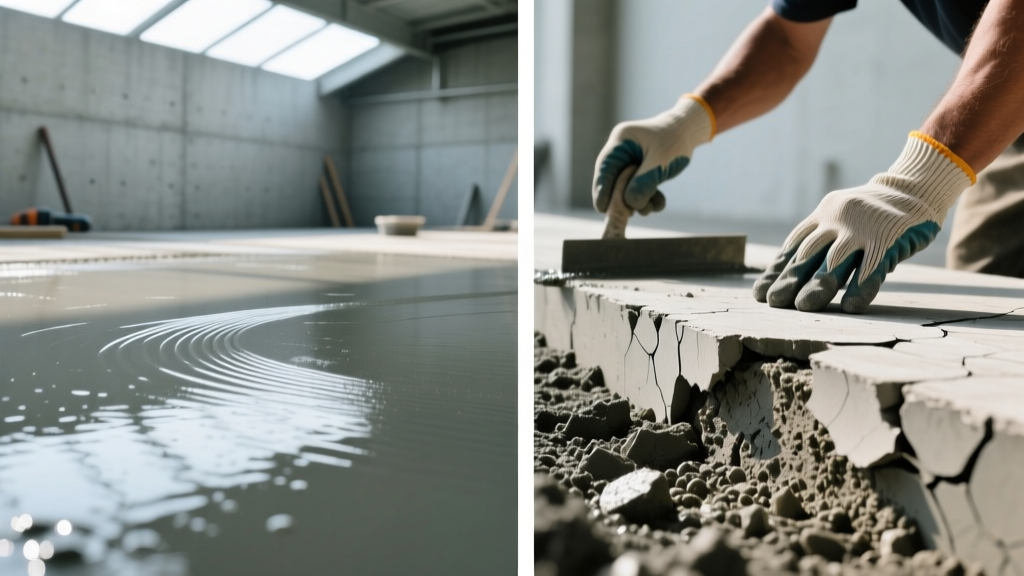
Scaling is a superficial defect. It involves the flaking or peeling away of the hardened concrete surface mortar, typically penetrating no deeper than 1/16 to 1/4 of an inch. It exposes the underlying fine aggregate but rarely compromises structural integrity. Spalling, conversely, is a deep-seated structural failure. It involves the breaking away of concrete in chunks or slabs, often extending 1/2 inch to several inches deep, frequently exposing or damaging the reinforcing steel.
| Defect | Depth of Failure | Primary Installer Cause | Visual Cue | Remediation Cost |
|---|---|---|---|---|
| Scaling | 1/16' to 1/4' | Finishing bleed water, over-troweling | Flaking mortar, exposed sand | Low (Sealers/Overlays) |
| Spalling | 1/2' to Rebar | Poor air entrainment, inadequate rebar cover | Deep craters, exposed rusted steel | High (Patching/Replacement) |
Installation Mistakes That Trigger Concrete Scaling
Scaling is almost exclusively a finishing and surface-curing issue. The most common culprit is trapping bleed water beneath the surface crust during the finishing process.
Another critical error is overworking the surface. Excessive floating brings too many fines and cement paste to the top, creating a brittle layer that lacks the durability of the underlying matrix. Furthermore, using steel trowels on exterior flatwork creates a dense, impermeable surface that traps air and prevents proper curing, accelerating surface delamination.
The Impact of SCMs on Scaling Risk
In 2026, sustainable mix designs heavily utilize Supplementary Cementitious Materials (SCMs) like slag cement (ASTM C989) and fly ash (ASTM C618). While excellent for long-term strength, high SCM replacements delay the initial set and significantly increase the duration and volume of bleed water. Installers must adjust their finishing timelines accordingly, waiting longer before the first float pass to avoid scaling.
Why Concrete Spalls: Structural and Curing Failures
Spalling is a volumetric expansion issue. It occurs when internal pressures exceed the tensile strength of the concrete matrix. According to the Portland Cement Association, the two dominant drivers of spalling in exterior flatwork are freeze-thaw hydraulic pressure and rebar corrosion.
- Inadequate Air Entrainment: Without a microscopic air-void system, freezing water inside the capillary pores expands by 9%. If the air content is below 4%, or the air-void spacing factor exceeds 0.008 inches, the hydraulic pressure shatters the concrete from the inside out, causing deep spalling.
- Insufficient Rebar Cover: ACI 318 mandates a minimum clear cover of 2 inches for exterior concrete exposed to weather and deicing salts. If chairs fail and rebar sits at 1 inch, moisture reaches the steel. As the steel rusts, it expands up to 6 times its original volume, creating 'rust jacking' that violently spalls the concrete cover off the slab.
- Thermal Shock During Curing: Pouring in extreme heat and applying cold curing water, or pouring in freezing temperatures without insulated blankets, creates thermal gradients that cause deep structural cracking and subsequent spalling.
The Installer's Mix Design Checklist
You cannot finish your way out of a bad mix. Before the truck arrives, verify these parameters with your batch plant to ensure the mix is engineered to resist both scaling and spalling:
Target Specs for Exterior Flatwork (Severe Exposure):
• Maximum w/c ratio: 0.45 (per ACI 318 Table 19.3.2.1)
• Air Content: 5% to 8% (Target 6.5% ± 1.5% per ASTM C260)
• Minimum Compressive Strength: 4,500 psi at 28 days
• Slump: 4 to 5 inches (Avoid high-slump mixes; use HRWRs/polycarboxylates instead of adding water)
Always require the batch plant to provide a certified air-meter test at the point of discharge. If the air content drops below 5% after pumping, the mix must be rejected, as the pumping process often collapses the vital microscopic air bubbles required for freeze-thaw resistance.
Step-by-Step Finishing Protocol to Prevent Surface Defects
Referencing the National Ready Mixed Concrete Association's best practices, follow this strict sequence to eliminate scaling:
- Strike-Off and Screed: Level the concrete immediately after placement. Do not use a vibratory screed on air-entrained concrete for more than one pass, as excessive vibration collapses the air void system at the surface.
- Monitor Evaporation: Use the ACI evaporation rate nomograph. If the evaporation rate exceeds 0.2 lb/ft²/hr due to wind or low humidity, apply an evaporation retardant (e.g., E-Con) to prevent plastic shrinkage, but do not use it as a substitute for curing.
- Wait for Bleed Water: This is non-negotiable. The surface must appear dull and matte. If you press your thumb into the concrete and water seeps out, it is not ready to float.
- Bullfloat (Magnesium): Use a magnesium bullfloat to push down coarse aggregate and level ridges. Magnesium does not seal the surface like steel, allowing remaining bleed water to escape.
- Edge and Joint: Cut control joints to a depth of 1/4 the slab thickness within the first 24 hours to control where the concrete cracks.
- Final Finish (Broom or Wood): For exterior flatwork, use a stiff-bristle broom or a wood float to create a textured, permeable surface. Never use a steel trowel on exterior concrete.
- Immediate Curing: Within 20 minutes of final finishing, apply an ASTM C309 compliant membrane curing compound (e.g., W.R. Meadows CS-309) or cover with wet burlap for a minimum of 7 days to prevent rapid moisture loss.
Remediation Decision Framework: When to Patch vs. Tear Out
If a defect slips through, use this framework to determine the most cost-effective and structurally sound remediation strategy, aligning with American Concrete Institute repair guidelines.
Defect Triage Tree
Scenario A: Light Scaling (Depth < 1/8 inch, no aggregate exposed)
Action: Clean surface with a mild acid etch, neutralize, and apply a penetrating silane/siloxane water repellent sealer. This halts moisture ingress and prevents further degradation.
Scenario B: Heavy Scaling (Depth 1/4 inch+, fine aggregate exposed)
Scenario C: Spalling with Exposed, Clean Rebar
Action: Chip out concrete to 1 inch behind the rebar. Clean steel with a wire wheel, apply a zinc-rich anti-corrosion primer, and patch with a high-build, shrinkage-compensated polymer mortar (e.g., SikaTop-123 Plus).
Scenario D: Spalling with Severe Rebar Section Loss (>20%)
Action: Tear out and replace the affected panel. Structural integrity is compromised, and patching will only delay inevitable failure.
By strictly controlling bleed water evaporation, enforcing precise air-entrainment metrics, and abandoning steel trowels on exterior flatwork, installers can effectively eliminate the root causes of both scaling and spalling, ensuring long-lasting, defect-free concrete flatwork.
Written by
Marcus ChenMarcus Chen is a licensed structural engineer (PE) and building materials analyst with over 12 years of experience across residential, commercial, and industrial construction. He holds a Master of Science in Civil Engineering from UC Berkeley and spent six years at Thornton Tomasetti before transitioning to independent consulting and technical writing. Marcus specializes in material selection for seismic-prone regions, concrete reinforcement strategies, and lifecycle cost analysis. His work has been cited by the American Concrete Institute (ACI) and the Structural Engineers Association of California (SEAOC). When he is not on a job site or at his desk, you will find him hiking the Sierra Nevada or restoring a 1920s craftsman bungalow in Oakland, CA.
More from Marcus Chen
View all
Construction Cost
How Much Did the Eiffel Tower Cost to Build?
How much did the Eiffel Tower cost to build in 1889? We adjust for inflation and compare its budget to modern skyscraper construction.
Aug 4, 2026

Fire Resistance
What Is a Fire Resistant Material? Testing & Certification Guide
Discover what is a fire resistant material through ASTM and UL testing. Learn how fire ratings, certifications, and assemblies work in construction.
Aug 4, 2026

Construction Cost
How Much Did the Burj Khalifa Cost to Build?
How much did the Burj Khalifa cost to build? We break down the $1.5B project and extract 5 money-saving strategies for your next build.
Jul 30, 2026