Concrete vs Stamped Concrete: Technical Specs and Mix Designs
Compare standard concrete vs stamped concrete technical specs. Analyze PSI, slump, mix designs, joint spacing, and sealer requirements.

The Technical Divide: Standard vs. Stamped Concrete
When specifying hardscapes, the choice between standard broom-finished concrete and stamped concrete extends far beyond aesthetics. Stamped concrete requires fundamental alterations to the mix design, placement tolerances, joint detailing, and curing protocols. While a standard concrete slab prioritizes structural uniformity and surface friction, stamped concrete demands a highly controlled surface paste, specific aggregate sizing, and specialized chemical sealers. Understanding these technical specifications is critical for contractors and engineers to prevent structural failure, surface delamination, and premature sealer degradation.
Quick Specification Matrix
- Standard Concrete: 3000-4000 PSI, 4-5 inch slump, 3/4-inch coarse aggregate, wet-cured or standard membrane.
- Stamped Concrete: 3500-4000 PSI, 3.5-4.5 inch slump, 3/8-inch or 1/2-inch coarse aggregate, liquid release agent, acrylic/polyurethane sealer (ASTM C1315).
Mix Design and Proportioning
The most critical technical divergence between standard and stamped concrete lies in the mix proportioning. According to the Portland Cement Association, altering the aggregate size and water-cement (w/c) ratio is mandatory when transitioning to stamped applications.
Aggregate Sizing and Gradation
Standard concrete typically utilizes a 3/4-inch maximum coarse aggregate (ASTM C33). However, using 3/4-inch aggregate in stamped concrete is a primary cause of surface tearing. When the polyurethane stamping mats are pressed into the slab, large aggregate particles near the surface can drag and tear the fresh mortar matrix, ruining the texture. Stamped concrete mixes must be restricted to a 3/8-inch or 1/2-inch maximum aggregate size. This ensures a deeper, more workable surface paste that accepts the stamp texture cleanly without aggregate interference.
Slump and Water-Cement Ratio
Standard flatwork often targets a 4 to 5-inch slump for ease of placement. Stamped concrete requires a stiffer mix, typically targeting a 3.5 to 4.5-inch slump. If the slump is too high, the concrete will be too fluid; the stamp mats will sink too deeply, causing the cement paste to ooze up through the joints of the mats and destroy the definition of the pattern. A lower w/c ratio (ideally 0.40 to 0.45) combined with polycarboxylate ether (PCE) based high-range water reducers (HRWR) achieves the necessary workability without excess bleed water.
Air Entrainment
Both standard and stamped exterior concrete require air entrainment for freeze-thaw durability (ASTM C260). Target air content remains 5% to 7% depending on the regional climate. However, the liquid release agents and powdered color hardeners used in stamped concrete can sometimes destabilize the air-void system. Contractors must perform trial batches to ensure the air content remains stable after the introduction of coloring admixtures.
Structural Thickness and Load Capacities
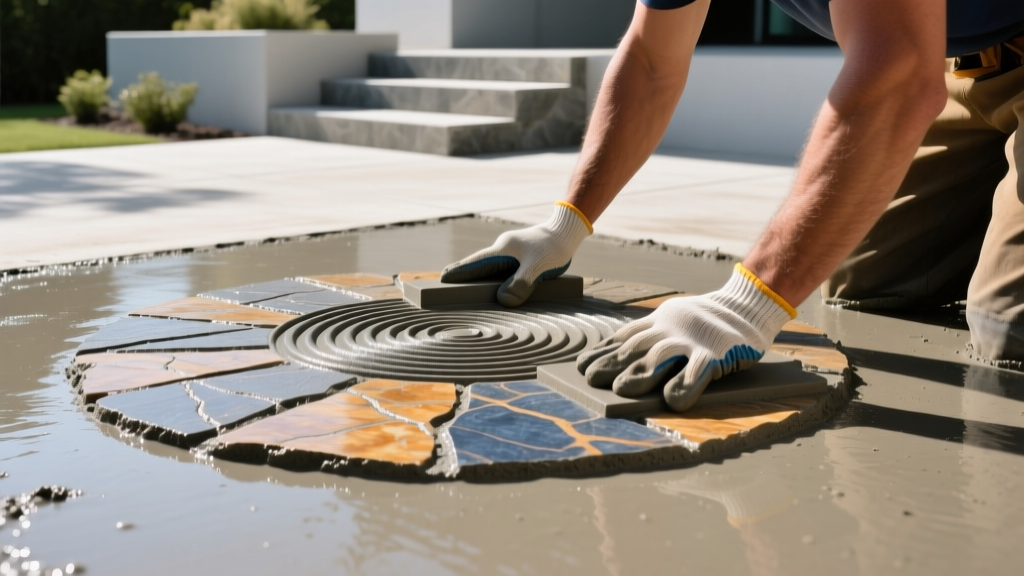
The stamping process physically displaces the concrete surface. A standard broom finish removes virtually no material thickness. In contrast, deep stone or slate stamp patterns can penetrate the surface by 1/4 inch to 1/2 inch. This displacement effectively reduces the structural cross-section of the slab. Therefore, base thickness requirements must be adjusted upward for stamped concrete.
| Application Type | Standard Concrete Minimum Thickness | Stamped Concrete Minimum Thickness | Base Requirement (Compacted Aggregate) |
|---|---|---|---|
| Pedestrian (Patios, Walkways) | 4.0 inches | 4.5 inches | 4 inches |
| Light Vehicular (Residential Driveways) | 4.0 inches | 5.0 inches | 6 inches |
| Heavy Vehicular (Commercial/Trucks) | 6.0 inches | 6.5 to 7.0 inches | 8+ inches |
Note: For stamped driveways, wire mesh (W1.4xW1.4) is generally insufficient. Use #3 or #4 rebar on a 24-inch to 36-inch grid, elevated to the upper third of the slab, to control thermal cracking under vehicular loads.
Joint Spacing and Crack Control Integration
Control joints are non-negotiable in concrete flatwork, but stamped concrete introduces a complex geometric constraint. Standard concrete joints are typically saw-cut in a grid pattern spaced 24 to 30 times the slab thickness (e.g., 10 to 12 feet for a 4-inch slab). The National Ready Mixed Concrete Association (NRMCA) emphasizes that joint depth must be at least one-quarter of the slab thickness to effectively induce cracking at the joint.
The "Hidden Joint" Technique
In stamped concrete, random saw cuts will destroy the visual illusion of natural stone or brick. Joints must be strategically aligned with the "grout lines" of the stamp pattern.
- Pattern Alignment: For Ashlar Slate or Cobblestone patterns, the joint layout must be planned before the pour. The stamp mats must be positioned so that a grout line falls exactly on the planned joint path every 10 to 12 feet.
- Tooling vs. Sawing: While early-entry saw cuts (using a Soff-Cut saw within 1-2 hours of finishing) are ideal for standard concrete, stamped concrete often requires grooving tools (jointers) pushed into the fresh concrete along the pattern lines before stamping begins. This hides the joint entirely within the texture.
- Isolation Joints: Perimeter isolation joints (using 1/2-inch asphalt-impregnated fiberboard) remain mandatory where stamped concrete abuts existing structures, foundations, or utility risers.
Curing Compounds and Sealer Specifications
The curing and sealing phase represents the most drastic technical departure between standard and stamped concrete. Standard concrete is frequently cured using water (wet burlap) or standard resin-based membrane-forming compounds (ASTM C309).
Why Standard Curing Fails on Stamped Slabs
Water curing is strictly prohibited on stamped concrete utilizing color hardeners or liquid release agents, as it will wash away the pigment and cause severe efflorescence. Standard ASTM C309 wax-based curing compounds will trap moisture and prevent the subsequent application of decorative sealers, leading to peeling and blushing (whitening).
Stamped Concrete Sealer Protocols
Stamped concrete requires a multi-phase chemical approach. First, a powdered or liquid release agent is applied before stamping to prevent the polyurethane mats from bonding to the concrete. This release agent must be thoroughly washed or blown off 24 to 48 hours post-pour.
Following surface preparation, the slab must be sealed using a solvent-based or water-based acrylic sealer compliant with ASTM C1315 (Standard Specification for Liquid Membrane-Forming Compounds Having Special Properties for Curing and Sealing Concrete). According to industry technical guidelines, the sealer must meet specific criteria:
- Solids Content: 20% to 30% solids by volume. Lower solids will fail to enhance the color; higher solids will create a slippery, plastic-like film prone to hot-tire pickup.
- UV Stability: Must contain non-yellowing acrylic resins (styrene-acrylics will amber under UV exposure within 12 months).
- Slip Resistance: Because acrylic sealers become highly slippery when wet, a secondary broadcast of a micronized polypropylene anti-slip additive (e.g., SureGrip or SharkGrip) at a rate of 1 pound per 5 gallons of sealer is mandatory for pool decks and exterior walkways.
Critical Failure Modes and Troubleshooting
Understanding the edge cases and failure modes separates standard flatwork contractors from decorative specialists.
Warning: Delamination from Over-Troweling
Applying color hardener and troweling it into the surface too early traps bleed water beneath the dense, colored crust. As the trapped water eventually evaporates, it creates a vapor pressure that causes the colored surface layer to delaminate and flake off, especially after the first freeze-thaw cycle. Rule of Thumb: Wait until the bleed water has completely evaporated and the concrete can support a worker's weight with only a 1/4-inch indentation before applying color hardener.
Sealer Blushing and Moisture Entrapment
Applying a solvent-based acrylic sealer to a slab that still retains internal moisture (or applying it during high humidity/cool evening temperatures) causes the solvent to evaporate faster than the moisture can escape. This drops the surface temperature below the dew point, trapping condensation under the sealer film. The result is "blushing"—a cloudy, white, opaque haze. To remediate, the sealer must be stripped using a chemical solvent (like xylene) and reapplied during optimal conditions (surface temperature between 50°F and 90°F, dropping humidity).
Hot-Tire Pickup on Driveways
Standard acrylic sealers soften at approximately 140°F. Vehicle tires resting on a sealed stamped driveway in direct summer sunlight can reach 160°F, causing the sealer to soften and bond to the tire tread. When the vehicle moves, it pulls the sealer off the concrete. For stamped driveways, specify a polyurethane or polyaspartic topcoat over the acrylic base coat. These advanced polymers maintain structural integrity at much higher thermal thresholds and resist plasticizer migration from modern tire compounds.
Written by
Elena RodriguezElena Rodriguez is a civil engineer and technical writer specializing in concrete technology, masonry systems, and ASTM/ACI compliance. She earned her B.S. in Civil Engineering from Texas A&M University and spent a decade at a materials testing laboratory, performing over 2,000 concrete compressive strength tests and masonry prism evaluations. Elena is an ACI-certified Field Testing Technician (Grade I) and a member of ASTM Committee C12 on Natural Building Stone. She currently consults on forensic engineering cases involving concrete failures and moisture intrusion. Based in San Antonio, TX, Elena is a proud member of the Society of Women Engineers (SWE) and coaches her daughter's FIRST Robotics team.
More from Elena Rodriguez
View all
Walls & Panels
Cost Analysis: Light Gauge Steel Framing Advantages and Disadvantages
Evaluate light gauge steel framing advantages and disadvantages through a strict cost analysis lens, comparing material, labor, and lifecycle expenses.
Aug 4, 2026

Walls & Panels
Gypsum Board Types: Exact Specifications, Thickness & Dimensions
Compare standard, Type X, and moisture-resistant gypsum board types. Get exact specifications, thicknesses, dimensions, and ASTM standards for your project.
Aug 4, 2026

Fire Resistance
Best Fire-Resistant Outdoor Decking Materials: 2026 Buyer Guide
Discover the best fire-resistant outdoor decking materials for 2026. Compare Class A PVC, aluminum, and hardwood options for WUI compliance and safety.
Aug 4, 2026