Concrete vs Stucco Installation: Methods and Costs
Compare concrete vs stucco installation methods, labor costs, curing times, and material specs to choose the right exterior cladding for your build.

The Core Difference: Structural Mass vs. Cementitious Veneer
When evaluating concrete vs stucco for exterior building envelopes, the fundamental distinction lies in structural capacity versus cladding application. Poured concrete and Insulated Concrete Forms (ICF) create a monolithic, load-bearing structural wall with high thermal mass. Stucco, conversely, is a non-structural, cementitious veneer applied over a structural substrate (wood framing, steel studs, or masonry). Understanding the installation realities of both systems is critical for accurate project scheduling, labor allocation, and moisture management.
Installation Matrix: Concrete Tilt-Up/ICF vs. Traditional Stucco
The following matrix contrasts the primary installation variables between structural ICF concrete walls and traditional 3-coat stucco systems applied over wood framing.
| Installation Variable | ICF Poured Concrete | Traditional 3-Coat Stucco |
|---|---|---|
| Substrate Prep | Level footing, rebar tying, form bracing | Sheathing, weather barrier, lath fastening |
| Application Method | Continuous pump or crane bucket pour | Hand troweling or pneumatic hopper spray |
| Total Thickness | 6 to 12 inches (concrete core) | 7/8 inch (plaster system only) |
| Curing Timeline | 28 days for full design strength | 48 hours between coats; 28 days total |
| Labor Skill Level | Certified ICF installers, concrete finishers | Licensed plasterers/stucco masons |
| Weather Constraints | Cannot pour below 40°F without heating | Cannot apply below 40°F or in high wind |
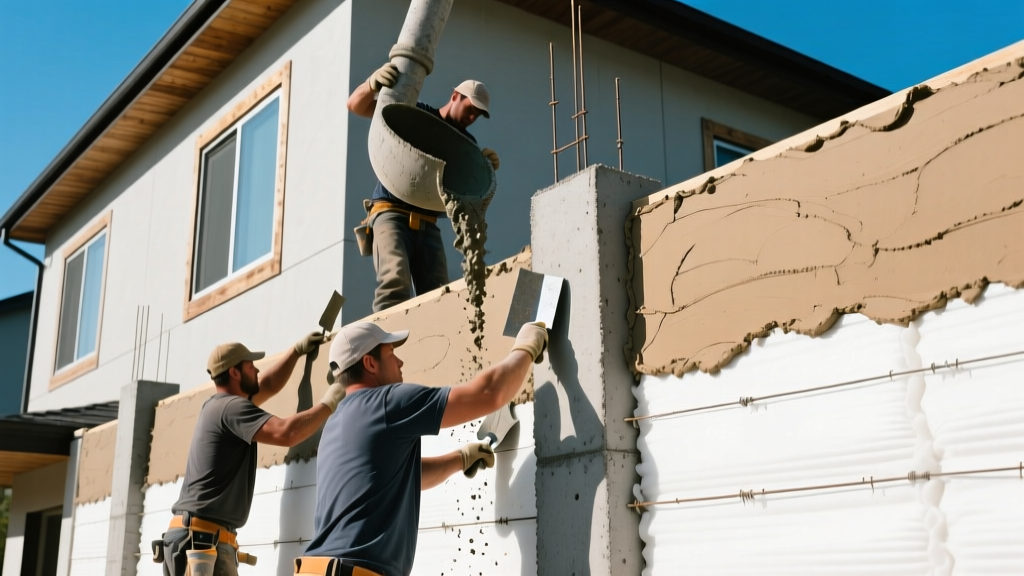
Concrete Wall Installation: ICF and Poured Methods
Modern residential and light-commercial concrete wall installation heavily favors Insulated Concrete Forms (ICF) over traditional removable plywood forms due to integrated insulation and faster assembly. Brands like Fox Blocks or Nudura utilize interlocking expanded polystyrene (EPS) foam blocks.
Step-by-Step ICF Installation Protocol
- Footing and Starter Track: Pour a level concrete footing (tolerance of 1/4 inch per 10 feet). Install a pressure-treated starter track or level the first course of ICF blocks using spray foam to seal gaps.
- Dry Stacking and Bracing: Stack the EPS blocks in a running bond pattern. Install interior and exterior aluminum turnbuckle bracing systems every 4 feet to maintain plumb during the pour.
- Rebar Placement: Insert #4 (1/2-inch) or #5 (5/8-inch) Grade 60 rebar horizontally and vertically per engineered specs. Standard residential placement is 16 inches on center (O.C.) both ways, with rebar chairs ensuring 1.5 inches of concrete cover.
- The Pour: Use a concrete mix with a minimum compressive strength of 3,000 PSI (4,000 PSI in freeze-thaw climates) and a 5-inch to 6-inch slump. The mix must include 5% to 7% air-entrainment for durability. Pour in 4-foot lifts to prevent hydrostatic blowouts of the foam forms.
- Consolidation: Use a 1-inch pencil vibrator to consolidate the concrete, ensuring it flows completely around the rebar and into the form webs without segregating the aggregate.
According to the National Ready Mixed Concrete Association (NRMCA), concrete placed in temperatures below 40°F (4°C) requires heated enclosures or accelerating admixtures. If the concrete core temperature drops below freezing before reaching 500 PSI, the expansion of freezing water will permanently destroy the cement matrix, resulting in catastrophic surface scaling.
Traditional 3-Coat Stucco Installation Protocol
While one-coat and EIFS (synthetic stucco) systems exist, traditional 3-coat Portland cement stucco remains the gold standard for impact resistance and longevity in commercial and high-end residential builds. The installation must strictly adhere to ASTM C926 standards.
Phase 1: Weather Barrier and Lath
Moisture management is the most critical phase of stucco installation. As noted by the Building Science Corporation, stucco is a reservoir cladding that absorbs and holds water; therefore, a drainage plane is non-negotiable.
- Weather Barrier: Apply two layers of Grade D building paper (ASTM D226) or a fluid-applied membrane over OSB/plywood sheathing. The double layer creates a microscopic drainage gap when the stucco cures against the paper.
- Weep Screed: Install a corrosion-resistant weep screed (ASTM C1063) at the base of all walls, extending minimum 1/4 inch past the sheathing to allow trapped water to escape.
- Wire Lath: Fasten 1-inch galvanized self-furring woven wire lath (ASTM C847) using 1-inch roofing nails or staples spaced 6 inches O.C. on studs. The self-furring dimples hold the lath 1/4 inch away from the sheathing, allowing the scratch coat to key behind the wire.
Phase 2: The Three Coats
- Scratch Coat (3/8 inch): Apply a Type S mortar mix (1 part Portland cement, 1/2 part hydrated lime, 3.5 parts sand). Force the material through the lath. Before it sets, horizontally scratch the surface with a rake to provide a mechanical key for the next layer. Mist-cure for 48 hours.
- Brown Coat (3/8 inch): Apply the same mix proportion. Use a darby or straight edge to screed the surface perfectly plumb and flat. Float the surface to a uniform, slightly rough texture. Mist-cure for another 48 hours.
- Finish Coat (1/8 inch): Apply a proprietary finish coat (often containing polymers and integral color pigments). Trowel to the desired texture (smooth, dash, or lace). Total system thickness must be exactly 7/8 inch.
If the scratch coat is applied too thin or the lath is not properly self-furred, the wire pattern will telegraph through the finish coat as 'shadowing' months after installation. Always verify the 1/4-inch standoff gap before the pump truck arrives.
One-Coat Stucco vs. Poured Concrete: The Fast-Track Comparison
For builders on aggressive timelines, comparing one-coat stucco systems to tilt-up or ICF concrete reveals distinct labor advantages. One-coat stucco utilizes fiberglass mesh and a 1/2-inch thick base coat applied directly over rigid foam insulation or sheathing, eliminating the 7-day curing wait between scratch and brown coats.
2026 Labor & Material Cost Estimates (Per 100 Sq. Ft.)
ICF Concrete Wall: $2,000 - $2,600 (Includes EPS forms, rebar, concrete, pump, and labor)
Traditional 3-Coat Stucco: $1,200 - $1,600 (Includes lath, paper, 3 coats, and mason labor)
One-Coat Stucco System: $850 - $1,100 (Includes foam, mesh, base coat, finish, and labor)
*Costs reflect Q1 2026 national averages for materials and prevailing union/open-shop labor rates.
Troubleshooting Common Installation Failures
Both materials are highly durable, but improper installation leads to specific, predictable failure modes. The Association of the Wall and Ceiling Industry (AWCI) frequently documents these issues in technical bulletins.
Symptom: Map Cracking (Spiderweb Pattern)
- Material: Stucco
- Cause: Rapid moisture loss during the curing phase, often due to high winds, direct sun exposure, or applying the brown coat before the scratch coat has adequately cured. It can also result from a mix with too high a cement-to-sand ratio.
- Fix: Implement strict fog-misting protocols twice daily for 48 hours post-application. Use windbreaks on scaffolding. For existing map cracks, apply a siloxane-based penetrating sealer to prevent water ingress, as patching will remain visible.
Symptom: Horizontal Cold Joints and Honeycombing
- Material: Poured Concrete (ICF or Removable Forms)
- Cause: Delaying the next concrete lift too long, allowing the previous lift to set before the new concrete is placed, or inadequate vibration resulting in voids (honeycombing) around dense rebar intersections.
- Fix: Maintain a continuous pour schedule; never exceed a 45-minute delay between lifts in warm weather. Use a pencil vibrator every 18 inches, inserting it 6 inches into the previous lift to mechanically bond the layers.
Symptom: Efflorescence (White Powdery Deposits)
- Material: Both Concrete and Stucco
- Cause: Water migrating through the cementitious matrix dissolves soluble salts (calcium hydroxide) and deposits them on the surface upon evaporation. In stucco, this often indicates a failed weather barrier or missing weep screed trapping water inside the wall cavity.
- Fix: Do not simply wash the surface with muriatic acid, which can etch the finish and worsen the problem. Identify and eliminate the water source (e.g., repair roof flashing, clear blocked weep screeds). Brush off dry deposits, then apply a breathable, silane-based water repellent.
Final Verdict: Which Installation Suits Your Project?
The decision between concrete and stucco installation ultimately hinges on your project's structural requirements, budget, and local climate.
Choose ICF Poured Concrete if you are building in high-wind zones (hurricane/tornado alleys), require superior sound attenuation (STC ratings above 50), and want a single-trade installation that provides structure, insulation, and air sealing simultaneously. The higher upfront installation cost is offset by long-term energy savings and structural resilience.
Choose Traditional 3-Coat Stucco if you are building over wood or steel framing in arid or moderate climates, desire a highly customizable architectural finish, and need a proven, breathable cladding system that handles minor substrate movement without catastrophic failure. Ensure your budget allocates heavily toward the weather barrier and flashing details, as stucco's longevity is entirely dependent on the quality of the hidden prep work.
Written by
Elena RodriguezElena Rodriguez is a civil engineer and technical writer specializing in concrete technology, masonry systems, and ASTM/ACI compliance. She earned her B.S. in Civil Engineering from Texas A&M University and spent a decade at a materials testing laboratory, performing over 2,000 concrete compressive strength tests and masonry prism evaluations. Elena is an ACI-certified Field Testing Technician (Grade I) and a member of ASTM Committee C12 on Natural Building Stone. She currently consults on forensic engineering cases involving concrete failures and moisture intrusion. Based in San Antonio, TX, Elena is a proud member of the Society of Women Engineers (SWE) and coaches her daughter's FIRST Robotics team.
More from Elena Rodriguez
View all
Walls & Panels
Cost Analysis: Light Gauge Steel Framing Advantages and Disadvantages
Evaluate light gauge steel framing advantages and disadvantages through a strict cost analysis lens, comparing material, labor, and lifecycle expenses.
Aug 4, 2026

Walls & Panels
Gypsum Board Types: Exact Specifications, Thickness & Dimensions
Compare standard, Type X, and moisture-resistant gypsum board types. Get exact specifications, thicknesses, dimensions, and ASTM standards for your project.
Aug 4, 2026

Fire Resistance
Best Fire-Resistant Outdoor Decking Materials: 2026 Buyer Guide
Discover the best fire-resistant outdoor decking materials for 2026. Compare Class A PVC, aluminum, and hardwood options for WUI compliance and safety.
Aug 4, 2026