Concrete Roof Replacement Materials List for Leak Repair
Diagnose concrete roof leaks and spalling with our expert roof replacement materials list, featuring 2026 product specs, costs, and application steps.

Troubleshooting Concrete Roof Failures: When to Repair vs. Replace
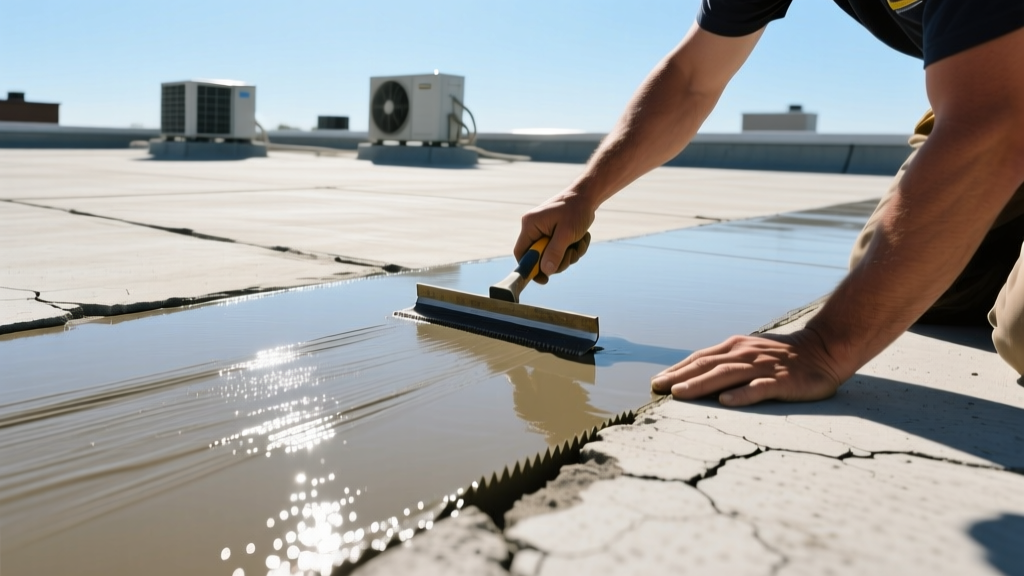
Flat and low-slope concrete roofs are exceptionally durable, but they are highly susceptible to water ingress, thermal cracking, and freeze-thaw spalling. Before compiling your roof replacement materials list, you must accurately diagnose the failure mode. Surface-level crazing and localized spalling can often be addressed with targeted patching and a liquid-applied membrane overlay. However, if you observe structural deflection, deep cracking penetrating the rebar mat, or severe efflorescence indicating chronic internal saturation, a full tear-off and structural intervention by a licensed engineer is required.
Never apply an impermeable roof replacement membrane directly over a moisture-saturated concrete slab. Trapped moisture will vaporize under solar heat, creating hydrostatic pressure that causes catastrophic blistering and delamination of the new roof system. Always perform an ASTM D4263 plastic sheet test or use a Tramex Concrete Encounter moisture meter before proceeding.
The Comprehensive Concrete Roof Replacement Materials List
A successful concrete roof overlay or replacement requires a systematic approach to surface preparation, slope correction, and waterproofing. The following materials list reflects 2026 industry standards, prioritizing polymer-modified and elastomeric products designed specifically for concrete substrates.
Phase 1: Surface Preparation & Crack Injection
- Abrasive Tooling: Diamond grinding cups (30/40 grit) or a walk-behind shot blaster to achieve a Concrete Surface Profile (CSP) of 3 to 4, which is mandatory for mechanical adhesion of liquid membranes.
- Chemical Etcher: Phosphoric acid concrete etcher (safer and more environmentally compliant than traditional muriatic acid) to open the pores of the cement paste.
- Active Joint Sealant: Sikaflex-1a polyurethane sealant. Used for expansion joints and active cracks that experience thermal movement. Do not use rigid epoxies here.
- Dormant Crack Injector: Sikadur-35 Hi-Mod low-viscosity epoxy. Used to structurally weld static, non-moving cracks wider than 1/16 inch.
Phase 2: Cementitious Patching & Slope Correction
Concrete roofs frequently suffer from inadequate slope, leading to ponding water. Ponding water accelerates membrane degradation and must be corrected during the replacement process.
- High-Build Patching Compound: SikaTop Patch Plus or Mapcrete W. These are polymer-modified, trowel-grade mortars that can be featheredged to 1/4 inch without cracking. Cost: Approximately $45 to $60 per 50 lb bag.
- Lightweight Slope Fill: Insulating lightweight concrete (e.g., Zonolite or perlite-based screeds) mixed with Portland cement to build up low areas and create a minimum 1/4 inch per foot slope toward drains.
- Drain Sump Kits: Pre-formed polyurethane or EPDM drain sumps to create a depressed area immediately around roof drains, ensuring positive water evacuation.
Phase 3: Primers & Primary Waterproofing Membranes
The choice of primary membrane dictates the longevity of the roof replacement. According to guidelines from the National Roofing Contractors Association (NRCA), concrete decks require specific vapor-retarding primers before membrane application.
- Moisture-Blocking Primer: Epoxy-based concrete primer (e.g., Sika Concrete Primer). This penetrates the CSP-3 profile and blocks moisture vapor transmission (MVT) up to 12 lbs per 1,000 sq ft per 24 hours.
- Liquid-Applied Polyurethane: Sikalastic RoofPro or GacoRoof. These form a seamless, fully adhered elastomeric monolith. Excellent for complex roofs with numerous penetrations. Cost: $5.50 to $8.50 per sq. ft. (material only).
- SBS Modified Bitumen: Torch-applied or cold-adhesive SBS rolls. Ideal for high-traffic concrete terraces due to extreme puncture resistance. Cost: $7.00 to $11.00 per sq. ft.
- Flashing & Termination: Aluminum termination bars with neoprene gaskets, secured with masonry tapcons and sealed with polyurethane caulking at all parapet walls.
Material Comparison Matrix: 2026 Market Data
| Membrane Type | Specific Product Example | Material Cost / Sq.Ft. | Expected Lifespan | Best Application Scenario |
|---|---|---|---|---|
| Liquid Polyurethane | Sikalastic 618 | $5.50 - $8.50 | 15 - 20 Years | Complex geometries, HVAC penetrations |
| SBS Mod-Bit (Torch) | Soprema Elastophene | $7.00 - $11.00 | 20 - 25 Years | High foot traffic, rooftop terraces |
| Fully Adhered TPO | Carlisle Sure-Weld | $6.00 - $9.00 | 20 - 30 Years | Large, open, unobstructed concrete decks |
| Acrylic Elastomeric | GacoFlex | $3.00 - $4.50 | 10 - 12 Years | Budget repairs, sloped concrete (no ponding) |
Step-by-Step Application & Curing Timelines
Proper sequencing is critical. The American Concrete Institute (ACI) emphasizes that ambient and substrate temperatures dictate curing times for cementitious and polymeric materials.
- Mechanical Preparation (Day 1): Shot blast or diamond grind the entire concrete deck. Vacuum all dust using HEPA-filtered industrial vacuums. The surface must be entirely free of laitance, curing compounds, and existing failing coatings.
- Crack Routing & Injection (Day 2): Route active cracks to a minimum 1/2 inch width and depth using a V-notch diamond blade. Clean with compressed air and backer rod, then inject with Sikaflex-1a. Allow 24 hours for tack-free cure.
- Patching & Slope Building (Day 3-4): Apply SikaTop Patch Plus to spalled areas. Build up low spots with lightweight slope fill. Critical: Cementitious patches require a minimum 48-hour cure at 70°F before applying moisture-blocking primers.
- Priming (Day 5): Roll on the epoxy concrete primer at a rate of 200 sq. ft. per gallon. Broadcast silica sand (0.4-0.8 mm) into the wet primer to create a mechanical key for the top membrane.
- Membrane Application (Day 6-7): Apply the liquid polyurethane or adhere the SBS/TPO membrane according to manufacturer specifications. Ensure a minimum wet mil thickness of 60 mils for liquid systems, verified with a wet mil gauge.
Common Installation Mistakes to Avoid
Even with the correct roof replacement materials list, improper execution leads to premature failure. Avoid these frequent edge-case errors:
- Ignoring Parapet Wall Flashing: Extending the membrane only to the roof edge is a critical error. The membrane must be carried up the parapet wall a minimum of 8 inches above the roof surface and secured with a termination bar. Water frequently migrates laterally through masonry parapets and bypasses edge flashing.
- Overlooking Control Joints: Concrete slabs are poured with control joints to dictate where cracking occurs. If you bridge a control joint with a rigid patch or a non-reinforced liquid coating, the membrane will split when the slab moves. You must install a pre-formed neoprene bellows or a reinforcing fabric mesh embedded in polyurethane over all control joints before the main membrane application.
- Trapping Solvents: When using solvent-based primers on porous concrete, applying the topcoat before the solvents have fully off-gassed will result in pinholes and blistering in the final membrane. Always adhere strictly to the manufacturer's recoat window.
Expert Sourcing & Maintenance Framework
Procuring authentic materials is vital; the market is saturated with diluted, off-brand elastomerics that fail to meet ASTM International standards for elongation and tensile strength. Source liquid membranes and epoxy primers directly from authorized commercial distributors rather than big-box retail centers to ensure you receive products with intact chemical catalysts and valid batch warranties.
Post-installation, implement a bi-annual inspection framework. Clear all roof drains of debris, inspect the termination bars for sealant shrinkage, and perform adhesion pull-tests on the membrane every five years to preemptively identify areas where hydrostatic pressure may be compromising the bond line. By strictly adhering to this materials list and application protocol, a concrete roof replacement will yield a watertight, structurally sound asset for decades.
Written by
Elena RodriguezElena Rodriguez is a civil engineer and technical writer specializing in concrete technology, masonry systems, and ASTM/ACI compliance. She earned her B.S. in Civil Engineering from Texas A&M University and spent a decade at a materials testing laboratory, performing over 2,000 concrete compressive strength tests and masonry prism evaluations. Elena is an ACI-certified Field Testing Technician (Grade I) and a member of ASTM Committee C12 on Natural Building Stone. She currently consults on forensic engineering cases involving concrete failures and moisture intrusion. Based in San Antonio, TX, Elena is a proud member of the Society of Women Engineers (SWE) and coaches her daughter's FIRST Robotics team.
More from Elena Rodriguez
View all
Walls & Panels
Cost Analysis: Light Gauge Steel Framing Advantages and Disadvantages
Evaluate light gauge steel framing advantages and disadvantages through a strict cost analysis lens, comparing material, labor, and lifecycle expenses.
Aug 4, 2026

Walls & Panels
Gypsum Board Types: Exact Specifications, Thickness & Dimensions
Compare standard, Type X, and moisture-resistant gypsum board types. Get exact specifications, thicknesses, dimensions, and ASTM standards for your project.
Aug 4, 2026

Fire Resistance
Best Fire-Resistant Outdoor Decking Materials: 2026 Buyer Guide
Discover the best fire-resistant outdoor decking materials for 2026. Compare Class A PVC, aluminum, and hardwood options for WUI compliance and safety.
Aug 4, 2026