Vinyl vs Concrete Pool Installation: Costs, Timelines, and Site Prep
Compare vinyl vs concrete pool installation. Explore costs, excavation timelines, structural requirements, and site prep for gunite and liner pools.

The Structural Philosophy: Membrane vs. Monolith
When evaluating a vinyl vs concrete pool for your property, the decision ultimately hinges on how the structure manages hydrostatic pressure and retains water. A concrete pool (typically shotcrete or gunite) is a monolithic, structural shell that relies on its own mass and steel reinforcement to resist soil and water pressure. The concrete itself is the waterproof barrier, sealed by an interior plaster or pebble finish. Conversely, a vinyl liner pool utilizes a non-structural framework—usually polymer or galvanized steel panels—paired with a vermiculite floor base. The water is held entirely by a flexible, 20-to-30-mil virgin vinyl membrane that acts as a drop-in bladder.
Understanding these divergent engineering approaches is critical because they dictate entirely different site preparation, excavation, and installation workflows. According to the Association of Pool & Spa Professionals (APSP), adhering to material-specific construction standards is the primary defense against premature structural failure.
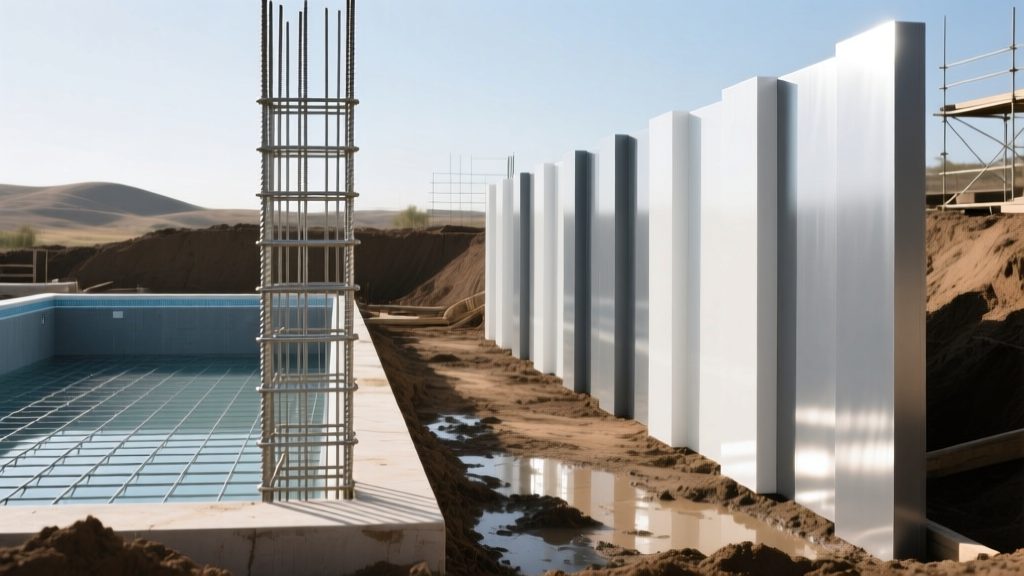
Site Preparation and Excavation Realities
The footprint required to dig the hole varies significantly between the two materials. This 'over-dig' requirement impacts landscaping destruction, soil removal costs, and site access needs.
Concrete Pool Excavation
Gunite and shotcrete pools require a substantial over-dig, typically 3 to 4 feet beyond the planned pool dimensions on all sides. This wide trench is mandatory to allow steel tiers to build the rebar cage and for plumbers to install the main drain and return lines behind the shell before the concrete is sprayed. If your property has tight side-yard setbacks or limited access for heavy excavation machinery, a concrete pool installation becomes highly complex and expensive.
Vinyl Liner Pool Excavation
Vinyl pools require a much tighter excavation footprint, usually 1.5 to 2 feet of over-dig. The prefabricated wall panels are lowered into the hole and braced from the outside. Because the plumbing is typically routed through the panels or under the floor base rather than behind a thick sprayed shell, less working space is required. This makes vinyl pools highly suitable for narrow lots or sites with restricted machinery access.
Concrete Pool Installation Flow: The Gunite Process
The installation of a concrete pool is a heavy construction project that requires specialized subcontractors and strict curing protocols. The Portland Cement Association emphasizes that proper mix design and curing are vital for subterranean water-retaining structures.
- Steel Reinforcement: A grid of 3/8-inch (or 1/2-inch for larger pools) steel rebar is tied on 10-inch to 12-inch centers. The cage is elevated on 2-inch dobies (concrete blocks) to ensure it sits in the middle of the eventual shell.
- Plumbing Rough-In: Rigid PVC Schedule 40 or 80 plumbing is installed and pressure-tested at 40 PSI for 24 hours to ensure zero leaks before it is encased in concrete.
- Shotcrete/Gunite Application: A pneumatic hose sprays the concrete mixture at high velocity into the rebar grid. Shotcrete (pre-mixed wet concrete) is generally preferred in 2026 for its consistent 4,000 to 5,000 PSI compressive strength and lower rebound waste. The shell is built to a thickness of 8 to 12 inches.
- Curing and Hydration: The rough shell must be watered down 3 to 4 times a day for 14 to 28 days to prevent thermal cracking and ensure proper hydration. The pool is not filled until the interior plaster or pebble finish is applied.
Vinyl Liner Pool Installation Flow: Panels and Base
Vinyl pool installation is more akin to precision assembly than heavy masonry. The timeline is significantly compressed, but the floor base requires meticulous hand-troweling.
- Panel Assembly: 42-inch or 48-inch tall polymer or galvanized steel wall panels are bolted together on a leveled concrete footer. They are braced outward with adjustable steel turnbuckles to withstand the inward pressure of wet backfill.
- Plumbing and Floor Base: Plumbing is routed and tested. The floor is then formed using a mixture of vermiculite and Portland cement (typically a 3:1 ratio). Installers hand-trowel this mixture over the dirt floor to create a smooth, porous, and insulating base that perfectly matches the 3D dimensions of the custom liner.
- Liner Drop and Vacuum: The custom-cut vinyl liner is unfolded and hung on a coping track. A shop-vac is placed between the liner and the wall to suck out the air, pulling the vinyl tight against the vermiculite floor and eliminating wrinkles.
- Filling and Backfill: Water is immediately added to weigh down the liner. Simultaneously, clean gravel or crushed stone is backfilled behind the panels in 12-inch compacted lifts to lock the walls in place.
Installation Matrix: Timeline, Cost, and Labor
The following matrix reflects average 2026 industry baselines for a standard 16x32 foot rectangular pool. Regional labor rates and soil conditions will cause variance.
| Metric | Concrete (Gunite/Shotcrete) | Vinyl Liner |
|---|---|---|
| Average Installation Cost | $75,000 - $130,000+ | $45,000 - $85,000 |
| Excavation to Swim Timeline | 3 to 6 months | 4 to 8 weeks |
| Required Over-Dig | 3 to 4 feet | 1.5 to 2 feet |
| Shell Structural Lifespan | 50+ years | 30 to 40 years (panels) |
| Interior Surface Lifespan | 15 to 25 years (plaster/pebble) | 7 to 12 years (vinyl) |
| Custom Shape Flexibility | Unlimited (freeform, infinity edges) | Limited (mostly geometric/radius) |
Long-Term Maintenance and Failure Modes
Every installation choice carries specific long-term liabilities. Understanding these failure modes is crucial for making an informed decision.
Concrete Pool Failure Modes
- Structural Cracking: Expansive clay soils can exert immense lateral pressure on a concrete shell. If the soil shifts, the rigid concrete can crack. Hydrostatic relief valves must be installed in the main drain to prevent the pool from cracking or popping out of the ground during heavy rain events when the pool is empty.
- Surface Degradation: Aggressive water chemistry (low pH or high chlorine) will etch and degrade the interior plaster over time, requiring a $15,000 to $25,000 resurfacing job every 15 years.
Vinyl Pool Failure Modes
- Liner Punctures and UV Degradation: While modern 30-mil liners are tough, sharp objects, pet claws, or improper brushing can cause tears. Furthermore, the waterline and steps are exposed to UV radiation, causing the plasticizers in the vinyl to break down, leading to brittleness and fading.
- Wall Panel Corrosion: If galvanized steel panels are used instead of polymer, chlorine-rich backfill or saltwater splashing can cause the steel to rust through, compromising the pool's structural integrity. Always specify heavy-duty polymer panels for saltwater chlorine generator (SWG) pools.
'The biggest mistake homeowners make with vinyl pools is ignoring the backfill material. Backfilling with native clay soil instead of clean, washed gravel traps moisture against the panels and creates hydrostatic pressure that bows the walls inward over time.'
— Senior Pool Structural Engineer, Regional Installation Review
Decision Framework: Which Installation Suits Your Site?
Use this practical framework to determine which installation method aligns with your property constraints and financial goals.
Choose Concrete (Gunite/Shotcrete) If:
- You have a high budget ($90,000+) and are willing to endure a 4-month construction disruption.
- You require a highly customized, freeform shape, negative edge, or integrated structural spa.
- Your site features highly expansive soils or rocky substrates where a rigid, heavily reinforced monolithic shell is necessary to resist shifting.
- You want a permanent, generational asset and do not mind the recurring 15-year resurfacing costs.
Choose Vinyl Liner If:
- You need the pool completed rapidly (under 6 weeks) for an upcoming summer season or home sale.
- Your budget is strictly capped below $70,000.
- Your property has tight side-yard setbacks, limiting the wide over-dig required for concrete shell forming and steel tying.
- You prefer a smooth, non-abrasive surface that inhibits algae growth and requires less aggressive chemical balancing than porous concrete plaster.
Ultimately, the choice between a vinyl vs concrete pool is not just about the final aesthetic; it is a fundamental decision about how you want to manage the excavation process, the construction timeline, and the long-term structural maintenance of your outdoor living space.
Written by
Elena RodriguezElena Rodriguez is a civil engineer and technical writer specializing in concrete technology, masonry systems, and ASTM/ACI compliance. She earned her B.S. in Civil Engineering from Texas A&M University and spent a decade at a materials testing laboratory, performing over 2,000 concrete compressive strength tests and masonry prism evaluations. Elena is an ACI-certified Field Testing Technician (Grade I) and a member of ASTM Committee C12 on Natural Building Stone. She currently consults on forensic engineering cases involving concrete failures and moisture intrusion. Based in San Antonio, TX, Elena is a proud member of the Society of Women Engineers (SWE) and coaches her daughter's FIRST Robotics team.
More from Elena Rodriguez
View all
Walls & Panels
Cost Analysis: Light Gauge Steel Framing Advantages and Disadvantages
Evaluate light gauge steel framing advantages and disadvantages through a strict cost analysis lens, comparing material, labor, and lifecycle expenses.
Aug 4, 2026

Walls & Panels
Gypsum Board Types: Exact Specifications, Thickness & Dimensions
Compare standard, Type X, and moisture-resistant gypsum board types. Get exact specifications, thicknesses, dimensions, and ASTM standards for your project.
Aug 4, 2026

Fire Resistance
Best Fire-Resistant Outdoor Decking Materials: 2026 Buyer Guide
Discover the best fire-resistant outdoor decking materials for 2026. Compare Class A PVC, aluminum, and hardwood options for WUI compliance and safety.
Aug 4, 2026