Installing Deck Composite Material: Pro Spacing & Fastener Guide
Master the installation of deck composite material with pro framing specs, thermal expansion matrices, and hidden fastener techniques to avoid warping.

The Hidden Physics of Deck Composite Material
Installing deck composite material requires a fundamental shift in carpentry logic. Unlike pressure-treated pine, which shrinks as it dries, composite decking—typically a blend of high-density polyethylene (HDPE) or PVC and reclaimed wood flour—expands and contracts primarily in response to thermal fluctuations. Furthermore, composite boards are significantly heavier (often 1.5 to 2 times the weight of wood) and lack the lateral rigidity of solid lumber. Ignoring these material properties during installation leads to buckled boards, pulled fasteners, and voided 25-year manufacturer warranties.
Substructure Preparation: Where 90% of Failures Begin
The longevity of your composite surface is entirely dependent on the wood substructure beneath it. Because composite boards do not rot, the pressure-treated joists will often outlive the deck if left unprotected against trapped moisture. Proper framing aligns with the American Wood Council's DCA-6 Deck Construction Guide, but requires specific modifications for composite loads.
Critical Framing Specifications
- Joist Spacing: Maximum 16 inches on-center (OC) for boards installed perpendicular to joists. If installing boards at a 45-degree diagonal, you must reduce joist spacing to 12 inches OC to prevent sagging under dynamic loads.
- Joist Tape: Apply a high-quality butyl flashing tape (e.g., Trex Protect or Grace Vycor Deck Flashing) to the top of every joist and beam. Avoid asphalt-based bitumen tapes, which can degrade and bleed into the composite over time.
- Slope and Drainage: Frame the substructure with a minimum slope of 1/4 inch per 10 feet to facilitate water runoff. For solid (non-grooved) composite boards, increase the slope to 1/4 inch per 12 inches to prevent water pooling.
- Blocking: Install solid wood blocking between joists every 4 to 6 feet. This prevents joist twisting under the heavy point-loads of composite boards and provides essential nailing surfaces for picture-frame borders.
Acclimation and Thermal Expansion Matrix
Never install composite boards directly from a sun-baked delivery truck. Store the material flat, in the shade, and off the ground for at least 48 hours prior to installation. Because the plastic polymers in the composite react aggressively to heat, the ambient temperature on the day of installation dictates your end-gaps.
Use the following thermal expansion matrix to determine the exact gap required at the butt joints and end walls. This assumes a maximum anticipated summer temperature of 100°F to 110°F in your region.
| Temperature at Installation | Required End Gap (Up to 20ft Board) | Required End Gap (20ft to 40ft Board) |
|---|---|---|
| 40°F or Below | 1/4 inch | 1/2 inch |
| 41°F to 70°F | 1/8 inch | 1/4 inch |
| 71°F or Above | 1/16 inch | 1/8 inch |
Fastening Systems: Hidden Clips vs. Face Screws
The fastening method you choose dictates the aesthetic, the cost, and the structural integrity of the deck. Most modern deck composite material comes in either grooved or square-edge profiles. Reference the TimberTech Installation Resources for brand-specific clip compatibility, as mixing manufacturers often results in improper engagement.
Hidden Fastener Clips
Best for: Grooved boards, main deck fields.
Cost: ~$1.50 - $2.00 per sq. ft.
Pros: Clean, fastener-free surface; allows for natural lateral expansion; faster installation with pneumatic tools.
Cons: Cannot be used on square-edge boards; requires specific starter clips at the perimeter; difficult to replace a single damaged board in the middle of the field.
Color-Matched Face Screws
Best for: Square-edge boards, picture frames, fascia, stairs.
Cost: ~$2.50 - $3.50 per sq. ft.
Pros: Superior pull-down strength; allows individual board replacement; required for stair treads and perimeter borders.
Cons: Slower installation; requires pre-drilling and counter-sinking; PVC plugs can pop out if not seated correctly in high-heat zones.
Step-by-Step Board Placement Protocol
When installing the main field using grooved boards and hidden clips, follow this exact sequence to maintain uniform gapping and prevent cumulative drift.
- Install the Starter Board: Use a square-edge board for the perimeter, or use manufacturer-specific starter clips for a grooved board. Face-screw this first board securely into the joists. This acts as the anchor for the entire deck.
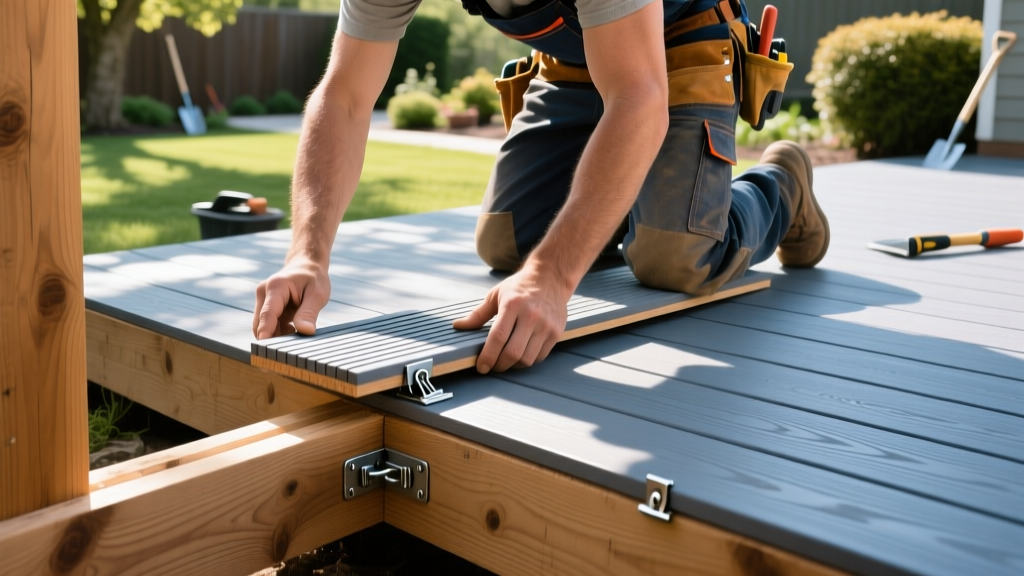
- Set the First Clip: Insert the hidden fastener clip into the groove of the starter board at every joist intersection. Ensure the clip's spacer tab is facing outward.
- Engage the Second Board: Slide the groove of the next composite board over the exposed spacer tabs. Do not force the board; tap it gently with a rubber mallet or a scrap piece of composite and a dead-blow hammer.
- Drive the Fastener: Using a torque-controlled drill set to a low clutch setting, drive the manufacturer-provided stainless steel screw through the clip at the specified 45-degree angle into the joist. Pro Tip: Over-torquing will strip the composite groove and destroy the clip's holding power.
- Maintain Side Gaps: Most modern clips feature built-in 3/16-inch or 1/4-inch spacers. If using universal clips without spacers, insert a 16d nail or a specialized gap tool between the boards at every joist before driving the screw.
Managing Long Runs: Breaker Boards vs. Scarf Joints
Composite boards typically max out at 16 or 20 feet. For decks exceeding these lengths, you must join boards end-to-end. Avoid traditional 45-degree scarf joints whenever possible. Because composite material expands longitudinally, scarf joints will inevitably slide past one another during seasonal temperature shifts, creating an unsightly and hazardous lip.
The Breaker Board Solution
Instead of butt joints, design a "breaker board" into your layout. A breaker board is a full-length board (or a series of shorter boards) installed perpendicular to the main field, intentionally breaking up the visual expanse and hiding the end gaps.
- Framing for Breaker Boards: You must double the joist directly beneath the breaker board to provide adequate bearing surface for the main field boards and the breaker board itself.
- Fastening: Because hidden clips cannot be used on the end-grain of a board, the main field boards that terminate at the breaker board must be face-screwed using color-matched composite screws, or secured with specialized end-clips that route a small channel into the board end.
Cutting, Routing, and Tooling Requirements
The abrasive nature of the wood flour and silica additives in deck composite material will rapidly dull standard steel blades. Equip your crew with the following tooling to ensure clean cuts and prevent edge chipping:
- Saw Blades: Use carbide-tipped blades with a minimum of 40 teeth (for 7-1/4" circular saws) or 60 teeth (for 10" miter saws). Higher tooth counts yield smoother cuts but require slower feed rates to prevent melting the HDPE matrix.
- Drill Bits: Use titanium-coated or carbide-tipped brad-point bits for pre-drilling face screws. Standard twist bits tend to wander and chip the polymer cap layer.
- Routing: If you need to create custom grooves for hidden clips on square-edge fascia boards, use a dedicated slotted milling bit designed specifically for composite materials, running the router in a climb-cutting direction to minimize tear-out on the outer shell.
Final Inspection Checklist
Before finalizing the project, walk the deck and verify: (1) All end gaps match the thermal matrix for the installation day's temperature. (2) No hidden clips are missing at any joist intersection. (3) All face screws are seated flush without breaking the polymer cap. (4) Cross-ventilation clearance of at least 12 inches is maintained between the ground and the bottom of the joists.
Written by
Sarah WhitfieldSarah Whitfield is a chartered quantity surveyor (MRICS) and construction cost analyst with 15 years of experience in material pricing, procurement strategy, and project budgeting. She earned her degree in Construction Management from the University of Reading (UK) and has worked on projects ranging from $2M custom homes to $180M mixed-use developments across North America and Europe. Sarah currently leads cost estimating for BuildMat Insight, maintaining a proprietary database of 4,000+ material price points updated quarterly. She is a frequent contributor to RSMeans cost data panels and has presented at the International Cost Engineering Council (ICEC) congress. Based in Denver, CO, Sarah is an avid trail runner and volunteer mentor for Women in Construction.
More from Sarah Whitfield
View all
Wood & Lumber
What Are the Different Types of Wood? A Builder's Guide
Compare structural softwoods, finish hardwoods, and engineered lumber. Analyze Janka ratings, MOE values, and 2026 pricing for construction.
Aug 4, 2026

Walls & Panels
Steel Framing vs Wood Framing: Corrosion and Moisture Defense
Compare steel framing vs wood framing for moisture resistance. Learn about galvanized coatings, condensation risks, and corrosion protection strategies.
Jul 21, 2026

Stone & Masonry
How to Cut Stone Veneer: Wet Saw vs Grinder Comparison
Compare the best tools for cutting stone veneer. We review wet saws, angle grinders, and chop saws to help you achieve clean, chip-free cuts.
Jul 21, 2026