Carlisle Construction Materials Roof Foam Repair and Moisture Fixes
Learn how to diagnose, cut out, and replace wet Carlisle Construction Materials roof foam insulation to restore R-value and prevent membrane blistering.

The Physics of Polyiso Moisture Intrusion
Carlisle Construction Materials (now operating primarily under the Carlisle SynTec Systems brand) manufactures some of the most widely used polyisocyanurate (polyiso) roof insulation boards in North America. Products like SecurShield, SecurGard, and RESISTA rely on a closed-cell foam structure blown with pentane to achieve high Long-Term Thermal Resistance (LTTR) values, typically around R-5.6 to R-5.7 per inch. However, when the single-ply membrane above the insulation is punctured or a seam fails, the Carlisle construction materials roof foam beneath is highly vulnerable to moisture intrusion.
Polyiso foam is not inherently waterproof. While the coated glass facers (CGF) provide a temporary moisture barrier, prolonged water exposure degrades the facer adhesive. Once water breaches the facer and enters the closed-cell matrix, it displaces the insulating gas. The thermal resistance of the wet core plummets from R-5.6 down to R-2.0 or lower per inch. Furthermore, trapped moisture vaporizes under solar heat loading, creating vapor pressure that causes catastrophic blistering in adhered TPO or EPDM membranes. Repairing the membrane without addressing the compromised foam beneath guarantees premature system failure.
Diagnostic Framework: Mapping the Damage
Before ordering replacement Carlisle polyiso boards, roofing contractors must accurately map the extent of the moisture damage. Visual inspection of the membrane is insufficient; water can travel dozens of feet along the roof deck flutes before pooling at a low point or structural depression.
Non-Destructive and Destructive Testing
- Tramex Impedance Scanning: Use a Tramex Deco Scanner or similar non-destructive impedance meter to map the roof surface. Readings above 20% relative moisture indicate saturated insulation that must be removed.
- Infrared (IR) Thermography: Conduct an IR scan at dusk when the roof is cooling. Wet polyiso retains heat longer than dry foam, appearing as bright white or yellow zones on the thermal camera.
- Core Sampling: Extract 2-inch diameter core samples at the boundaries of the suspected wet zones. Visually inspect the core for darkening, facer delamination, and structural softening.
Carlisle Polyiso Product Matrix for Repairs
When replacing damaged sections, the new insulation must match or exceed the structural and thermal properties of the existing assembly. According to Carlisle SynTec technical specifications, selecting the correct board type is critical for maintaining wind uplift ratings and membrane adhesion.
| Product Line | Facer Type | Compressive Strength | Best Repair Application |
|---|---|---|---|
| SecurShield HD | Coated Glass | 110 psi | High-traffic areas, direct-to-deck base layers |
| SecurGard | Heavy-duty Glass | 80 psi | Fully adhered TPO/PVC membranes, high moisture vapor drive |
| RESISTA | Aluminum / CGF | 20 psi | Cover boards, mechanically attached overlays |
Step-by-Step Excavation and Replacement Protocol
The National Roofing Contractors Association (NRCA) emphasizes that partial repairs of wet insulation lead to trapped moisture and secondary rot. Follow this strict excavation and replacement protocol for Carlisle polyiso systems.
- Membrane Peeling and Preservation: If the existing single-ply membrane is salvageable, carefully cut it back using a hook blade. Peel the membrane away from the insulation, keeping it as intact as possible to minimize the size of the final patch. Clean the exposed membrane flange with Carlisle Splice Wash.
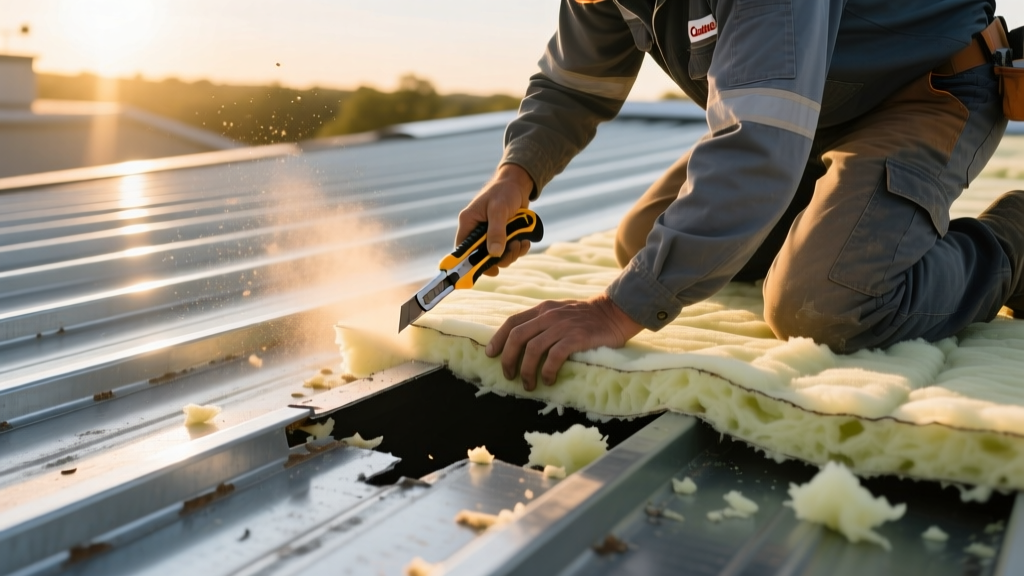
- The 12-Inch Excavation Rule: Cut out the wet polyiso foam, extending the cut at least 12 inches beyond the furthest point of detected moisture. This ensures a completely dry substrate for the new board seams.
- Deck Preparation: Remove all rust, debris, and old fasteners from the exposed steel or wood deck. If the deck is steel, apply a rust-inhibitive primer to any exposed metal. Ensure the deck flutes are clear of standing water.
- Board Staging and Cutting: Cut the replacement Carlisle SecurShield or RESISTA boards to fit the excavated void. Maintain a tight 1/4-inch gap between the new foam and the existing dry foam to allow for thermal expansion.
- Mechanical Fastening: Secure the replacement foam using Carlisle heavy-duty fasteners and V-Plates or HD Plus plates. For steel decks, fasteners must achieve a minimum pull-out resistance of 200 lbs. Use a 5x5 fastener pattern for standard zones, and upgrade to a 6x6 pattern in perimeter and corner zones to maintain FM 1-90 wind uplift compliance.
- Membrane Splicing: Install the new membrane patch over the repaired foam. Use Carlisle Sure-Weld TPO or SecureWeld EPDM primer and tape, ensuring a minimum 3-inch overlap on all splice edges. Roll all seams with a 1.5-inch silicone roller applying at least 25 lbs of pressure.
Vapor Drive and Secondary Condensation Risks
Managing vapor drive is the most overlooked aspect of Carlisle construction materials roof foam repair. In cold climates, interior building moisture migrates upward through the roof deck. If the original roof assembly included a Carlisle Vapor Retarder (such as a modified bitumen base sheet or a specialized polyiso vapor barrier), any cuts made during the foam excavation must be meticulously patched with compatible mastic and reinforcement fabric. Failing to restore the vapor barrier continuity allows warm, humid indoor air to condense directly on the cold underside of the newly installed polyiso boards during winter months.
Cost and Scheduling Considerations for 2026
As of 2026, material costs for 2-inch to 3-inch Carlisle polyiso boards range from $0.75 to $1.10 per square foot, depending on the specific facer and compressive strength requirements. Labor for precision excavation, moisture mapping, and seam splicing typically adds $3.50 to $5.00 per square foot. While overlaying a new layer of insulation over the wet foam might seem like a cost-saving shortcut, it violates Carlisle's warranty requirements and traps the moisture against the structural deck, leading to deck corrosion that can cost upwards of $15.00 per square foot to remediate later. True repair requires complete extraction of the compromised core.
Written by
David NakamuraDavid Nakamura is a licensed architect (AIA) and construction technology writer focused on sustainable building methods, mass timber engineering, and high-performance building envelopes. He holds a Master of Architecture from the University of Washington and is a certified Passive House Consultant (CPHC). David spent eight years at the Seattle firm Mithun, where he led the design of three LEED Platinum projects, before founding his own practice specializing in net-zero residential design. He serves on the editorial advisory board of GreenBuilder Magazine and has authored peer-reviewed papers on cross-laminated timber (CLT) connections for the Journal of Structural Engineering. In his spare time, David teaches woodworking at Pratt Fine Arts Center and kayaks the Puget Sound.
More from David Nakamura
View all
Construction Cost
Labor Cost to Build a Deck Per Sq Ft: 2026 Installation Guide
Discover the exact labor cost to build a deck per sq ft in 2026. This installation guide breaks down contractor rates, complexity factors, and hidden fees.
Aug 4, 2026

Construction Cost
How Much Does It Cost to Build a 3 Bedroom House? Financing Guide
Learn exactly how much it costs to build a 3 bedroom house and explore 2026 financing options, construction loan types, and budget frameworks for your build.
Aug 4, 2026

Construction Cost
Cost to Build a Tennis Court: 2026 Guide
How much does it cost to build a tennis court in 2026? Breakdowns for asphalt, concrete, and synthetic surfaces plus fencing and lighting.
Jul 30, 2026