Composite Roofing Material Installation: A Pro's Step-by-Step Guide
Master composite roofing material installation with this pro guide. Learn decking prep, nailing patterns, expansion gaps, and flashing details.

Core Differences: Polymer Composite vs. Traditional Roofing
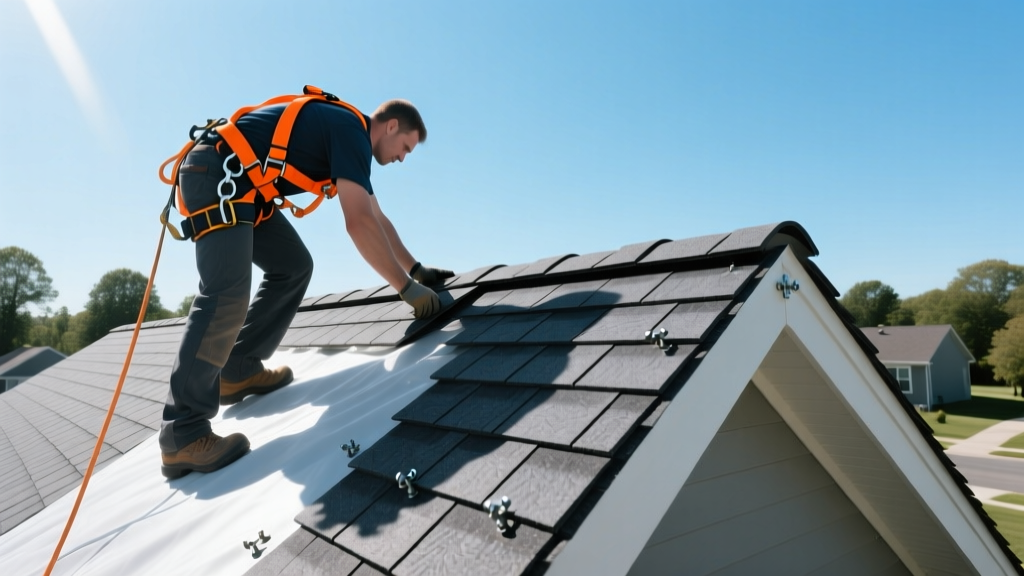
Composite roofing material—engineered from a proprietary blend of polymer resins, recycled rubber, and plastic composites—demands a distinct installation methodology compared to traditional asphalt or natural slate. While premium products like DaVinci Bellaforte or EcoStar Majestic Niagara accurately mimic the shadow lines and texture of natural materials, their thermal expansion coefficients and structural rigidity require strict adherence to manufacturer tolerances. Unlike asphalt shingles that seal via heat-activated tar strips, composite shingles rely entirely on mechanical fastening and precise interlocking geometry to achieve wind uplift ratings up to 110 mph.
Pre-Installation: Decking, Acclimation, and Tooling
Before unloading the first bundle, the roof deck must be inspected. Composite shingles require a continuous, solid substrate. CDX plywood or OSB, minimum 1/2-inch thick (5/8-inch preferred for trusses spaced 24 inches on-center), is mandatory. Spaced sheathing (skip sheathing), which is sometimes used for natural wood shakes, is strictly prohibited for composite systems as it lacks the continuous support needed to prevent the polymer from sagging between joints.
Acclimation Protocol
Polymer composites are highly sensitive to ambient temperature at the time of installation. Shingles installed at 35°F will expand significantly when summer temperatures reach 95°F. Bundles must be stored flat, out of direct sunlight, and allowed to acclimate to the ambient roof temperature for at least 24 hours before installation. Never stack bundles more than four high, as the weight will permanently deform the bottom shingles.
Required Tool and Fastener Specifications
| Category | Specification | Why It Matters |
|---|---|---|
| Cutting Blade | 60-tooth to 80-tooth fine carbide | Prevents micro-fracturing and crushing of the polymer edges. |
| Fastener Type | 1-1/4' to 1-1/2' hot-dipped galvanized or stainless steel ring-shank | Electro-galvanized nails will rust and stain the composite; smooth shanks will back out under thermal cycling. |
| Fastener Tool | Pneumatic coil roofing nailer (depth-adjustable) | Staple guns are universally voided by composite manufacturers. Depth adjustment prevents over-driving. |
| Chalk Line | Non-chalking blue or white line | Standard red chalk will permanently stain the porous texture of the composite surface. |
Step-by-Step Installation Protocol
1. Underlayment and Drip Edge Integration
Begin by installing a high-quality synthetic underlayment (such as Tyvek Protec 120 or equivalent). In climates prone to ice damming, apply a self-adhering ice and water shield along the eaves, extending at least 24 inches past the interior warm wall line. Install the metal drip edge over the ice and water shield at the eaves, but under the synthetic underlayment at the rakes (gable edges). This specific layering directs wind-driven water over the drip edge rather than underneath it.
2. Starter Course Alignment
Most composite systems require a dedicated starter shingle or a field shingle with the tabs removed. Install the starter course with a 1/4-inch to 1/2-inch overhang past the drip edge. Fasten with four nails per starter shingle, placed 3 inches from the exposed edge. Ensure the starter course is perfectly level; any deviation here will telegraph up the entire roof plane, causing a wavy appearance in the composite shadow lines.
3. Field Shingle Application and Nailing
Composite shingles typically feature an interlocking side lap and a top nailing flange. The standard nailing pattern requires two nails per 12-inch shingle, positioned 3/4-inch from each side edge and 1-inch above the exposure line.
4. Ridge and Hip Caps
Never field-cut standard composite shingles to bend over the ridge. The polymer memory will cause them to lift and eventually snap. Use the manufacturer's pre-formed ridge and hip units. Install them with a 2-inch overlap, fastening each unit with two nails placed 1-inch from the edge and 1-inch above the exposure line of the overlapping cap.
Temperature-Dependent Expansion Gaps
The most common cause of composite roof failure is ignoring thermal expansion. Polymers expand and contract at a much higher rate than asphalt or wood. Manufacturers mandate specific side-lap and butt-joint gaps based on the ambient temperature at the exact time of installation.
| Ambient Temperature | Side-Lap Gap | Butt-Joint Gap |
|---|---|---|
| Below 40°F (4°C) | 1/8 inch (3 mm) | 3/16 inch (5 mm) |
| 40°F to 70°F (4°C - 21°C) | 1/16 inch (1.5 mm) | 1/8 inch (3 mm) |
| Above 70°F (21°C) | Tight (No gap) | 1/16 inch (1.5 mm) |
Use the thickness of a standard roofing nail shaft as a quick field gauge for a 1/8-inch gap when working in moderate temperatures.
Flashing, Valleys, and Penetrations
Composite roofing material requires open metal valleys rather than woven or closed-cut valleys. Woven valleys trap debris and inhibit the natural shedding characteristics of polymer shingles. Install a minimum 16-inch wide, 24-gauge galvanized steel or aluminum valley liner over the ice and water shield. Shingles should be trimmed 3 inches from the valley centerline, and the cut edges must be sealed with a high-quality polyurethane roofing sealant (not asphalt-based mastic, which can degrade the polymer).
'Proper attic ventilation is not optional with composite roofs. Because polymer materials absorb and retain heat differently than natural slate, an unventilated attic can cause the underside of the shingles to reach temperatures exceeding 160°F, accelerating thermal cycling and reducing the lifespan of the fasteners.' — Insurance Institute for Business & Home Safety (IBHS)
Troubleshooting Common Failure Modes
- Symptom: Shingles are buckling or 'tenting' in the field.
Cause: Installed too tightly in cold weather without adequate expansion gaps, or fasteners were over-driven, pinning the shingle and preventing lateral movement.
Fix: Remove the affected course, re-nail flush (not tight), and introduce the correct temperature-based spacing. - Symptom: Visible shadow lines are inconsistent or wavy.
Cause: Starter course was not leveled, or the chalk lines snapped for the field courses drifted out of square.
Fix: Correct the alignment immediately. Do not attempt to 'fudge' the alignment on the next course; the interlocking side laps will force the shingles out of plane. - Symptom: Chalking or fading on the surface.
Cause: Use of harsh chemical cleaners during installation or red chalk lines that were not brushed off.
Fix: Clean only with mild soap and water. For red chalk stains, a specialized polymer-safe roof cleaner may be required, though prevention is the only guaranteed remedy.
Industry Standards and Sourcing
When specifying and installing composite roofing material, always cross-reference the manufacturer's technical data sheets with the National Roofing Contractors Association (NRCA) Steep-Slope Roofing Manual. As of 2026, material costs for premium composite slate and shake systems range from $14.00 to $24.00 per square foot, with specialized labor adding $9.00 to $15.00 per square foot. Because the installation tolerances are significantly tighter than asphalt, ensure your crew has specific manufacturer certification or documented experience with polymer systems before breaking ground.
Written by
Elena RodriguezElena Rodriguez is a civil engineer and technical writer specializing in concrete technology, masonry systems, and ASTM/ACI compliance. She earned her B.S. in Civil Engineering from Texas A&M University and spent a decade at a materials testing laboratory, performing over 2,000 concrete compressive strength tests and masonry prism evaluations. Elena is an ACI-certified Field Testing Technician (Grade I) and a member of ASTM Committee C12 on Natural Building Stone. She currently consults on forensic engineering cases involving concrete failures and moisture intrusion. Based in San Antonio, TX, Elena is a proud member of the Society of Women Engineers (SWE) and coaches her daughter's FIRST Robotics team.
More from Elena Rodriguez
View all
Walls & Panels
Cost Analysis: Light Gauge Steel Framing Advantages and Disadvantages
Evaluate light gauge steel framing advantages and disadvantages through a strict cost analysis lens, comparing material, labor, and lifecycle expenses.
Aug 4, 2026

Walls & Panels
Gypsum Board Types: Exact Specifications, Thickness & Dimensions
Compare standard, Type X, and moisture-resistant gypsum board types. Get exact specifications, thicknesses, dimensions, and ASTM standards for your project.
Aug 4, 2026

Fire Resistance
Best Fire-Resistant Outdoor Decking Materials: 2026 Buyer Guide
Discover the best fire-resistant outdoor decking materials for 2026. Compare Class A PVC, aluminum, and hardwood options for WUI compliance and safety.
Aug 4, 2026