Copper Roofing Material Cost and Installation Guide (2026 Data)
Discover the true copper roofing material cost for 2026, including standing seam vs. shingle pricing, labor rates, and a step-by-step installation guide.

2026 Copper Roofing Material Cost Breakdown
Copper remains the premier architectural metal for roofing, offering a 100-year lifespan and a self-protecting patina. However, commodity fluctuations and specialized fabrication requirements dictate its premium price point. As of 2026, the copper roofing material cost ranges from $18 to $26 per square foot for the metal alone, with total installed costs reaching $35 to $50 per square foot depending on roof complexity and profile.
| Material / Component | Specification | 2026 Material Cost | Installed Cost (per sq. ft.) |
|---|---|---|---|
| Standing Seam Panels | 16 oz. Cold Rolled | $18.00 - $22.00 / sq. ft. | $35.00 - $42.00 |
| Flat Lock Shingles | 20 oz. Cold Rolled | $22.00 - $26.00 / sq. ft. | $40.00 - $50.00 |
| Corrugated Copper | 16 oz. / 2.67" Pitch | $16.00 - $19.00 / sq. ft. | $30.00 - $38.00 |
| Flashing & Trim | 16 oz. / 20 oz. | $12.00 - $18.00 / lin. ft. | $20.00 - $30.00 / lin. ft. |
| Rosin Paper Underlayment | Heavy Duty Slip Sheet | $0.15 - $0.25 / sq. ft. | $0.50 - $0.80 |
While 16 oz. copper (weighing 16 ounces per square foot, or roughly 1 lb/sq. ft.) is standard for wall cladding and steep-slope standing seam roofs, the Copper Development Association (CDA) mandates 20 oz. or 24 oz. copper for flat lock shingles, low-slope applications, or regions with high wind uplift and heavy snow loads. Upgrading from 16 oz. to 20 oz. increases material costs by approximately 25%, but prevents oil-canning (visible rippling) and structural tearing.
Hidden Costs: Underlayment, Fasteners, and Labor
The copper roofing material cost is only half the equation. Specialized accessories and skilled labor drastically impact the final budget.
- Specialized Fasteners: You cannot use standard galvanized or aluminum nails. Copper requires 300-series stainless steel or solid copper cleats and fasteners to prevent galvanic corrosion. Expect to pay a 40% premium over standard roofing fasteners.
- Slip Sheets (Rosin Paper): Asphalt-saturated felt will chemically bond to copper over time and cause tearing during thermal expansion. A rosin-sized paper slip sheet is mandatory, adding $0.20/sq. ft. to material costs.
- Specialized Labor: Installing a copper roof requires sheet metal artisans, not standard asphalt shingle crews. Labor rates for certified metal roofers typically range from $120 to $180 per hour, translating to $15 to $22 per square foot in labor alone.
Step-by-Step Copper Roof Installation Guide
Proper installation ensures the roof achieves its 100-year lifecycle. The following methodology aligns with the SMACNA Architectural Sheet Metal Manual standards for continuous standing seam copper roofs.
Step 1: Deck Preparation and Underlayment
Copper requires a solid, continuous substrate. Plywood (minimum 5/8" exterior grade) or solid wood decking is mandatory; spaced sheathing is unacceptable for architectural copper.
- Inspect the deck for protruding nails or uneven seams. Sand down any high spots.
- Install a high-temp ice and water shield at the eaves, valleys, and penetrations.
- Lay down 30 lb. asphalt felt as the primary moisture barrier.
- Critical Step: Overlay the entire roof with red rosin-sized paper. This acts as a slip sheet, allowing the copper to expand and contract freely without binding to the asphalt felt beneath it.
Step 2: Installing the Starter Strip and Drip Edge
Never allow copper to rest directly on untreated wood or asphalt shingles at the eaves.
- Fabricate a continuous copper drip edge with a 2-inch top flange and a 3-inch face drop.
- Secure the drip edge using copper cleats spaced 12 inches on center. Do not nail directly through the face of the copper.
- Install a starter strip (a flat copper sheet bent at a 90-degree angle) over the drip edge to provide a rigid base for the first panel seam.
Step 3: Forming and Seaming the Panels
Thermal movement is the primary engineering challenge with copper. Copper expands approximately 1 inch per 100 feet of length for every 100°F temperature change.
- Form standing seam pans with a 1.5-inch seam height for slopes under 3:12, and a 1-inch seam height for steeper slopes.
- Secure the male leg of the panel to the deck using copper or stainless steel cleats. Space cleats 12 inches apart in the field, and 6 inches apart at the perimeters and corners.
- Fold the female leg of the adjacent panel over the male leg. For slopes under 3:12, execute a double-lock standing seam using a mechanical seamer. For steep slopes, a single-lock seam is sufficient.
- Never use through-fasteners (screws piercing the flat pan of the metal). All attachment must be hidden within the seams via cleats.
Step 4: Flashing and Penetrations
Copper flashing must be soldered, not caulked. Sealants will eventually fail; a properly wiped solder joint will last as long as the roof.
- Use 50/50 tin-lead solder for unexposed joints and high-lead or lead-free tin-copper solder for exposed weather joints.
- When flashing a pipe penetration, create a two-piece soldered copper sleeve with a 4-inch flange that integrates into the standing seams.
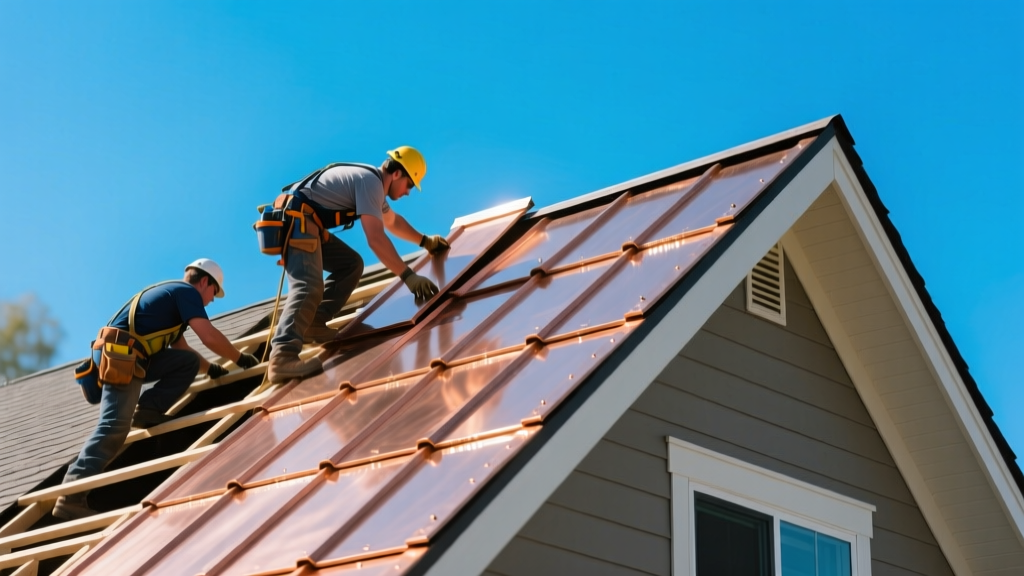
Critical Installation Mistakes to Avoid
Copper is highly noble on the galvanic scale. If it comes into contact with aluminum, galvanized steel, or untreated iron in the presence of moisture, the lesser metal will rapidly corrode, and the runoff will stain and degrade the copper. Ensure all gutters, downspouts, snow guards, and HVAC mounting racks in contact with the roof are either copper, lead-coated copper, or 300-series stainless steel.
Another common failure mode is restricting thermal movement. If an installer pins a continuous 40-foot copper panel at both the top and bottom without allowing the cleats to slide, the thermal expansion will cause the seams to buckle, tear, or pull the fasteners straight through the decking. Always leave a 1/4-inch gap at the top of the panel slot to allow for upward expansion.
Material Selection Matrix: Which Copper Profile to Choose?
| Profile Type | Best Application | Minimum Slope | Wind Uplift Resistance |
|---|---|---|---|
| Double-Lock Standing Seam | Low slope commercial, harsh coastal winds | 1/4:12 (with sealed seams) | Exceptional (Class 90+) |
| Single-Lock Standing Seam | Steep residential, historic restorations | 3:12 | High (Class 60-90) |
| Flat Lock Shingles | Dormers, mansard roofs, complex geometries | 4:12 | Moderate (Requires interlocking) |
| Batten Seam | Historic architecture, heavy snow regions | 3:12 | High (Batten caps secure the system) |
Frequently Asked Questions
Does copper roofing require a patina accelerator?
No. Untreated copper will naturally oxidize from a bright mill finish to a brown statuary bronze, and finally to a green verdigris patina over 15 to 30 years, depending on local humidity and acid rain levels. Chemical patina accelerators are available but are generally discouraged by the National Roofing Contractors Association (NRCA) for exterior roofing, as they can result in uneven coloration and streaking over time.
How does copper handle hail and impact?
While 16 oz. copper will dent under severe hail (similar to aluminum or steel), it will not crack, shatter, or lose its waterproofing integrity like tile or slate. If impact resistance is a primary concern in your region, specify 20 oz. or 24 oz. copper, which offers significantly higher yield strength and dent resistance.
Can I install copper over an existing asphalt roof?
Never install copper directly over existing asphalt shingles. The uneven surface will cause the copper to oil-can, and the lack of a solid substrate will prevent proper cleat attachment. Furthermore, the trapped moisture and heat will accelerate the degradation of both the old roof and the copper underlayment system. A complete tear-off to the wood deck is mandatory.
Written by
Marcus ChenMarcus Chen is a licensed structural engineer (PE) and building materials analyst with over 12 years of experience across residential, commercial, and industrial construction. He holds a Master of Science in Civil Engineering from UC Berkeley and spent six years at Thornton Tomasetti before transitioning to independent consulting and technical writing. Marcus specializes in material selection for seismic-prone regions, concrete reinforcement strategies, and lifecycle cost analysis. His work has been cited by the American Concrete Institute (ACI) and the Structural Engineers Association of California (SEAOC). When he is not on a job site or at his desk, you will find him hiking the Sierra Nevada or restoring a 1920s craftsman bungalow in Oakland, CA.
More from Marcus Chen
View all
Construction Cost
How Much Did the Eiffel Tower Cost to Build?
How much did the Eiffel Tower cost to build in 1889? We adjust for inflation and compare its budget to modern skyscraper construction.
Aug 4, 2026

Fire Resistance
What Is a Fire Resistant Material? Testing & Certification Guide
Discover what is a fire resistant material through ASTM and UL testing. Learn how fire ratings, certifications, and assemblies work in construction.
Aug 4, 2026

Construction Cost
How Much Did the Burj Khalifa Cost to Build?
How much did the Burj Khalifa cost to build? We break down the $1.5B project and extract 5 money-saving strategies for your next build.
Jul 30, 2026