Diagnostic Guide to Repairing Common Flat Roof Materials
Learn how to diagnose, repair, and maintain EPDM, TPO, PVC, and modified bitumen flat roof materials with material-specific protocols and cost data.

The Diagnostic Approach to Flat Roof Material Failures
Flat roof systems—technically classified as low-slope roofs with a pitch of 3:12 or less—dominate commercial architecture due to their HVAC placement flexibility and cost-efficiency. However, the phrase "flat roof materials" encompasses vastly different chemical compositions, each with unique failure modes. A repair protocol that restores an EPDM membrane will chemically degrade a PVC roof, and heat-welding techniques used on thermoplastics will melt modified bitumen into an unmanageable mess.
Effective maintenance requires material-specific diagnostics. Before ordering patch kits or scheduling a roofing crew, facility managers must identify the exact membrane type, understand its inherent vulnerabilities, and apply the correct chemical or thermal repair methodology. This guide details the failure profiles, repair protocols, and 2026 maintenance cost baselines for the four primary flat roof materials.
EPDM Rubber Membranes: Shrinkage, Punctures, and Seam Failures
Ethylene Propylene Diene Monomer (EPDM) is a synthetic rubber membrane prized for its UV resistance and flexibility in extreme cold. Typically installed in 45-mil or 60-mil thicknesses, EPDM's primary vulnerability lies in its seams and perimeter flashings.
Identifying EPDM Degradation
Unlike thermoplastics, EPDM does not heat-weld; it relies on liquid adhesives or double-sided seam tapes. Over a 15- to 20-year lifespan, these adhesives dry out, leading to seam separation. Additionally, EPDM is prone to membrane shrinkage, which pulls the material away from parapet walls and HVAC curbs, creating immense tension that eventually tears the flashing.
Step-by-Step EPDM Patching Protocol
Never use asphalt-based cements or generic roofing tar on EPDM. The petroleum distillates will break down the rubber matrix, causing irreversible swelling and rot. Follow this National Roofing Contractors Association (NRCA) aligned protocol for seam and puncture repairs:
- Clean the Substrate: Scrub the repair area with a dedicated EPDM splice wash or specialized membrane cleaner. Standard soap leaves a residue that prevents primer adhesion.
- Apply Primer: Coat the area with the manufacturer-specified yellow or black EPDM primer. Allow it to flash off until it is tacky but does not transfer to a dry knuckle (usually 15–30 minutes).
- Install Uncured Flashing: Apply uncured EPDM flashing tape (which conforms to 90-degree angles and pipe penetrations) over the seam or puncture, extending at least 3 inches past the damage in all directions.
- Stitch the Seam: Use a heavy silicone seam roller. Apply a minimum of 50 lbs of pressure, rolling from the center outward to eliminate air pockets and activate the bonding layer.
2026 Cost Baseline: Professional EPDM patch repairs average $4.50 to $7.00 per square foot, while full seam re-taping runs $3.00 to $5.00 per linear foot.
TPO and PVC Thermoplastics: Heat-Welded Seam Degradation
Thermoplastic Polyolefin (TPO) and Polyvinyl Chloride (PVC) membranes are heat-welded at the seams, creating a monolithic bond that is theoretically stronger than the membrane itself. However, environmental stressors and improper initial installation temperatures lead to specific failure patterns.
The "Fishmouth" and Seam Separation Issue
A "fishmouth" is a wrinkle in the seam that creates an open channel for water ingress. This occurs when the automatic heat welder travels too fast or the ambient temperature drops below 45°F during installation. PVC membranes also suffer from plasticizer migration; as the membrane ages, plasticizers leach out, making the PVC brittle and prone to cracking around fastener plates.
Thermoplastic Repair Matrix
Repairing thermoplastics requires precise thermal control. Hand welders must be calibrated based on ambient conditions and material type.
| Material | Optimal Weld Temp | Repair Solvent / Prep | Primary Failure Mode |
|---|---|---|---|
| TPO (White/Grey) | 950°F - 1,050°F | TPO Cleaner / Isopropyl | Chalking, UV micro-cracking, seam voids |
| PVC (White/Tan) | 1,000°F - 1,100°F | PVC Solvent Wipe | Plasticizer loss, brittleness, shattering |
When repairing a TPO seam, score the top surface of the bottom sheet with a scouring pad before welding to ensure the oxidized layer does not inhibit the melt. Always probe the cooled weld with a blunt cotter pin; if the pin catches, the weld is incomplete and must be re-run.
Modified Bitumen (Mod-Bit): Blistering and Alligatoring
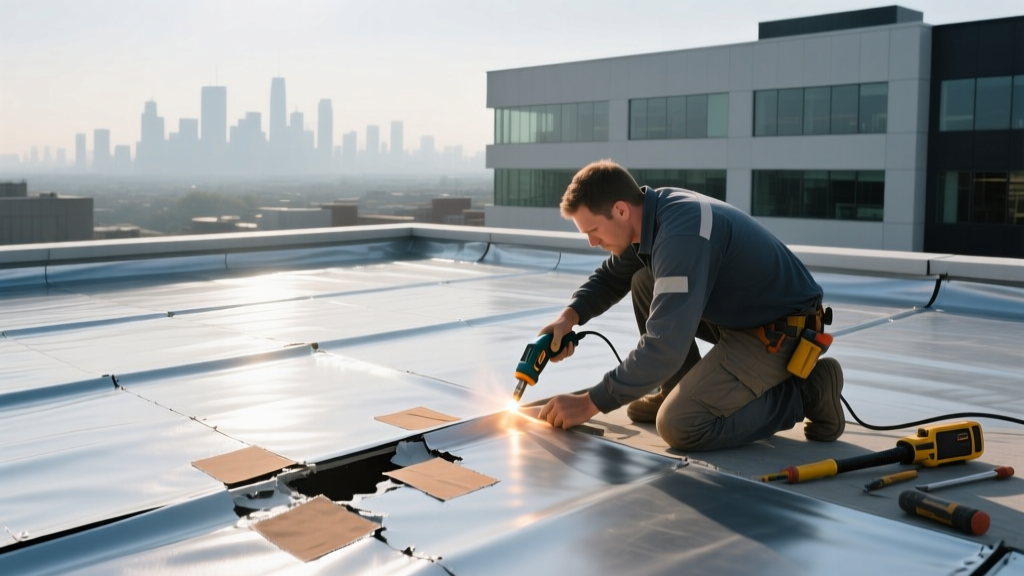
Modified bitumen bridges the gap between traditional built-up roofing (BUR) and modern single-ply membranes. It comes in two distinct formulations: SBS (Styrene-Butadiene-Styrene), which is rubberized and typically torch-applied or mopped in hot asphalt, and APP (Atactic Polypropylene), which is plasticized and exclusively torch-applied.
Fixing Mod-Bit Blisters (The "X-Cut" Method)
Blisters form when moisture trapped between the membrane plies or within the insulation vaporizes under solar heat, expanding and pushing the membrane upward. If left untreated, the blister will crack, allowing water into the roof deck.
- Cut an "X": Use a hooked roofing blade to cut an X across the center of the blister, extending to the edges of the raised area.
- Peel and Dry: Fold back the four flaps. Allow the trapped moisture to evaporate completely; use a heat gun if necessary.
- Fill and Embed: Trowel a layer of manufacturer-approved roofing cement into the void. Embed a piece of reinforcing fiberglass mesh into the cement.
- Seal the Flaps: Fold the flaps back down over the cement. Top-coat the entire area with cement and embed a second layer of mesh, feathering the edges to prevent water damming.
Moisture Surveys: Finding the Hidden Damage
The most critical mistake in flat roof maintenance is repairing the membrane without verifying the condition of the substrate. A visually sound TPO or EPDM membrane can be hiding completely saturated polyiso insulation beneath it. Wet insulation loses its R-value, increases building energy costs, and adds massive dead weight to the structural deck.
Before committing to a large-scale repair budget, commission a moisture survey. Infrared thermography is highly effective for flat roofs; conducted at dusk, the thermal camera detects the heat retained by water-logged insulation compared to dry areas. For definitive proof, roofing professionals perform nuclear moisture scans or physical core cuts (extracting a 2-inch cylinder of the roof down to the deck) to verify moisture percentages. According to the U.S. Department of Energy, maintaining the thermal integrity of commercial roofs is vital for overall building energy efficiency, making moisture detection a non-negotiable step in the maintenance cycle.
Preventative Maintenance Schedules and 2026 Cost Baselines
Reactive repairs cost significantly more than scheduled maintenance. Below is a material-specific maintenance framework designed to maximize membrane lifespan.
| Material | Bi-Annual Task | Quinquennial (5-Year) Task | Est. Annual Maintenance Cost (per sq. ft.) |
|---|---|---|---|
| EPDM | Clean drains, inspect seam tape adhesion | Re-seal perimeter flashings and pipe boots | $0.08 - $0.12 |
| TPO / PVC | Wash surface to maintain reflectivity, probe seams | Re-weld fishmouths, apply UV protectant to PVC | $0.06 - $0.10 |
| Mod-Bit (SBS/APP) | Clear granules from drains, check for alligatoring | Apply reflective aluminum or acrylic elastomeric coating | $0.10 - $0.15 |
The Decision Framework: When to Transition from Repair to Replacement
Facility managers often fall into the trap of continuous patching, throwing capital at a failing system. Use the 25% Rule to make objective replacement decisions. If core cuts and moisture surveys reveal that more than 25% of the roof's insulation is saturated with water, localized repairs are a sunk cost. Most modern building codes and energy standards mandate a full tear-off to the deck when this threshold is crossed, as wet insulation cannot be dried in place and violates minimum R-value requirements.
Furthermore, if a single-ply membrane has experienced widespread plasticizer loss (PVC) or severe UV embrittlement (older TPO generations), liquid adhesives and patch tapes will fail to bond to the degraded surface. In these scenarios, the membrane's chemical structure has fundamentally altered, and a complete overlay or tear-off is the only structurally and financially sound resolution.
Written by
David NakamuraDavid Nakamura is a licensed architect (AIA) and construction technology writer focused on sustainable building methods, mass timber engineering, and high-performance building envelopes. He holds a Master of Architecture from the University of Washington and is a certified Passive House Consultant (CPHC). David spent eight years at the Seattle firm Mithun, where he led the design of three LEED Platinum projects, before founding his own practice specializing in net-zero residential design. He serves on the editorial advisory board of GreenBuilder Magazine and has authored peer-reviewed papers on cross-laminated timber (CLT) connections for the Journal of Structural Engineering. In his spare time, David teaches woodworking at Pratt Fine Arts Center and kayaks the Puget Sound.
More from David Nakamura
View all
Construction Cost
Labor Cost to Build a Deck Per Sq Ft: 2026 Installation Guide
Discover the exact labor cost to build a deck per sq ft in 2026. This installation guide breaks down contractor rates, complexity factors, and hidden fees.
Aug 4, 2026

Construction Cost
How Much Does It Cost to Build a 3 Bedroom House? Financing Guide
Learn exactly how much it costs to build a 3 bedroom house and explore 2026 financing options, construction loan types, and budget frameworks for your build.
Aug 4, 2026

Construction Cost
Cost to Build a Tennis Court: 2026 Guide
How much does it cost to build a tennis court in 2026? Breakdowns for asphalt, concrete, and synthetic surfaces plus fencing and lighting.
Jul 30, 2026