Roofing Coating Materials: A Complete Guide to Types & Costs
Compare the best roofing coating materials for flat and low-slope roofs. Learn about acrylic, silicone, and polyurethane costs, lifespans, and application.

The Strategic Value of Liquid-Applied Roof Coatings
Extending the lifecycle of a commercial or residential low-slope roof without executing a full tear-off requires precise material selection. Liquid-applied roofing coating materials serve as a seamless, monolithic membrane that restores watertight integrity, reflects ultraviolet radiation, and reduces building cooling loads. According to the U.S. Environmental Protection Agency, highly reflective cool roof coatings can reduce peak cooling demand by 10% to 15%, significantly lowering HVAC operational costs.
However, applying the wrong chemistry to an incompatible substrate or a roof with poor drainage will result in rapid delamination, blistering, and wasted capital. This guide dissects the three primary coating chemistries—acrylic, silicone, and polyurethane—providing exact performance metrics, current pricing, and application protocols to ensure your restoration project succeeds.
Performance Matrix: Acrylic vs. Silicone vs. Polyurethane
Before selecting a product, facility managers and contractors must evaluate the roof's specific environmental and structural conditions. The following matrix compares the core performance attributes of the three dominant roofing coating materials.
| Attribute | Acrylic (Water-Based) | Silicone (Moisture-Cure) | Polyurethane (Two-Part) |
|---|---|---|---|
| Best Application | Steep-slope metal, well-draining flat roofs | Flat roofs with ponding water, EPDM, TPO | High foot traffic areas, concrete decks |
| Ponding Water Tolerance | Poor (degrades in standing water) | Excellent (impervious to standing water) | Good (resists water, but joints may weaken) |
| UV Stability | Excellent (chalks slowly over time) | Excellent (minimal degradation) | Varies (Aromatic yellows; Aliphatic is UV stable) |
| Dirt Pickup | Low (sheds dirt with rain) | High (tacky surface attracts debris) | Low (hard, smooth finish) |
| Material Cost (per sq. ft.) | $0.75 – $1.25 | $1.50 – $2.50 | $2.00 – $3.50 |
| Volume Solids | 50% – 60% | 80% – 98% | 70% – 90% |
Deep Dive: Chemistry and Product Selection
1. Acrylic Elastomeric Coatings
Acrylics are water-based, making them easy to apply, clean up, and highly cost-effective. They rely on the evaporation of water to cure, which means they require specific weather conditions (above 50°F and low humidity) to form a proper film. Products like Henry 587 Dura-Brite or GacoFlex A400 are industry standards.
Application Nuance: Because acrylics contain roughly 50% water by volume, applying 20 wet mils yields only about 10 dry mils. To achieve the industry-standard 20 dry mil thickness, you must apply multiple coats or apply a very heavy single coat, which increases the risk of surface skinning and underlying curing failures.
2. Silicone Roof Coatings
Silicone coatings, such as Henry 887 Tropi-Cool 100% Silicone or Gaco Western S2000, are moisture-cured. They draw ambient humidity from the air to crosslink and cure, meaning they can be applied in colder temperatures and high humidity. Silicone is the undisputed champion for roofs suffering from ponding water, as its chemical structure is entirely impervious to water degradation.
The Dirt Pickup Factor: Standard silicones remain slightly tacky even after curing, which attracts airborne dirt and pollen, reducing the roof's solar reflectance index (SRI) over time. To mitigate this, specify 'high-solids' or 'dirt-shedding' silicone formulations, or plan for a light power washing every 3 to 5 years to restore reflectivity.
3. Polyurethane Coatings
Polyurethanes are the heavy-duty option, prized for their exceptional tensile strength, abrasion resistance, and impact tolerance. They are the mandatory choice for roofs that experience heavy foot traffic, such as those housing HVAC units, helipads, or rooftop patios.
Polyurethanes come in two chemical variants:
- Aromatic: Less expensive and highly durable, but not UV stable. It will chalk and degrade in sunlight, so it must be top-coated with an aliphatic or acrylic finish.
- Aliphatic: UV stable, colorfast, and highly resistant to chemical exposure, but significantly more expensive. Often used as the topcoat in a dual-layer system.
Decision Framework: Matching Material to Roof Condition
Use this diagnostic flow to determine the optimal roofing coating materials for your specific project:
- Step 1: Conduct a Moisture Scan. Before any coating is applied, use an infrared camera or nuclear moisture meter to identify wet insulation. Coating over trapped moisture guarantees blistering and voids the manufacturer's warranty. All wet substrate sections must be cut out and replaced.
- Step 2: Evaluate Drainage. If water stands for >48 hours after rainfall, eliminate acrylics immediately. Choose a high-solids silicone.
- Step 3: Assess Foot Traffic. If the roof requires daily maintenance access or serves as a pedestrian deck, polyurethane is mandatory. Silicone and acrylic will tear under heavy abrasion.
- Step 4: Check Substrate Compatibility. Consult the National Roofing Contractors Association (NRCA) guidelines to ensure your chosen primer and coating are chemically compatible with the existing membrane (e.g., EPDM requires a specific tie-in primer to ensure adhesion).
Preparation and Application Protocols
The most expensive coating will fail if the substrate preparation is inadequate. Adhesion failure accounts for over 80% of liquid-applied roof coating defects.
Surface Preparation
Power wash the entire roof surface using a minimum of 2,500 PSI to remove chalk, dirt, biological growth, and loose gravel. For heavily soiled EPDM or TPO membranes, use a specialized roof cleaner (like trisodium phosphate alternatives) to remove plasticizers and oily residues that inhibit adhesion. Allow the roof to dry completely—typically 24 to 48 hours depending on ambient conditions.
Detailing and Seam Reinforcement
Do not coat the field of the roof until all penetrations, drains, and seams are addressed. Apply a heavy bead of compatible mastic or flashing-grade coating, and immediately embed a reinforcing polyester or fiberglass mesh tape into the wet material. This creates a composite bridge that accommodates thermal expansion and contraction without tearing.
Field Application and Mil Thickness
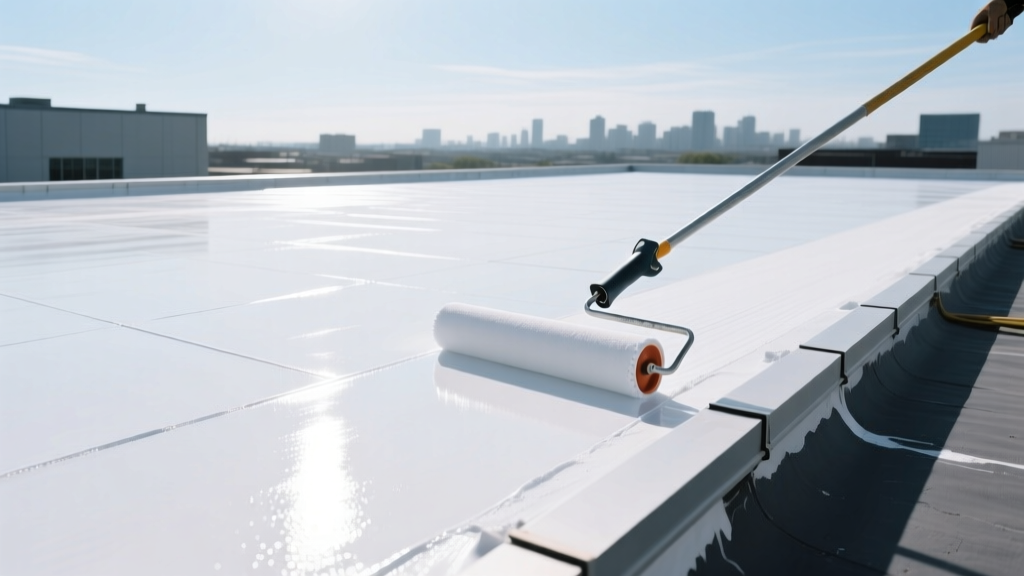
Apply the field coating using a heavy-nap roller (minimum 3/4-inch nap) or an airless sprayer. If spraying, back-roll the material to ensure it is worked into the substrate's pores and to eliminate pinholes. Use a wet mil gauge continuously during application to verify thickness. Referencing ASTM D6694 standards for liquid-applied coatings, maintaining the manufacturer's specified wet mil thickness is legally required to validate the material warranty.
Troubleshooting Common Failure Modes
Even with meticulous planning, environmental variables can cause application defects. Recognize these common failure modes and their remedies:
- Alligatoring: The surface cracks like alligator skin. Cause: Applying the coating too thick in a single pass, causing the surface to skin over while the underlying material remains liquid and shrinks as it cures. Fix: Apply in multiple thinner coats, adhering strictly to the manufacturer's maximum wet mil per-pass limits.
- Blistering: Bubbles form under the cured film. Cause: Trapped moisture in the substrate or applying the coating when the roof surface temperature is rising rapidly (causing trapped air to expand). Fix: Apply coatings early in the morning when the roof is cooling down, and never coat over damp substrates.
- Delamination at Seams: The coating peels away from EPDM or TPO seams. Cause: Failure to use the correct primer or failure to adequately clean the membrane's surface oxidization. Fix: Mechanically abrade the seams and apply the exact manufacturer-specified primer before coating.
Financial Analysis: Coating vs. Replacement
A complete commercial roof tear-off and replacement typically costs between $8.00 and $14.00 per square foot, factoring in disposal fees, labor, and new insulation. In contrast, a high-quality silicone restoration system (including power washing, priming, detailing, and 20 dry mils of coating) averages $3.50 to $5.50 per square foot installed. By extending the roof's life by 10 to 15 years and drastically reducing cooling costs, the ROI on liquid-applied roofing coating materials frequently exceeds 100% over the lifecycle of the system, making it a premier asset management strategy for commercial real estate portfolios.
Written by
Marcus ChenMarcus Chen is a licensed structural engineer (PE) and building materials analyst with over 12 years of experience across residential, commercial, and industrial construction. He holds a Master of Science in Civil Engineering from UC Berkeley and spent six years at Thornton Tomasetti before transitioning to independent consulting and technical writing. Marcus specializes in material selection for seismic-prone regions, concrete reinforcement strategies, and lifecycle cost analysis. His work has been cited by the American Concrete Institute (ACI) and the Structural Engineers Association of California (SEAOC). When he is not on a job site or at his desk, you will find him hiking the Sierra Nevada or restoring a 1920s craftsman bungalow in Oakland, CA.
More from Marcus Chen
View all
Construction Cost
How Much Did the Eiffel Tower Cost to Build?
How much did the Eiffel Tower cost to build in 1889? We adjust for inflation and compare its budget to modern skyscraper construction.
Aug 4, 2026

Fire Resistance
What Is a Fire Resistant Material? Testing & Certification Guide
Discover what is a fire resistant material through ASTM and UL testing. Learn how fire ratings, certifications, and assemblies work in construction.
Aug 4, 2026

Construction Cost
How Much Did the Burj Khalifa Cost to Build?
How much did the Burj Khalifa cost to build? We break down the $1.5B project and extract 5 money-saving strategies for your next build.
Jul 30, 2026