Installation Guide for Different Types of Roof Materials
Master the installation of different types of roof materials. This pro guide covers asphalt, metal, and EPDM systems with exact specs, costs, and failure modes.

Pre-Installation Deck Preparation and Universal Standards
The longevity of any roofing system is dictated by the substrate beneath it. Before deploying any of the various types of roof materials, the roof deck must meet strict structural and moisture-management criteria. For residential and light commercial applications, 1/2-inch CDX plywood or 7/16-inch OSB (Oriented Strand Board) are the standard substrates. However, OSB is highly susceptible to edge swelling if exposed to moisture during construction delays. To mitigate this, all decking must be fastened using 8d ring-shank nails spaced 6 inches on-center at the edges and 12 inches on-center in the field, securing directly into the roof trusses or rafters.
Universal underlayment protocols have shifted heavily toward synthetic membranes in 2026. While traditional #15 asphalt felt is still permitted by code, synthetic underlayments like GAF TigerPaw or Owens Corning ProArmor offer superior tear resistance (up to 35 lbs of nail pull-through resistance) and do not absorb moisture or wrinkle when exposed to rain during installation. In all climate zones experiencing freezing temperatures, a self-adhering polymer-modified bitumen membrane (commonly known as ice and water shield, such as Grace Ice & Water Shield) must be installed at the eaves, extending at least 24 inches past the interior plane of the exterior wall, as well as in all valleys and around penetrations.
Material-Specific Installation Matrix
Selecting the correct fasteners, underlayments, and slope minimums is critical for warranty validation. The following matrix outlines the baseline installation parameters for the three most dominant roofing systems in the current market.
| Material Type | Minimum Slope | Underlayment Spec | Fastener / Attachment | Avg Installed Cost (2026) |
|---|---|---|---|---|
| Architectural Asphalt | 2:12 (4:12 preferred) | Synthetic + Ice/Water at eaves | 11.25' galvanized ring-shank nails | $4.50 - $7.50 / sq.ft. |
| Standing Seam Metal | 1:12 (with ice shield) or 3:12 | High-temp synthetic or peel-and-stick | Concealed sliding clips, #14 pancake screws | $11.00 - $18.00 / sq.ft. |
| EPDM Rubber (Adhered) | 1:40 (essentially flat) | 1/2' HD Polyiso cover board | Water-based contact adhesive, seam tape | $8.00 - $12.00 / sq.ft. |
Asphalt Shingles: Overcoming Wind Uplift and Nailing Errors
Architectural asphalt shingles, such as the GAF Timberline HDZ or Owens Corning Duration, remain the most prevalent residential roofing material. However, improper nailing is the leading cause of premature failure and wind blow-offs. Modern architectural shingles feature a laminated two-piece construction, creating a distinct nailing zone. For example, the StrikeZone on GAF HDZ shingles is a 1.5-inch wide groove designed to catch nails driven at high velocities by pneumatic roofing guns.
The 6-Nail Pattern vs. 4-Nail Standard
Standard manufacturer instructions require four 11.25-inch galvanized or stainless-steel roofing nails per shingle. However, in High-Velocity Hurricane Zones (HVHZ) or regions prone to severe convective storms, the IBHS FORTIFIED Home Standard mandates a 6-nail pattern. Upgrading to a 6-nail application increases wind resistance ratings from 110 mph to 130 mph. The additional labor cost is marginal (approximately $0.15 to $0.20 per square foot), but it drastically reduces the risk of catastrophic roof envelope failure during extreme weather events.
Pneumatic nail guns must be recalibrated at the start of every shift and whenever ambient temperatures shift by more than 15°F. A nail driven too deep (capping) fractures the fiberglass mat, reducing pull-through strength by up to 70%. A nail left proud (overdriven) will puncture the overlapping shingle and prevent the asphalt sealant strip from engaging.
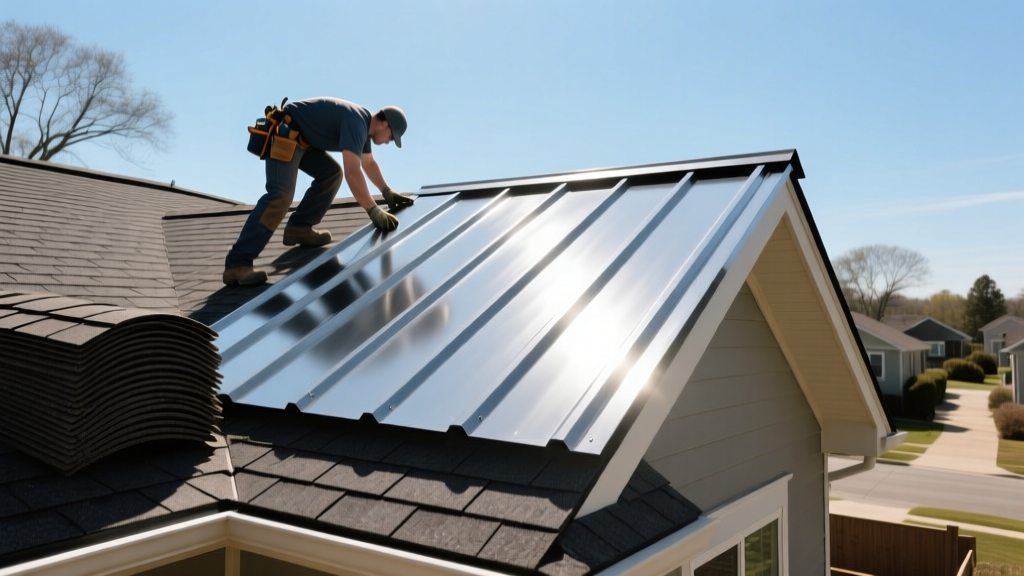
Standing Seam Metal: Managing Thermal Expansion
Standing seam metal roofing, typically fabricated from 24-gauge or 22-gauge Galvalume-coated steel, is engineered for extreme longevity (40 to 60 years). The most critical installation variable for metal is accommodating thermal expansion and contraction. Steel expands at a rate of approximately 1/16 of an inch per 10 feet of panel length for every 100°F change in temperature. If a 30-foot panel is installed on a 40°F morning and heats up to 140°F in the summer sun, it will expand by nearly 3/8 of an inch.
Clip Spacing and Panel Engagement
To manage this movement, panels must never be pinned directly to the deck. Instead, they are secured using concealed sliding clips. According to the Metal Construction Association (MCA), fixed clips should only be used at the eaves or the exact center of the panel run (for panels exceeding 40 feet) to establish a thermal datum point. All other clips must be floating or sliding clips, fastened to the structural purlins or deck using #14 pancake-head screws. The panel seams are then mechanically crimped or snapped together over the clips.
Oil-canning (visible waviness or buckling in the flat areas of the metal panel) is almost always an installation defect, not a material defect. It is caused by over-driving the pancake screws into the clips, which restricts lateral movement, or by installing panels over an uneven substrate. Always use a low-profile, neoprene-washer pancake screw and set the drill clutch to stop exactly when the washer compresses, without indenting the metal clip.
EPDM Rubber Membrane: Adhesive vs. Ballasted Protocols
For low-slope and flat commercial roofs, 60-mil reinforced EPDM (Ethylene Propylene Diene Monomer) is a dominant choice due to its exceptional UV and ozone resistance. While ballasted systems exist, fully adhered systems are preferred in 2026 for their superior wind uplift ratings and ease of leak detection. A fully adhered EPDM system requires a rigid cover board—typically 1/2-inch high-density polyisocyanurate (HD Polyiso)—installed over the primary insulation to provide a smooth, puncture-resistant surface and prevent the seams from telegraphing through the membrane.
Seam Taping and Pressure Rolling
The Achilles heel of any EPDM roof is the seam. Modern installations rely on factory-applied or field-applied butyl seam tape (such as Carlisle SecurTape) rather than liquid lap adhesives. The protocol demands rigorous surface preparation: both mating surfaces must be cleaned with a specialized splice wash, allowed to flash off, and then coated with a primer. Once the primer becomes tacky (usually 15 to 30 minutes, depending on ambient humidity), the seam tape is applied. Crucially, the seam must be compressed using a 2-inch wide steel hand roller, applying a minimum of 75 pounds of downward pressure. This ensures the butyl adhesive flows into the microscopic pores of the EPDM, creating a vulcanized, watertight bond.
Common Installation Failure Modes & Diagnostics
Even premium materials fail when installation protocols are violated. Use this diagnostic framework to identify and rectify common field errors:
- Asphalt Shingle Blistering: Often misdiagnosed as a manufacturing defect, blistering is typically caused by trapped moisture in the OSB deck or inadequate attic ventilation. When the sun heats the roof, moisture vaporizes and expands, pushing the asphalt upward. Fix: Ensure a minimum of 1 square foot of net free ventilation area (NFVA) for every 150 square feet of attic space, balanced 50/50 between intake (soffit) and exhaust (ridge).
- Metal Panel Fastener Back-Out: Pancake screws backing out of the substrate usually indicate that the screws were driven into OSB or plywood rather than structural framing or steel purlins. Fix: Screws must penetrate a minimum of 1 inch into solid wood or engage at least three threads in steel purlins. Use a pull-out test gauge on the first few screws of every job to verify substrate holding strength.
- EPDM Fishmouths (Wrinkles in Seams): A 'fishmouth' is a small, triangular wrinkle in a taped seam that creates a direct capillary path for water ingress. This occurs when the membrane is stretched during application or when tape is applied in temperatures below 40°F without using a low-temperature primer and heat gun. Fix: Cut out the fishmouth, clean the area, apply a patch of uncured EPDM flashing, and seal the edges with EPDM lap sealant.
Understanding the specific mechanical and chemical requirements of these different types of roof materials ensures that the system performs as engineered. Always cross-reference field conditions with the specific manufacturer's current technical data sheets, as adhesive formulations and fastener requirements are frequently updated to meet evolving building codes and U.S. Department of Energy efficiency standards.
Written by
Marcus ChenMarcus Chen is a licensed structural engineer (PE) and building materials analyst with over 12 years of experience across residential, commercial, and industrial construction. He holds a Master of Science in Civil Engineering from UC Berkeley and spent six years at Thornton Tomasetti before transitioning to independent consulting and technical writing. Marcus specializes in material selection for seismic-prone regions, concrete reinforcement strategies, and lifecycle cost analysis. His work has been cited by the American Concrete Institute (ACI) and the Structural Engineers Association of California (SEAOC). When he is not on a job site or at his desk, you will find him hiking the Sierra Nevada or restoring a 1920s craftsman bungalow in Oakland, CA.
More from Marcus Chen
View all
Construction Cost
How Much Did the Eiffel Tower Cost to Build?
How much did the Eiffel Tower cost to build in 1889? We adjust for inflation and compare its budget to modern skyscraper construction.
Aug 4, 2026

Fire Resistance
What Is a Fire Resistant Material? Testing & Certification Guide
Discover what is a fire resistant material through ASTM and UL testing. Learn how fire ratings, certifications, and assemblies work in construction.
Aug 4, 2026

Construction Cost
How Much Did the Burj Khalifa Cost to Build?
How much did the Burj Khalifa cost to build? We break down the $1.5B project and extract 5 money-saving strategies for your next build.
Jul 30, 2026