How to Select and Install the Right Roof Soffit Material
Learn how to select the best roof soffit material for your home and follow our pro installation guide for perfect ventilation and weather protection.

The soffit is the unsung hero of a high-performance roofing system. While shingles and metal panels shed water, the roof soffit material you choose dictates your attic’s intake ventilation, protects your rafter tails from rot, and seals the eave against pest intrusion. Selecting the wrong material or installing it without respecting thermal expansion and Net Free Vent Area (NFVA) requirements will lead to sagging panels, buckled seams, and catastrophic attic moisture buildup.
Material Matrix: Vinyl vs. Aluminum vs. Fiber Cement
Before purchasing, you must align your roof soffit material with your local climate, budget, and architectural style. Below is a 2026 market comparison of the three dominant soffit materials.
| Material | Top 2026 Product Lines | Installed Cost (per sq. ft.) | Max Unsupported Span | Best Application |
|---|---|---|---|---|
| Vinyl (PVC) | Ply Gem Vantage, Alside | $4.50 - $7.00 | 16 inches (12" in high wind) | Standard residential retrofits, budget-conscious builds. |
| Aluminum | Rollex, Quality Aluminum | $7.50 - $11.00 | 24 inches | Coastal zones, high-wind regions, commercial eaves. |
| Fiber Cement | James Hardie HardieSoffit | $9.00 - $14.50 | 24 inches (requires nailing to trusses) | High-end custom homes, wildfire zones (WUI compliant). |
Pre-Installation: Calculating Ventilation and Material Needs
The most common failure in soffit installation is treating it purely as a cosmetic trim rather than a critical intake lung for your attic. According to the National Roofing Contractors Association (NRCA), a balanced ventilation system requires a 50/50 split between intake (soffit) and exhaust (ridge or gable).
The 1:300 Ventilation Rule
Modern building codes (IRC Section R806) generally require 1 square foot of Net Free Vent Area (NFVA) for every 300 square feet of attic floor space, provided you have a continuous vapor barrier and ridge venting.
Calculation Example: For a 1,500 sq. ft. attic floor, you need 5 sq. ft. (720 sq. inches) of total NFVA. Half of this (360 sq. inches) must come from the soffit. If you use a continuous hidden vent strip that provides 9 sq. inches of NFVA per linear foot, you will need exactly 40 linear feet of vented soffit material distributed evenly across the eaves.
Step-by-Step Installation Workflow
This guide focuses on the installation of interlocking vinyl and aluminum soffit panels, which represent 80% of residential installations. Fiber cement requires specialized cutting tools and blind-nailing techniques detailed in the James Hardie HardieSoffit technical literature.
Step 1: Substrate Preparation and Furring
Soffit panels must be installed over a flat, solid surface. If your rafter tails are uneven or exposed, install 1x3 or 2x4 wood furring strips perpendicular to the rafters, spaced exactly 16 inches on center (OC). Use a chalk line to ensure the furring strips create a perfectly level plane; even a 1/4-inch variance will cause visible rippling in vinyl panels.
Step 2: Installing J-Channel and F-Channel
The receiving channels dictate the straightness of your entire run.
- Wall Side: Nail F-channel (or J-channel) directly to the house wall or fascia backing. Keep the bottom lip perfectly level.
- Fascia Side: Install J-channel along the inside edge of the fascia board.
- Fastening Rule: Use 1-1/4" aluminum or hot-dipped galvanized roofing nails. Drive nails into the center of the nailing slots. Do not drive them tight. Leave a 1/32" gap between the nail head and the channel to allow for thermal expansion.
Step 3: Cutting and Fitting the Panels
Measure the distance from the inside of the wall F-channel to the inside of the fascia J-channel. Cut your roof soffit material 1/4-inch to 3/8-inch shorter than this measurement. This gap is non-negotiable for vinyl and aluminum, which will expand significantly during summer heat. If you cut it flush, the panels will buckle and pop out of the channels when temperatures exceed 85°F.
Step 4: Securing the Panels
Flex the panel slightly, insert the edge into the wall channel, and push the opposite end into the fascia channel. If you are using an H-channel to join two panels mid-span, ensure the H-channel is nailed to a solid wood backing. Never leave an H-channel floating, as wind uplift will tear the joint apart.
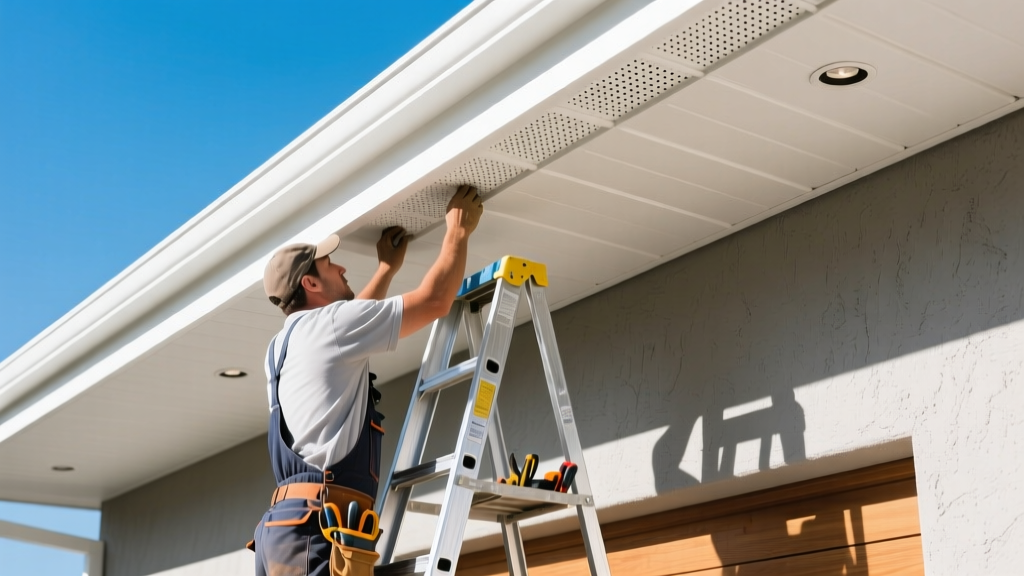
Common Failure Modes and Troubleshooting
Even experienced crews make mistakes when rushing soffit installations. Here is how to identify and fix the most frequent issues.
| Symptom | Root Cause | The Fix |
|---|---|---|
| Panels sagging in the middle | Span exceeds 16 inches without wood backing, or furring strips are warped. | Remove panels, install additional 1x3 furring strips to reduce span to 12 inches, and reinstall. |
| Buckling and wavy seams | Panels cut too long (no expansion gap) or nails driven too tightly in the slots. | Remove the buckled panel, trim 3/8" off the end with aviation snips, and re-insert. Loosen surrounding nails. |
| Attic mold and high humidity | Insulation blown into the eaves, blocking the soffit vents, reducing NFVA to zero. | Install rigid foam or plastic rafter baffles (chutes) between the rafters to maintain a 2-inch clear airway above the soffit vents. |
Long-Term Performance and Airflow Dynamics
Understanding the fluid dynamics of your roof system is crucial. As noted by the Building Science Corporation, soffit vents rely on the stack effect and wind pressure to push cool, dry air into the attic. If your roof soffit material features perforated holes rather than continuous slits, ensure the holes face downward to prevent wind-driven rain from being forced directly into the attic cavity.
Finally, coordinate your soffit installation timeline with your gutter installation. Gutters should be hung after the soffit and fascia are completed. If gutters are installed first, the gutter hangers will block the fascia J-channel, forcing you to face-nail the soffit directly into the aluminum gutter apron—a guaranteed path to water infiltration and galvanic corrosion.
Written by
Sarah WhitfieldSarah Whitfield is a chartered quantity surveyor (MRICS) and construction cost analyst with 15 years of experience in material pricing, procurement strategy, and project budgeting. She earned her degree in Construction Management from the University of Reading (UK) and has worked on projects ranging from $2M custom homes to $180M mixed-use developments across North America and Europe. Sarah currently leads cost estimating for BuildMat Insight, maintaining a proprietary database of 4,000+ material price points updated quarterly. She is a frequent contributor to RSMeans cost data panels and has presented at the International Cost Engineering Council (ICEC) congress. Based in Denver, CO, Sarah is an avid trail runner and volunteer mentor for Women in Construction.
More from Sarah Whitfield
View all
Wood & Lumber
What Are the Different Types of Wood? A Builder's Guide
Compare structural softwoods, finish hardwoods, and engineered lumber. Analyze Janka ratings, MOE values, and 2026 pricing for construction.
Aug 4, 2026

Walls & Panels
Steel Framing vs Wood Framing: Corrosion and Moisture Defense
Compare steel framing vs wood framing for moisture resistance. Learn about galvanized coatings, condensation risks, and corrosion protection strategies.
Jul 21, 2026

Stone & Masonry
How to Cut Stone Veneer: Wet Saw vs Grinder Comparison
Compare the best tools for cutting stone veneer. We review wet saws, angle grinders, and chop saws to help you achieve clean, chip-free cuts.
Jul 21, 2026