Straw Roof Material Maintenance: Repair Techniques & Guide
Learn expert techniques for straw roof material repair and maintenance. Discover how to patch thatch, prevent rot, and extend your natural roof's lifespan.

The Anatomy of Thatch Degradation
Straw roof material, whether water reed, combed wheat straw, or long straw, relies on a delicate balance of surface weathering and core dryness. Unlike synthetic membranes, thatch is a sacrificial surface. The outer 1/2-inch to 1-inch of the straw roof material degrades from UV exposure, rain impact, and biological growth, while the inner core remains completely dry and structurally sound—provided the roof pitch exceeds 45 degrees. When the pitch drops below this threshold, or when the surface layer wears down to the underlying fixings, water infiltration accelerates exponentially. Understanding this weathering mechanism is the foundation of effective straw roof material repair.
Essential Tools for Straw Roof Material Repair
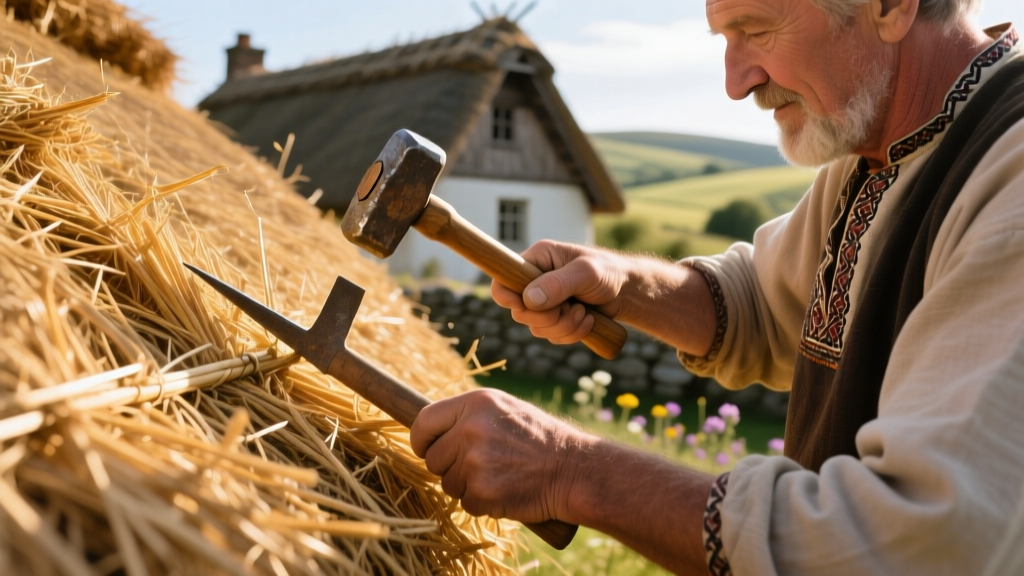
Professional thatching requires specialized implements designed to compress, align, and secure organic fibers without snapping them. Attempting repairs with standard carpentry tools will damage the straw and compromise the roof's weatherproofing.
- Thatching Rake (or Hatcher): A specialized rake with widely spaced, blunt tines used to remove loose, decayed surface straw and moss without pulling out the healthy, anchored bundles.
- Leggett: A flat, paddle-like tool (often covered in leather or textured wood) used to beat the straw bundles (yealms) upward, aligning the butts and creating a tight, waterproof surface.
- Thatching Mallet: A heavy, cylindrical wooden mallet used to drive hazel or willow spars deep into the underlying thatch layers.
- Hazel Sways and Spars: Sways are long, twisted hazel rods used to tie bundles to the roof battens. Spars are sharpened, U-shaped hazel staples driven over the sways to lock the straw roof material in place.
Step-by-Step Patching: Fixing Localized Thatch Wear
Localized wear often occurs around chimneys, dormer windows, and valleys where water runoff concentrates. Patching (or "dressing in") requires integrating new straw roof material into the existing matrix seamlessly.
- Excavate the Worn Area: Using a thatching rake and your hands, carefully remove the decayed straw down to the sound, dry layer. This typically requires excavating to a depth of 4 to 6 inches. Create a stepped, tapered edge rather than a sheer vertical drop to allow the new material to blend.
- Prepare the Yealms: Dampen the new straw bundles (yealms) slightly with water to increase their flexibility. For combed wheat straw, ensure the butts (the thick cut ends) are perfectly aligned.
- Dress the Straw into the Void: Lay the new bundles into the excavated cavity, ensuring the butts face downward to shed water. The new material must be laid at the exact same angle as the surrounding roof.
- Secure with Sways and Spars: Drive a hazel sway horizontally across the top of the new bundle, anchoring it into the older, solid thatch on either side. Lock the sway in place by driving 3 to 4 sharpened hazel spars deeply into the underlying layers.
- Beat and Blend: Use the leggett to aggressively beat the new straw upward. This pushes the butts tightly together, creating a dense, impenetrable surface. Finally, use a side rake to trim any stray stalks, blending the patch into the surrounding roof profile.
Ridge Replacement vs. Surface Dressing: Decision Matrix
The ridge is the most vulnerable part of any straw roof material installation because it is exposed to weather on multiple planes and features complex bending. While the main roof coat may last 25 to 40 years, the ridge typically requires replacement every 10 to 15 years. Below is a decision framework to determine the appropriate maintenance intervention.
| Condition Indicator | Required Action | Estimated 2026 Lifespan Added |
|---|---|---|
| Surface moss, minor discoloration, intact spars | Routine raking and zinc strip installation | N/A (Preventative) |
| Ridge spars protruding, slight hollowing at apex | Complete Ridge Replacement (Block or Flush) | 10 - 15 Years |
| Main coat worn to 8 inches, fixings exposed | Surface Dressing (Spar coating over existing) | 8 - 12 Years |
| Core rot, spongy decking, severe sagging | Full Strip and Re-thatch | 25 - 40+ Years |
Biological Threats: Managing Moss, Algae, and Pests
Straw roof material is an organic substrate, making it highly susceptible to biological colonization. According to Historic England's guidance on thatched roofs, managing biological growth is critical to preventing the retention of surface moisture, which accelerates straw decay.
The Zinc Strip Solution
For north-facing slopes that remain shaded and damp, algae and moss are persistent issues. Instead of chemical washes that degrade the lignin in the straw, install continuous zinc or copper strips just beneath the ridge capping. When it rains, trace amounts of zinc ions wash down the roof pitch, creating an environment that inhibits moss and algae growth without harming the straw roof material.
Rodent and Bird Deterrence
Birds pulling straw for nesting, and rodents burrowing into the eaves, can cause catastrophic localized failures. To mitigate this, master thatchers recommend installing 19-gauge galvanized wire netting over the eaves and ridge. The netting must be pulled taut and secured with stainless steel staples to prevent wind flutter, which can mechanically abrade the straw stalks over time. For deeper insights into historical preservation techniques, the Building Conservation directory offers extensive case studies on pest management in heritage thatch.
"The longevity of a thatched roof is determined not just by the quality of the straw, but by the microclimate of the roof surface. A roof that dries rapidly after rain will outlast a shaded, damp roof by decades, even if the latter uses superior water reed." — Master Thatcher's Guild Principles
Cost Breakdown: Professional Thatching vs. DIY Maintenance
Thatching is a highly specialized trade. While homeowners can perform basic surface raking and gutter clearance, structural repairs, ridge replacements, and patching require a certified master thatcher. Below is a breakdown of current 2026 market rates for straw roof material maintenance in North America and the UK.
| Service / Material | Estimated Cost (2026) | Notes & Variables |
|---|---|---|
| Master Thatcher Day Rate | $750 - $1,100 / day | Varies by region and heritage certification. |
| Ridge Replacement (per linear ft) | $120 - $180 / ft | Includes labor, hazel spars, and ridge straw. |
| Surface Dressing (per sq ft) | $12 - $18 / sq ft | Applied over existing sound base coats. |
| Combed Wheat Straw (per bundle) | $18 - $28 / bundle | Prices fluctuate based on annual harvest yields. |
| Galvanized Wire Netting (Eaves) | $4 - $7 / linear ft | Material cost; installation usually bundled. |
Maximizing Your Roof's Lifespan
To protect your investment in straw roof material, maintain a minimum 3-foot clearance around the roof perimeter by trimming overhanging tree branches. This maximizes UV exposure and wind flow, ensuring the thatch dries rapidly after precipitation. Furthermore, ensure that chimney flashings and lead soakers are inspected annually; a leaking flashing will rot the surrounding thatch from the inside, necessitating expensive, invasive repairs that could have been prevented with a $50 tube of lead sealant.
Written by
Elena RodriguezElena Rodriguez is a civil engineer and technical writer specializing in concrete technology, masonry systems, and ASTM/ACI compliance. She earned her B.S. in Civil Engineering from Texas A&M University and spent a decade at a materials testing laboratory, performing over 2,000 concrete compressive strength tests and masonry prism evaluations. Elena is an ACI-certified Field Testing Technician (Grade I) and a member of ASTM Committee C12 on Natural Building Stone. She currently consults on forensic engineering cases involving concrete failures and moisture intrusion. Based in San Antonio, TX, Elena is a proud member of the Society of Women Engineers (SWE) and coaches her daughter's FIRST Robotics team.
More from Elena Rodriguez
View all
Walls & Panels
Cost Analysis: Light Gauge Steel Framing Advantages and Disadvantages
Evaluate light gauge steel framing advantages and disadvantages through a strict cost analysis lens, comparing material, labor, and lifecycle expenses.
Aug 4, 2026

Walls & Panels
Gypsum Board Types: Exact Specifications, Thickness & Dimensions
Compare standard, Type X, and moisture-resistant gypsum board types. Get exact specifications, thicknesses, dimensions, and ASTM standards for your project.
Aug 4, 2026

Fire Resistance
Best Fire-Resistant Outdoor Decking Materials: 2026 Buyer Guide
Discover the best fire-resistant outdoor decking materials for 2026. Compare Class A PVC, aluminum, and hardwood options for WUI compliance and safety.
Aug 4, 2026