Shed Roof Material Repair: Fixing Common Leak Types
Learn how to identify, repair, and maintain your shed roof material. Step-by-step fixes for asphalt, metal, and EPDM rubber membrane leaks.

Diagnosing the Source of Your Shed Roof Leak
Shed roofs endure disproportionate weathering compared to primary residential structures. Because they are often unheated and lack attic ventilation, ice damming, condensation, and thermal shock accelerate material degradation. Before purchasing any sealants or replacement panels, you must accurately trace the leak. Water rarely enters directly above the interior drip point; it travels along rafters, purlins, or roof decking before dropping.
For low-slope shed roofs (pitches between 1:12 and 3:12), capillary action can draw water upward under overlapping materials during wind-driven rain. According to the National Roofing Contractors Association (NRCA), low-slope applications require strict adherence to minimum pitch requirements for the specific shed roof material installed. If your asphalt shingle shed roof is pitched below 2:12, the material itself is the failure point, and no surface patch will provide a permanent fix.
Material-Specific Repair Protocols
The repair methodology changes drastically depending on the exact shed roof material. Using asphalt cement on an EPDM membrane will cause the rubber to dissolve, while applying silicone to a metal roof without proper priming will result in peeling within one freeze-thaw cycle.
1. Asphalt Shingles and Rolled Roofing
Asphalt is the most common shed roof material for pitched structures (4:12 or greater). Leaks typically originate from blown-off tabs, cracked sealant strips, or rusted-through nails backing out of the OSB decking.
- Isolate the Damaged Tab: Slide a flat pry bar under the shingle directly above the damaged area to break the factory tar seal. Carefully lift the shingle to expose the nails holding the damaged tab.
- Extract Fasteners: Use a cat's paw or the claw of a hammer to pull the galvanized roofing nails. Do not pry against the granule surface of the surrounding shingles; use a thin piece of aluminum flashing as a buffer to prevent gouging.
- Apply Wet-Patch Sealant: Squeeze a 1/4-inch bead of rubberized wet-patch sealant (such as Henry 208R, which costs approximately $12 per caulking tube) directly onto the exposed OSB decking. This specific formulation bonds even if the wood is damp.
- Seat the Replacement Shingle: Slide the new architectural shingle tab into place. Apply a second 1/4-inch bead of sealant under the overlapping shingle tab above it, then press down firmly.
- Secure and Conceal: Drive two 1-1/4 inch galvanized roofing nails through the new tab. Cover the nail heads with a dollop of polyurethane roof mastic and embed a layer of mineral granules scraped from a spare shingle to hide the repair from UV degradation.
2. Corrugated Metal and Exposed-Fastener Panels
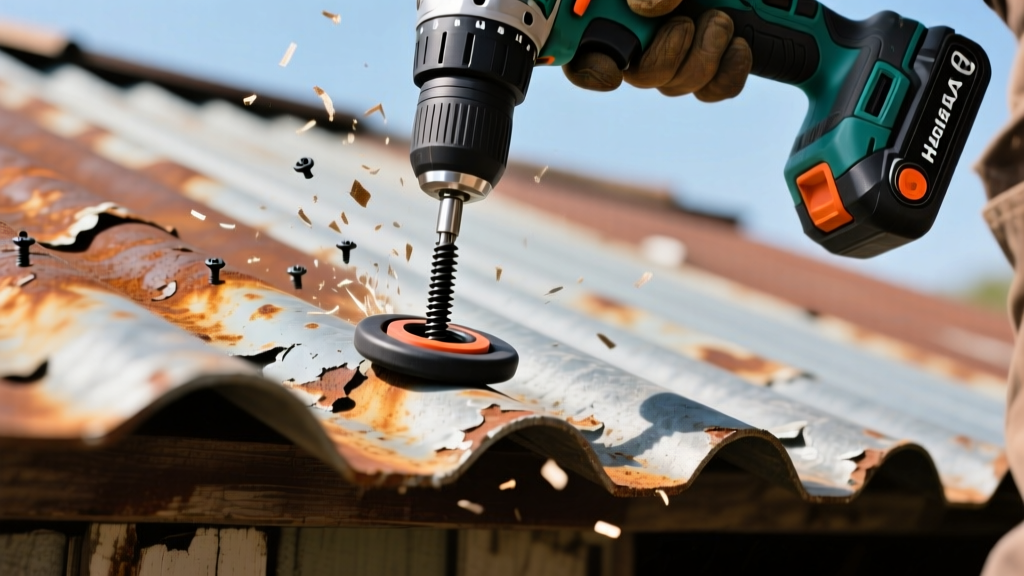
Corrugated ag-panels and R-panels are highly durable, but their Achilles heel is the exposed fastener. The neoprene washers on standard metal roofing screws degrade and crack after 5 to 8 years of UV exposure, allowing water to wick down the screw shaft into the purlins.
Expert Insight: Never attempt to fix a leaking metal roof screw by smearing caulk over the head. The thermal expansion and contraction of the metal panels (which can move up to 1/8 inch over a 10-foot run) will shear the caulk bond within weeks. You must replace the physical fastener.
When replacing failed screws, you must upgrade to an oversized repair screw to ensure a watertight bite into the existing wood hole.
| Original Fastener | Required Repair Fastener | Washer Type | Est. Cost (per 100) |
|---|---|---|---|
| #9 x 1-1/4" Standard | #10 x 1-1/2" Oversized | EPDM (1/2" diameter) | $35 - $45 |
| #10 x 1-1/2" Standard | #12 x 1-1/2" Oversized | EPDM (5/8" diameter) | $45 - $60 |
| Lapel Sidelap Stitch | #12 x 1" Pancake Head | Neoprene / Steel Cap | $50 - $70 |
3. EPDM Rubber Membranes (Flat/Low-Slope)
EPDM (Ethylene Propylene Diene Monomer) is the premier shed roof material for flat structures. While highly resistant to UV and ozone, it is vulnerable to punctures from falling branches and improper foot traffic. Repairing EPDM requires chemical bonding, not just adhesive sealing. Referencing Henry Company technical specifications and standard EPDM manufacturer guidelines, proper surface preparation is non-negotiable.
- Clean the Area: Scrub a 6-inch radius around the puncture with a dedicated EPDM splice wash or a mild, non-oily detergent. Never use mineral spirits or paint thinner, as the oily residue will prevent the primer from bonding.
- Apply Primer: Brush on a coat of yellow EPDM primer over the cleaned area. Wait 15 to 30 minutes until the primer is tacky to the touch but does not transfer to your knuckle.
- Install Seam Tape: Peel the backing off a 3-inch or 6-inch wide butyl-backed EPDM repair tape. Center it over the puncture.
- Roll and Seal: Use a hard silicone seam roller to apply firm, overlapping pressure across the entire patch. This expels microscopic air pockets and activates the butyl adhesive. Finally, brush a layer of EPDM lap sealant around the extreme perimeter of the patch to create a water-shedding bevel.
Preventative Maintenance Matrix
Reactive repairs cost three times as much as proactive maintenance. Implement this bi-annual schedule to maximize the lifespan of your shed roof material.
| Shed Roof Material | Spring Task (Post-Winter) | Fall Task (Pre-Winter) | Critical Vulnerability |
|---|---|---|---|
| Asphalt Shingles | Check for lifted tabs; re-seal with roofing cement. | Clear valley channels of leaf debris to prevent ice dams. | Wind uplift on ridges and eaves. |
| Metal Panels | Inspect neoprene washers for cracking; tighten loose screws. | Clear snow guards and gutters; check for galvanic corrosion at flashing. | Thermal fastener back-out. |
| EPDM / TPO | Wash off pollen and algae; inspect inside/outside corners for peeling. | Check drain scuppers for blockages; verify ballast (if applicable) placement. | Ponding water and seam shrinkage. |
| Rolled Roofing (MSR) | Look for blistering and granule loss at horizontal laps. | Apply reflective aluminum roof coating to extend UV life. | Brittle cracking at nail lines. |
The 3-Strike Rule: When to Abandon Repair
Knowing when to stop patching and completely replace the shed roof material is critical for protecting the contents and structural integrity of the building. Apply the 3-Strike Rule to evaluate the roof's remaining viability:
- Strike 1: Decking Deflection. If you step on the roof and feel a spongy deflection greater than 1/4 inch, the OSB or plywood decking has absorbed moisture and lost its structural shear strength. Patching the surface material is useless if the substrate is rotting. Verdict: Full tear-off required.
- Strike 2: Widespread Fastener Failure (Metal). If more than 15% of the exposed screws on a metal shed roof show degraded washers or have backed out, the cost of labor and replacement screws will exceed the cost of installing a new standing seam or hidden-fastener system. Verdict: Replace panels and upgrade fastener system.
- Strike 3: Membrane Shrinkage (EPDM). Over decades, EPDM can shrink, pulling taut across the roof surface and tearing away from the drip edge or parapet flashing. If the membrane is under tension and pulling away from the perimeter by more than 1/2 inch, localized patches will immediately rip under thermal stress. Verdict: Complete membrane replacement.
By accurately identifying your specific shed roof material and applying the correct, chemically and mechanically sound repair techniques, you can extend the service life of your structure by a decade or more, avoiding the high costs of premature replacement.
Written by
Sarah WhitfieldSarah Whitfield is a chartered quantity surveyor (MRICS) and construction cost analyst with 15 years of experience in material pricing, procurement strategy, and project budgeting. She earned her degree in Construction Management from the University of Reading (UK) and has worked on projects ranging from $2M custom homes to $180M mixed-use developments across North America and Europe. Sarah currently leads cost estimating for BuildMat Insight, maintaining a proprietary database of 4,000+ material price points updated quarterly. She is a frequent contributor to RSMeans cost data panels and has presented at the International Cost Engineering Council (ICEC) congress. Based in Denver, CO, Sarah is an avid trail runner and volunteer mentor for Women in Construction.
More from Sarah Whitfield
View all
Wood & Lumber
What Are the Different Types of Wood? A Builder's Guide
Compare structural softwoods, finish hardwoods, and engineered lumber. Analyze Janka ratings, MOE values, and 2026 pricing for construction.
Aug 4, 2026

Walls & Panels
Steel Framing vs Wood Framing: Corrosion and Moisture Defense
Compare steel framing vs wood framing for moisture resistance. Learn about galvanized coatings, condensation risks, and corrosion protection strategies.
Jul 21, 2026

Stone & Masonry
How to Cut Stone Veneer: Wet Saw vs Grinder Comparison
Compare the best tools for cutting stone veneer. We review wet saws, angle grinders, and chop saws to help you achieve clean, chip-free cuts.
Jul 21, 2026