How to Repair and Maintain Single Ply Membrane Roofing Materials
Learn expert repair and maintenance techniques for single ply membrane roofing materials, including EPDM, TPO, and PVC patching and seam welding.

The Diagnostic Approach: Identifying Membrane Failures
Single ply membrane roofing materials—primarily EPDM, TPO, and PVC—dominate the commercial low-slope market due to their flexibility, UV resistance, and ease of installation. However, environmental stressors, HVAC foot traffic, and thermal cycling inevitably cause seam separation, punctures, and shrinkage. Repairing these systems requires membrane-specific chemistry and precise thermal applications; using the wrong adhesive or patch material will result in catastrophic chemical degradation and voided warranties.
Before initiating any repair, facility managers and roofing contractors must accurately diagnose the failure mode. The National Roofing Contractors Association (NRCA) emphasizes that misidentifying the membrane polymer is the leading cause of premature repair failure.
| Symptom | Membrane Type | Root Cause | Primary Repair Protocol |
|---|---|---|---|
| Seam peeling / fishmouths | TPO / PVC | Insufficient heat-weld temperature or moisture during install | Clean, re-weld with hot air, and probe test |
| Shrinkage at parapets | EPDM | UV degradation and lack of mechanical fastening | Install uncured EPDM flashing and termination bars |
| Chalking / surface erosion | TPO (Early gen) | Polymer breakdown from standing water and UV | Silicone or urethane roof restoration coating |
| Punctures / tears | All Types | Dropped tools, hail, or unauthorized foot traffic | Clean, prime (if EPDM), and apply 3-inch overlap patch |
EPDM Repair Protocols: Seam and Puncture Fixes
Ethylene Propylene Diene Monomer (EPDM) is a thermoset rubber, meaning it cannot be heat-welded. Repairs rely on chemical adhesives, pressure-sensitive tapes, and liquid rubber compounds. Most commercial EPDM systems are 45-mil or 60-mil thick, available in both reinforced (polyester scrim) and non-reinforced variants.
Patching Punctures in EPDM
For standard punctures under 2 inches in diameter, a peel-and-stick patch is sufficient. For larger tears, use a cured EPDM membrane patch with a lap sealant.
- Clean the Area: Use a dedicated EPDM cleaner (e.g., Elevate QuickPrime Plus or Carlisle Splice Wash) to remove dirt, oils, and oxidation. The surface must be completely dry.
- Apply Primer: Roll a thin, even coat of primer over the repair area. Allow it to flash off until it is tacky but does not transfer to a dry knuckle (typically 10 to 15 minutes at 70°F).
- Set the Patch: Cut a patch that extends a minimum of 3 inches past the damage in all directions. Roll the patch from the center outward using a heavy-duty silicone seam roller to eliminate air pockets.
- Seal the Edges: Apply a continuous 1/4-inch bead of EPDM lap sealant around the entire perimeter of the patch to prevent water wicking under the edges.
Never use asphalt-based flashings, bitumen, or petroleum distillates on or near EPDM, TPO, or PVC membranes. Asphalt causes the plasticizers in single ply membrane roofing materials to leach out, resulting in severe brittleness, cracking, and irreversible membrane failure within months.
TPO and PVC Heat-Weld Patching Procedures
Thermoplastic Olefin (TPO) and Polyvinyl Chloride (PVC) membranes are thermoplastic, allowing them to be fused together using hot air. This creates a monolithic, watertight bond that is often stronger than the membrane itself. According to the Single-Ply Roofing Industry (SPRI), proper heat-welding requires strict adherence to ambient temperature adjustments.
Step-by-Step Puncture Repair (TPO/PVC)
Repairing a thermoplastic membrane requires a hot-air welding gun (such as a Leister Triac) or an automatic welder for long seams. The weld temperature typically ranges between 950°F and 1100°F, but this must be adjusted based on ambient temperature, wind speed, and membrane thickness.
- Surface Preparation: Wash the area with a TPO/PVC-specific cleaner. Unlike EPDM, TPO does not require chemical primers; the heat activates the polymers. However, the surface must be entirely free of dust and grease.
- Cut the Patch: Use a matching TPO or PVC membrane (ensure you match the manufacturer and generation, as polymer formulations vary wildly between brands and years). Cut the patch with a 3-inch overlap on all sides. Round the corners of the patch to prevent edge peeling.
- Tack Weld: Use the welding gun to tack the center of the patch to hold it in place.
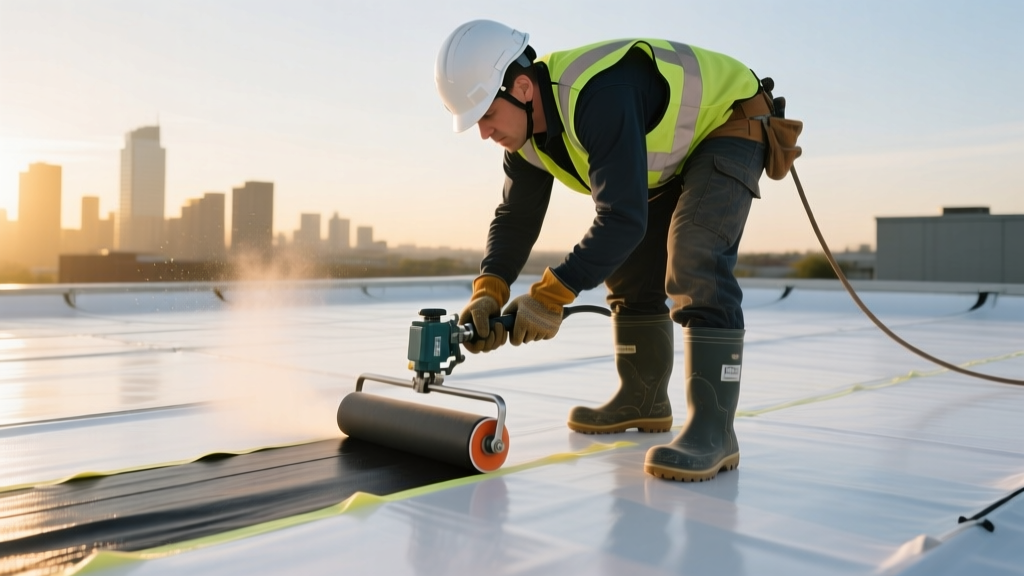
- Perimeter Welding: Insert the nozzle of the hot-air gun between the patch and the base membrane. Follow immediately with a silicone roller, applying firm, consistent pressure. The ideal weld width is 1.5 inches.
- Probe Testing: Once the weld cools (approximately 30 minutes), run a blunt seam probe or cotter pin along the entire outer edge of the weld. If the probe catches or penetrates the seam, mark the spot and re-weld.
2026 Repair Cost Estimates and Material Pricing
Budgeting for single ply membrane roofing materials repair requires understanding the split between specialized materials and certified labor. Below are the average commercial repair costs for 2026:
| Repair Type | Material Cost | Labor Cost | Total Estimated Range |
|---|---|---|---|
| EPDM Puncture Patch (per patch) | $25 - $45 | $85 - $150 | $110 - $195 |
| TPO/PVC Seam Re-welding (per linear ft) | $2 - $5 | $6 - $12 | $8 - $17 / lin. ft. |
| Pipe Penetration Boot Replacement | $40 - $90 | $150 - $250 | $190 - $340 |
| Silicone Coating Restoration (per sq. ft.) | $1.80 - $2.50 | $1.50 - $3.00 | $3.30 - $5.50 / sq. ft. |
Preventative Maintenance: Extending Membrane Lifespan
Reactive repairs are exponentially more expensive than proactive maintenance. The U.S. Department of Energy notes that maintaining the reflectivity and structural integrity of cool roofs (like white TPO and PVC) directly impacts building energy efficiency and prevents premature membrane degradation.
Bi-Annual Inspection Checklist
- Spring/Fall Seam Audits: Walk all primary seams and flashings. Look for fishmouths, discoloration, or dirt accumulation that indicates micro-leaks.
- Penetration Flashing: Inspect pourable sealant pockets around HVAC curbs and pipe boots. Re-caulk with polyurethane sealant if cracking is observed.
- Drainage Clearing: Remove debris from scuppers and internal drains. Standing water accelerates the breakdown of plasticizers in PVC and promotes biological growth on TPO.
- Fastener Back-Out: On mechanically attached systems, check for 'tenting' where fasteners push up against the membrane. Install fastener plates and patches immediately to prevent punctures.
Frequently Asked Questions
Can I use a liquid rubber coating to repair a TPO roof?
Standard acrylic or asphalt-based liquid rubbers will not adhere properly to TPO or PVC due to their non-porous, chemical-resistant surfaces. If liquid restoration is required, you must use a 100% silicone roof coating or a specialized urethane system designed specifically for thermoplastic substrates, applied only after a rigorous power-washing and primer phase.
How do I identify if my existing single ply membrane is TPO or PVC?
If the membrane lacks identifying markings, perform a burn test on a small scrap piece in a safe environment. PVC contains chlorine and will self-extinguish when removed from a flame, emitting a sharp, acidic odor. TPO will continue to burn, melt, and drip like candle wax, producing a petroleum-like scent. Alternatively, use a copper wire heated with a torch; touching it to PVC and returning it to the flame will turn the flame green due to the chlorine content.
Written by
Elena RodriguezElena Rodriguez is a civil engineer and technical writer specializing in concrete technology, masonry systems, and ASTM/ACI compliance. She earned her B.S. in Civil Engineering from Texas A&M University and spent a decade at a materials testing laboratory, performing over 2,000 concrete compressive strength tests and masonry prism evaluations. Elena is an ACI-certified Field Testing Technician (Grade I) and a member of ASTM Committee C12 on Natural Building Stone. She currently consults on forensic engineering cases involving concrete failures and moisture intrusion. Based in San Antonio, TX, Elena is a proud member of the Society of Women Engineers (SWE) and coaches her daughter's FIRST Robotics team.
More from Elena Rodriguez
View all
Walls & Panels
Cost Analysis: Light Gauge Steel Framing Advantages and Disadvantages
Evaluate light gauge steel framing advantages and disadvantages through a strict cost analysis lens, comparing material, labor, and lifecycle expenses.
Aug 4, 2026

Walls & Panels
Gypsum Board Types: Exact Specifications, Thickness & Dimensions
Compare standard, Type X, and moisture-resistant gypsum board types. Get exact specifications, thicknesses, dimensions, and ASTM standards for your project.
Aug 4, 2026

Fire Resistance
Best Fire-Resistant Outdoor Decking Materials: 2026 Buyer Guide
Discover the best fire-resistant outdoor decking materials for 2026. Compare Class A PVC, aluminum, and hardwood options for WUI compliance and safety.
Aug 4, 2026