Complete Guide to TPO Roofing Materials & Costs in 2026
Explore TPO roofing materials, including 2026 installation costs, 60-mil vs 80-mil specifications, seam welding techniques, and system comparisons.

The Anatomy of TPO: What Makes It the Commercial Standard?
Thermoplastic Polyolefin (TPO) has captured over 40% of the North American low-slope commercial roofing market. Unlike EPDM (a thermoset rubber) or PVC (which relies on plasticizers that can migrate over time), TPO roofing materials are formulated from a blend of polypropylene and ethylene-propylene polymers. This composition yields a single-ply membrane that is inherently flexible, UV-resistant, and does not require plasticizers to maintain its structural integrity.
- Reinforcement: Anti-wicking polyester scrim encapsulated between two TPO plies.
- Standard Thicknesses: 45-mil, 60-mil, and 80-mil (1 mil = 0.001 inches).
- Standard Widths: 10-foot and 12-foot rolls to minimize field seams.
- Reflectivity: White TPO membranes typically achieve an initial solar reflectance of 0.80+ and thermal emittance of 0.90+, easily meeting EPA Heat Island Effect guidelines for cool roofs.
2026 Cost Breakdown: Material, Labor, and System Types
Pricing for TPO systems fluctuates based on petroleum derivatives, insulation requirements, and regional labor rates. The data below reflects Q1 2026 national averages for commercial installations over a standard polyisocyanurate insulation base.
| Membrane Thickness | Mechanically Attached (per sq. ft.) | Fully Adhered (per sq. ft.) | Typical Warranty |
|---|---|---|---|
| 45-Mil | $5.50 - $7.00 | $7.50 - $9.00 | 10 - 15 Years |
| 60-Mil (Industry Standard) | $6.50 - $8.50 | $8.50 - $11.00 | 20 Years NDL |
| 80-Mil | $7.50 - $9.50 | $10.00 - $13.50 | 25 - 30 Years NDL |
Note: NDL (No Dollar Limit) warranties cover both materials and labor for leak repairs. These costs exclude structural deck repairs, tear-offs of existing roofing, or the addition of high-density cover boards.
Attachment Methods: Mechanically Fastened vs. Fully Adhered
The longevity of TPO roofing materials is heavily dictated by how the membrane is secured to the substrate. Choosing the wrong attachment method for your specific wind zone or deck type is a primary cause of premature system failure.
Mechanically Attached Systems
In this system, the insulation and membrane are secured using heavy-duty steel plates and corrosion-resistant fasteners driven directly into the structural deck. The TPO seams are then hot-air welded over the fastener line.
- Best For: Steel and wood decks, new construction, and buildings in moderate wind zones.
- Advantage: Faster installation and lower labor costs. Allows for slight substrate movement without stressing the membrane.
- Limitation: Fastener spacing must be tightened at the perimeters and corners (typically 12 inches on center) to meet FM Global or UL wind uplift ratings.
Fully Adhered Systems
The membrane is rolled out into a specialized low-VOC water-based or solvent-based adhesive applied to the substrate (usually a cover board or insulation facer).
- Best For: Concrete decks, buildings in high-velocity hurricane zones (HVHZ), and structures where deck penetration is prohibited.
- Advantage: Superior wind uplift resistance, smoother aesthetic appearance (no fastener ripples), and enhanced puncture resistance due to continuous support.
- Limitation: Highly weather-dependent during installation; adhesives will not cure properly if ambient temperatures drop below 40°F (4°C) or if moisture is present.
The Critical Weakness: Seam Welding and Failure Modes
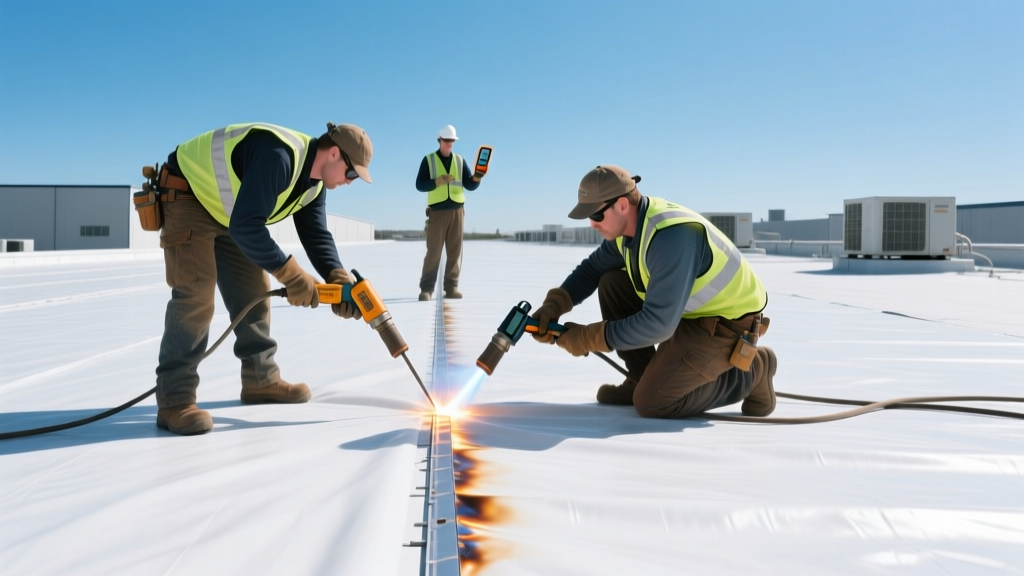
TPO membranes do not cure or vulcanize like EPDM; they are thermoplastic. This means seams are fused together using hot air, creating a monolithic, homogenous bond that is theoretically stronger than the membrane itself. However, field execution is where most TPO systems fail.
1. Cold Welds: Occur when the robotic welder moves too fast (over 15 ft/min) or the nozzle temperature drops below 1000°F. The top ply melts, but the bottom ply fails to fuse, leading to hidden seam peeling during high winds.
2. Scorched Membrane: If nozzle temperatures exceed 1150°F or the machine stalls, the TPO degrades, losing its UV stabilizers and becoming brittle.
3. T-Joint Vulnerabilities: Where three seams intersect (a T-joint), the thickness variation creates a capillary path for water. Installers must use pre-fabricated T-joint covers or apply a specialized TPO-compatible sealant and uncured flashing patch over every single T-joint.
Substrate Compatibility and the Cover Board Imperative
A frequent mistake in commercial roofing is installing TPO directly over soft polyisocyanurate (polyiso) insulation. While polyiso offers excellent R-values (typically R-5.7 per inch), its facers can delaminate under the thermal expansion and contraction cycles of a white TPO membrane. Furthermore, foot traffic from HVAC maintenance will crush the polyiso, causing the TPO to fatigue and puncture.
The 2026 Best Practice: Always specify a cover board between the polyiso and the TPO membrane.
- High-Density Polyiso (HD ISO): Adds R-5.0 and provides a firm walking surface.
- Glass-Mat Gypsum Board (1/2 inch): Adds fire resistance, acoustic dampening, and exceptional dimensional stability.
- Asphaltic Core Boards: Ideal for high-traffic roofs or roofs with heavy solar panel arrays.
TPO vs. PVC and EPDM: A Decision Matrix
While TPO is highly versatile, it is not the universal solution for every low-slope application. Use this matrix to determine if TPO is the correct specification for your project.
| Feature | TPO | PVC | EPDM |
|---|---|---|---|
| Chemical Resistance | Moderate (Fails near grease vents) | Excellent (Ideal for restaurants) | Poor (Degrades with oils/fats) |
| Seam Method | Hot Air Welded | Hot Air / Solvent Welded | Tape / Liquid Adhesive |
| Solar Reflectance | High (White options) | High (White options) | Low (Typically Black) |
| Cold Weather Flexibility | Good (Stiffens below 20°F) | Excellent | Superior (Remains flexible to -40°F) |
| Relative Installed Cost | $ (Most Economical) | $$$ (Premium) | $$ (Mid-Range) |
Energy Efficiency and Code Compliance
White TPO membranes are a cornerstone of modern energy-efficient building envelopes. According to the Department of Energy's Cool Roof standards, highly reflective roofs can reduce peak cooling demand by 10% to 15%. In 2026, updated ASHRAE 90.1 energy codes in most climate zones (Zones 1 through 4) mandate minimum aged solar reflectance values that only white or light-gray single-ply membranes can reliably achieve without the need for reflective coatings.
However, facility managers in northern climates (Zones 5 and above) should consider the 'winter heating penalty.' A highly reflective white TPO roof will not absorb winter solar heat, potentially increasing heating loads. In these regions, specifying a tan or gray TPO membrane, or adding thicker polyiso insulation layers (achieving R-35 to R-40+), offsets the reflectivity penalty while maintaining the waterproofing benefits of the TPO system.
Final Specification Checklist for Architects and Owners
Before finalizing your roofing bid, ensure your specifications explicitly state the following to avoid contractor substitutions that compromise system integrity:
- Membrane Origin: Require TPO manufactured by top-tier producers (e.g., Carlisle SynTec, GAF, or Holcim Elevate) with a proven track record of formulation consistency.
- Thickness Mandate: Explicitly specify 60-mil or 80-mil; do not allow 'or equal' substitutions for 45-mil unless it is a non-critical, short-term outbuilding.
- Fastener Specs: Mandate heavy-duty, corrosion-coated fasteners with 3-inch diameter plates for mechanical attachments.
- Quality Assurance: Require the contractor to perform destructive seam testing (peel tests) at the start of each workday and after every nozzle change, documenting the results for the manufacturer's warranty file.
Written by
David NakamuraDavid Nakamura is a licensed architect (AIA) and construction technology writer focused on sustainable building methods, mass timber engineering, and high-performance building envelopes. He holds a Master of Architecture from the University of Washington and is a certified Passive House Consultant (CPHC). David spent eight years at the Seattle firm Mithun, where he led the design of three LEED Platinum projects, before founding his own practice specializing in net-zero residential design. He serves on the editorial advisory board of GreenBuilder Magazine and has authored peer-reviewed papers on cross-laminated timber (CLT) connections for the Journal of Structural Engineering. In his spare time, David teaches woodworking at Pratt Fine Arts Center and kayaks the Puget Sound.
More from David Nakamura
View all
Construction Cost
Labor Cost to Build a Deck Per Sq Ft: 2026 Installation Guide
Discover the exact labor cost to build a deck per sq ft in 2026. This installation guide breaks down contractor rates, complexity factors, and hidden fees.
Aug 4, 2026

Construction Cost
How Much Does It Cost to Build a 3 Bedroom House? Financing Guide
Learn exactly how much it costs to build a 3 bedroom house and explore 2026 financing options, construction loan types, and budget frameworks for your build.
Aug 4, 2026

Construction Cost
Cost to Build a Tennis Court: 2026 Guide
How much does it cost to build a tennis court in 2026? Breakdowns for asphalt, concrete, and synthetic surfaces plus fencing and lighting.
Jul 30, 2026