Fireplace Insulation Material Guide: High-Temp Types and Installation
Expert guide to choosing and installing fireplace insulation material. Compare mineral wool, ceramic fiber, and calcium silicate for safe, code-compliant builds.

The Hidden Danger of Pyrolysis in Fireplace Construction
When insulating around a fireplace, the primary enemy is not just direct flame contact, but a process called pyrolysis. Wood framing exposed to sustained temperatures as low as 150°F to 200°F over several years undergoes chemical changes, gradually lowering its auto-ignition point to as little as 200°F. Standard building insulation fails catastrophically in these zones. Selecting the correct fireplace insulation material is not merely about thermal retention; it is a critical life-safety intervention to prevent structural fires caused by radiant heat transfer and compromised clearances to combustibles.
According to the FEMA U.S. Fire Administration, improper clearance and inadequate thermal barriers are leading causes of residential heating fires. This guide details the exact high-temperature materials required for masonry fireplaces, zero-clearance units, and fireplace inserts, alongside precise installation protocols.
Never use standard fiberglass batt insulation (pink or yellow rolls) directly against a firebox, chimney flue, or fireplace insert. The kraft paper or foil facing is highly combustible. Furthermore, the binder resins in standard fiberglass vaporize at 250°F (121°C). Once the binder burns off, the glass fibers slump and collapse, leaving your wood framing completely exposed to radiant heat.
Fireplace Insulation Material Comparison Matrix
Different fireplace configurations demand specific thermal breakpoints. Use this matrix to select the appropriate material based on your maximum expected surface temperature and spatial constraints.
| Material Type | Specific Product Examples | Max Temp Limit | R-Value (per inch) | Best Application | Avg Cost (per sq ft) |
|---|---|---|---|---|---|
| High-Temp Mineral Wool | Rockwool ProRox SL 960, Thermafiber SAFB | 2,150°F (1,177°C) | R-4.2 | Wall cavities behind masonry fireplaces, fireblocking | $1.50 - $2.50 |
| Ceramic Fiber Blanket | Kaowool, Insulfrax, Morgan Superwool | 2,300°F (1,260°C) | R-3.5 | Direct firebox wrapping, chase insulation for inserts | $3.00 - $4.50 |
| Calcium Silicate Board | Promat PROMASIL-1100KS, Skamol | 2,000°F (1,093°C) | R-2.8 | Rigid backing boards, zero-clearance framing shields | $8.00 - $12.00 |
| Microporous Board | Insulboard, Microtherm | 1,800°F (982°C) | R-6.0 | Tight-clearance inserts, premium hearth extensions | $15.00 - $20.00 |
Deep Dive: Selecting the Right Material for Your Build
1. Mineral Wool for Masonry and Cavity Insulation
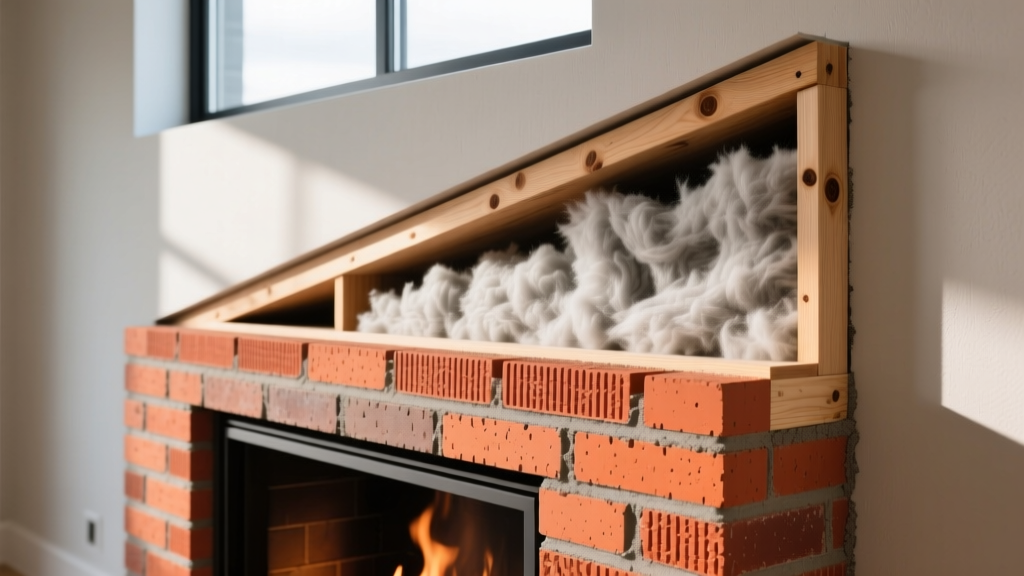
For the stud cavities surrounding a masonry fireplace or a factory-built chimney chase, high-density mineral wool is the industry standard. Unlike residential acoustic batts, industrial-grade mineral wool (such as Rockwool ProRox) is spun from basalt rock and slag, containing zero combustible binders. It maintains its structural integrity and R-value even when subjected to prolonged heat. Application Tip: Always maintain the mandatory 2-inch air gap between the masonry chimney and the mineral wool insulation to allow for convective cooling, as mandated by NFPA 211 standards.
2. Ceramic Fiber for Direct Insert Wrapping
When retrofitting a wood-burning or gas insert into an existing masonry firebox, the metal chassis of the insert can reach extreme surface temperatures. Ceramic fiber blankets (often sold in 1-inch or 2-inch thicknesses) are flexible, allowing you to wrap the insert's surround panels or line the back of the firebox. Ceramic fiber is bio-soluble in modern formulations (like Superwool), reducing respiratory risks during installation compared to older refractory ceramic fibers (RCF).
3. Calcium Silicate for Rigid Zero-Clearance Shields
When building out a zero-clearance fireplace surround where wood framing must be brought close to the manufacturer's specified clearance lines, rigid calcium silicate boards are required. These boards can be cut with standard woodworking tools, screwed into metal studs, and finished with high-temperature joint compound. They provide a structural, non-combustible thermal break that prevents heat transfer to adjacent drywall or wood mantels.
Step-by-Step Application: Insulating a Fireplace Insert Chase
Installing a fireplace insert requires sealing the old firebox to prevent cold air infiltration while protecting the surrounding masonry. Follow this sequence for a code-compliant thermal envelope.
- Prep and Clean the Firebox: Remove all creosote, ash, and loose mortar. Seal any cracks in the masonry with a high-temperature refractory cement (rated for 2,000°F+). Allow 48 hours to cure.
- Install the Backer Board: Cut calcium silicate board to fit the back and side walls of the existing firebox. Secure it using high-temp silicone adhesive and masonry anchors. Pro Tip: Leave a 1-inch gap at the bottom to allow any trapped moisture to weep out.
- Apply the Ceramic Fiber Layer: Over the rigid backer board, apply a 1-inch layer of ceramic fiber blanket. Use high-temperature metal weld pins and self-locking washers to pin the blanket to the calcium silicate board. Do not compress the blanket; its R-value depends on its loft.
- Seal the Insert Collar: When sliding the insert into place, use a ceramic fiber rope gasket and high-temperature RTV silicone (rated to 450°F minimum) to seal the gap between the insert's metal surround and the masonry face. This prevents room air from being drawn into the cold chimney chase.
- Block the Damper: Seal the old damper opening with a custom-cut piece of sheet metal and high-temp sealant, routing the stainless steel chimney liner directly to the insert's flue collar.
Code Compliance Note: The Chimney Safety Institute of America (CSIA) and NFPA 211 dictate that any insulation used within a chimney chase or fireplace enclosure must not impede the required cooling air pathways of factory-built fireplaces. Never pack insulation tightly against the louvers or cooling vents of a zero-clearance unit.
Cost and Sourcing Considerations for 2026
Sourcing high-temperature fireplace insulation material often requires looking beyond big-box home improvement stores. While standard mineral wool is available at retail, ceramic fiber blankets and calcium silicate boards are typically sourced through specialized HVAC suppliers, masonry distributors, or direct from industrial insulation fabricators. Budget approximately $350 to $600 for the complete insulation and sealing materials required for a standard 36-inch fireplace insert retrofit, excluding the cost of the chimney liner and the insert itself.
Frequently Asked Technical Questions
Can I use closed-cell spray foam behind a fireplace surround?
No. Closed-cell polyurethane spray foam is highly combustible and will melt or ignite when exposed to the radiant heat of a fireplace. Even "fire-retardant" spray foams are only designed to resist ignition from a brief flame exposure, not sustained thermal radiation. Always use rigid mineral wool or calcium silicate in these cavities.
Do I need to insulate the chimney liner inside the masonry chimney?
Yes, if you are installing a wood-burning insert. Pouring a vermiculite/Portland cement mix (like Chim-All) or wrapping the stainless steel liner with a ceramic fiber blanket keeps the flue gases hot. Hot flue gases improve draft and significantly reduce the accumulation of highly flammable creosote on the liner walls.
How do I handle electrical wires running behind the fireplace?
Electrical wiring must never be embedded directly in high-temp insulation or placed against the firebox. Route all wiring through rigid metal conduit (EMT) and maintain the manufacturer's specified clearance to the fireplace unit. If the wire supplies a gas valve or blower, use only the manufacturer-approved high-temperature wire harness.
Written by
David NakamuraDavid Nakamura is a licensed architect (AIA) and construction technology writer focused on sustainable building methods, mass timber engineering, and high-performance building envelopes. He holds a Master of Architecture from the University of Washington and is a certified Passive House Consultant (CPHC). David spent eight years at the Seattle firm Mithun, where he led the design of three LEED Platinum projects, before founding his own practice specializing in net-zero residential design. He serves on the editorial advisory board of GreenBuilder Magazine and has authored peer-reviewed papers on cross-laminated timber (CLT) connections for the Journal of Structural Engineering. In his spare time, David teaches woodworking at Pratt Fine Arts Center and kayaks the Puget Sound.
More from David Nakamura
View all
Construction Cost
Labor Cost to Build a Deck Per Sq Ft: 2026 Installation Guide
Discover the exact labor cost to build a deck per sq ft in 2026. This installation guide breaks down contractor rates, complexity factors, and hidden fees.
Aug 4, 2026

Construction Cost
How Much Does It Cost to Build a 3 Bedroom House? Financing Guide
Learn exactly how much it costs to build a 3 bedroom house and explore 2026 financing options, construction loan types, and budget frameworks for your build.
Aug 4, 2026

Construction Cost
Cost to Build a Tennis Court: 2026 Guide
How much does it cost to build a tennis court in 2026? Breakdowns for asphalt, concrete, and synthetic surfaces plus fencing and lighting.
Jul 30, 2026