How to Apply the Best Waterproof Material for Shoes by Fabric Type
Learn exact application techniques for every waterproof material for shoes. Master DWR sprays, waxes, and silicone treatments for leather, suede, and canvas.

The Chemistry of Footwear Hydrophobics
The efficacy of any waterproof material for shoes depends entirely on the chemical interaction between the hydrophobic agent and the substrate's surface tension. Applying a heavy wax to a microporous synthetic membrane will destroy its breathability, while using a light fluorocarbon-free spray on full-grain leather will result in rapid wet-out. To achieve true hydrophobicity without compromising the structural integrity of the footwear, you must match the chemical carrier to the material's porosity.
Historically, the footwear industry relied on C8 and C6 fluorocarbons for Durable Water Repellent (DWR) treatments. However, due to stringent EPA regulations on per- and polyfluoroalkyl substances (PFAS), the market has shifted aggressively toward C0 (PFC-free) formulations. These modern C0 DWRs utilize hyper-branched polyurethanes and dendrimeric siloxanes. While environmentally superior, C0 treatments require much more precise application techniques—specifically regarding ambient temperature, substrate preparation, and thermal curing—to achieve the same contact angles (>140°) as legacy fluorocarbons.
Substrate-to-Material Application Matrix
Before selecting a product, identify your shoe's primary upper material. The wrong pairing will either fail to repel water or permanently damage the footwear's moisture-vapor transmission rate (MVTR). According to SATRA Technology's footwear testing standards, improper chemical application is the leading cause of premature delamination in waterproof footwear.
| Substrate Material | Optimal Waterproof Material | Application Tool | Breathability Impact |
|---|---|---|---|
| Full-Grain Leather | Beeswax/Siloxane Emulsion Paste | Horsehair brush + Heat gun | Low (Reduces MVTR by ~15%) |
| Nubuck & Suede | C0 (PFC-Free) DWR Aerosol | Fine-mist spray nozzle | None (Preserves nap & pores) |
| Canvas & Cotton Blends | Wash-in Silicone Water Repellent | Sponge saturation or washing machine | Moderate (Fills woven gaps) |
| Synthetic Mesh / Nylon | Water-based Fluorocarbon-Free Spray | Pump-action targeted sprayer | Minimal (Coats fibers only) |
| Gore-Tex / eVent Membranes | Specific Membrane-Safe DWR | Aerosol mist (outer face only) | None (If applied correctly) |
Precision Application Protocols
Full-Grain Leather: Wax & Siloxane Emulsions
Full-grain leather is highly porous and requires a penetrative waterproof material for shoes that lubricates the fibers while blocking capillary action. Products like Sno-Seal or Nikwax Waterproofing Wax for Leather utilize a water-based siloxane and beeswax emulsion.
- Preparation: Clean the leather with a pH-balanced saddle soap. The leather must be damp (not soaking wet) during application. Water acts as a carrier, pulling the wax emulsion deep into the dermal layers.
- Application: Apply a generous, even layer of the paste using a horsehair dauber. Focus heavily on the welt-to-upper stitching line, which is the primary ingress point for water.
- Thermal Activation: Use a heat gun set to exactly 110°F–120°F (43°C–49°C). Keep the nozzle moving at a distance of 6 inches. The goal is to melt the beeswax (which has a melting point of roughly 145°F) so it wicks into the leather's corium layer without cooking the hide or degrading the polyurethane midsole adhesive.
- Buffing: After a 20-minute cooling period, buff the surface with a microfiber cloth to remove excess surface wax that could attract abrasive dirt.
Suede & Nubuck: C0 DWR Aerosols
Suede and nubuck rely on their raised nap for texture and color depth. Applying waxes or heavy silicones will mat the fibers, permanently darkening and stiffening the material. You must use a C0 DWR aerosol that deposits microscopic hydrophobic polymers on individual fibers without bridging the gaps between them.
- Nap Preparation: Brush the dry suede vigorously with a brass-bristled suede brush to lift the nap and remove embedded silicates.
- Spray Dynamics: Hold the aerosol can exactly 8 to 10 inches from the shoe. Spray in a continuous, overlapping grid pattern. The mist must be fine enough to coat the fibers without pooling on the surface.
- Layering: Apply two light coats rather than one heavy coat. Wait 15 minutes between coats to allow the water carrier to flash off.
- Nap Restoration: Once fully cured (minimum 24 hours), brush the suede again to separate any fibers that may have lightly bonded during the drying process.
Canvas & Woven Synthetics: Wash-in vs. Spray-on
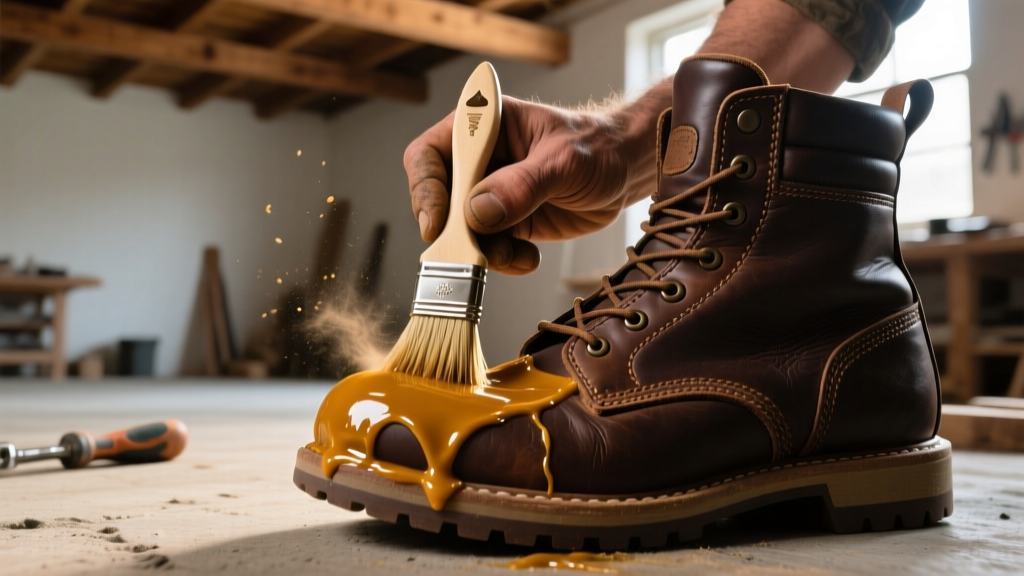
For unlined canvas shoes or heavy ballistic nylon uppers, wash-in silicone treatments (like Grangers Footwear Repel) offer superior penetration. Because these materials lack a dermal structure, the waterproofing agent must coat every individual yarn within the weave.
Critical Failure Modes & Troubleshooting
Even high-end waterproof materials for shoes will fail if application parameters are ignored. Below are the most common field failures and their chemical causes.
Symptom: The nylon or polyester thread holding the sole to the upper begins to fray and snap after repeated applications of heavy silicone sprays.
Cause: Certain low-grade solvent-based silicone sprays degrade the tensile strength of synthetic threads over time.
Fix: Switch to water-based emulsions. Always check the product label to ensure it is explicitly marked 'safe for synthetic stitching and Gore-Tex membranes'.
Symptom: Waterproof hiking boots feel wet on the inside, but the interior liner is actually dry. The foot is sweating profusely.
Cause: Over-application of wax or DWR has clogged the microscopic pores of the outer fabric, destroying breathability. The internal moisture (sweat) cannot escape, condensing against the membrane.
Fix: Strip the outer fabric using a specialized technical cleaner (e.g., Nikwax Tech Wash) to remove the clogged polymers, then reapply a highly breathable, membrane-specific DWR in a single, light mist.
Curing Kinetics and Maintenance Timelines
The curing phase is where the chemical cross-linking occurs. Rushing this process compromises the durability of the hydrophobic barrier. According to REI's expert boot care guidelines, environmental conditions during the curing window dictate the lifespan of the treatment.
- Temperature & Humidity: Apply and cure all DWRs and waxes in environments between 60°F and 75°F (15°C–24°C) with relative humidity below 65%. High humidity traps water molecules beneath the polymer layer, leading to a cloudy finish and weak substrate adhesion.
- Cure Time: While a shoe may feel dry to the touch in 2 hours, full polymer cross-linking requires 24 to 48 hours. Do not expose the footwear to moisture or abrasion during this window.
- Reapplication Intervals: For daily commuter shoes, reapply DWR every 4 to 6 weeks. For heavy-duty hiking boots subjected to abrasive scree and mud, reapply wax-based treatments every 30 to 40 miles of active use, as mechanical friction physically strips the hydrophobic layer from the leather's surface.
Mastering the application of these materials transforms standard footwear into highly capable, weather-resistant gear. By respecting the chemical nature of the substrate and adhering to strict thermal and environmental application protocols, you ensure maximum water repellency without sacrificing the comfort and longevity of the shoe.
Written by
Marcus ChenMarcus Chen is a licensed structural engineer (PE) and building materials analyst with over 12 years of experience across residential, commercial, and industrial construction. He holds a Master of Science in Civil Engineering from UC Berkeley and spent six years at Thornton Tomasetti before transitioning to independent consulting and technical writing. Marcus specializes in material selection for seismic-prone regions, concrete reinforcement strategies, and lifecycle cost analysis. His work has been cited by the American Concrete Institute (ACI) and the Structural Engineers Association of California (SEAOC). When he is not on a job site or at his desk, you will find him hiking the Sierra Nevada or restoring a 1920s craftsman bungalow in Oakland, CA.
More from Marcus Chen
View all
Construction Cost
How Much Did the Eiffel Tower Cost to Build?
How much did the Eiffel Tower cost to build in 1889? We adjust for inflation and compare its budget to modern skyscraper construction.
Aug 4, 2026

Fire Resistance
What Is a Fire Resistant Material? Testing & Certification Guide
Discover what is a fire resistant material through ASTM and UL testing. Learn how fire ratings, certifications, and assemblies work in construction.
Aug 4, 2026

Construction Cost
How Much Did the Burj Khalifa Cost to Build?
How much did the Burj Khalifa cost to build? We break down the $1.5B project and extract 5 money-saving strategies for your next build.
Jul 30, 2026