Troubleshooting Flexible Waterproof Material Membrane Failures
Diagnose and fix common failures in flexible waterproof material membranes, including blistering, adhesion loss, and seam tears with expert repair steps.

The Anatomy of Flexible Membrane Failures
Liquid-applied elastomerics and single-ply sheet membranes represent the most common flexible waterproof material systems used in modern construction. Unlike rigid cementitious coatings, these systems—ranging from polyurethanes and silicones to TPO, PVC, and EPDM sheets—are engineered to accommodate structural movement, thermal expansion, and substrate cracking. However, their flexibility introduces unique failure modes when installation parameters or environmental conditions deviate from manufacturer specifications.
According to the U.S. Department of Energy's Building Envelope guidelines, moisture intrusion through compromised flexible membranes accounts for over 70% of commercial roofing and below-grade warranty claims. Troubleshooting these failures requires moving beyond surface-level patching to identify the root mechanical or chemical breakdown.
- Visual: Are blisters clustered near drains or randomly distributed?
- Tactile: Does the membrane feel spongy (trapped moisture) or brittle (UV degradation)?
- Thermal: Use an infrared camera to detect temperature differentials indicating subsurface water pooling.
Symptom 1: Blistering in Liquid-Applied Elastomerics
Blistering in liquid-applied flexible waterproof material systems, such as polyurethane or acrylic coatings, typically manifests as raised, fluid- or gas-filled domes. This is rarely a product defect; it is almost always a substrate preparation failure.
Root Cause Analysis: Osmotic vs. Outgassing Blisters
You must distinguish between the two primary types of blisters before attempting a repair:
- Osmotic Blisters: Caused by moisture vapor transmission (MVT) from a damp concrete substrate. The moisture reacts with the coating, creating a semi-permeable cell that draws in more water, expanding the blister. These feel fluid-filled and are often clustered.
- Outgassing Blisters: Caused by air trapped in porous concrete expanding under solar heat. These feel hollow and are usually randomly distributed across the surface.
Before applying any liquid membrane, concrete must be tested per ASTM F2170 (relative humidity probe) showing <75% RH, or ASTM F1869 (calcium chloride test) showing <3 lbs per 1,000 sq ft per 24 hours.
Step-by-Step Remediation Protocol
- Core and Vent: Do not simply slice the blister. Use a 1-inch hole saw to core the center of the blister down to the substrate, allowing trapped moisture to escape.
- Forced Drying: Use a heat gun on a low setting (max 150°F) to dry the exposed substrate for 15-20 minutes.
- Inject and Seal: Inject a moisture-curing polyurethane sealant (e.g., Sikaflex-11 FC) into the void to displace residual air and bond the membrane back to the substrate.
- Patch and Topcoat: Apply a 40-mil thick patch of the original elastomeric coating, embedding a polyester reinforcing fabric (like Henry 296) to bridge the core hole and prevent telegraphing.
Symptom 2: Adhesion Loss and Edge Peeling in Sheet Membranes
When EPDM or modified bitumen sheets peel away from parapets, curbs, or termination bars, the flexible waterproof material loses its primary defense against wind uplift and capillary water draw. Adhesion loss is usually traced to improper primer selection or inadequate surface cleaning.
| Substrate Type | Required Primer/Cleaner | Common Failure Cause |
|---|---|---|
| Poured Concrete | Water-based acrylic primer | Applying adhesive before primer fully flashes off (tack-free) |
| Plywood / OSB | Solvent-based primer | Wood tannins or sap bleeding through and breaking the adhesive bond |
| Metal Coping | Isopropyl alcohol wipe | Skipping the solvent wipe, leaving factory oils on the metal surface |
The Fix: Re-establishing the Bond
To repair peeled EPDM edges, do not simply apply more adhesive over the old residue. Clean the exposed substrate and the back of the membrane with a dedicated splice wash (e.g., Carlisle Splice Wash) or 99% isopropyl alcohol. Apply a uniform coat of contact adhesive to both surfaces. Wait until the adhesive is completely dry to the touch but aggressively tacky (usually 15-30 minutes depending on ambient humidity). Mate the surfaces and immediately apply pressure using a 2-inch steel seam roller, exerting at least 15 lbs of downward pressure to ensure microscopic mechanical interlocking.
Symptom 3: Thermal Seam Splitting in TPO and PVC
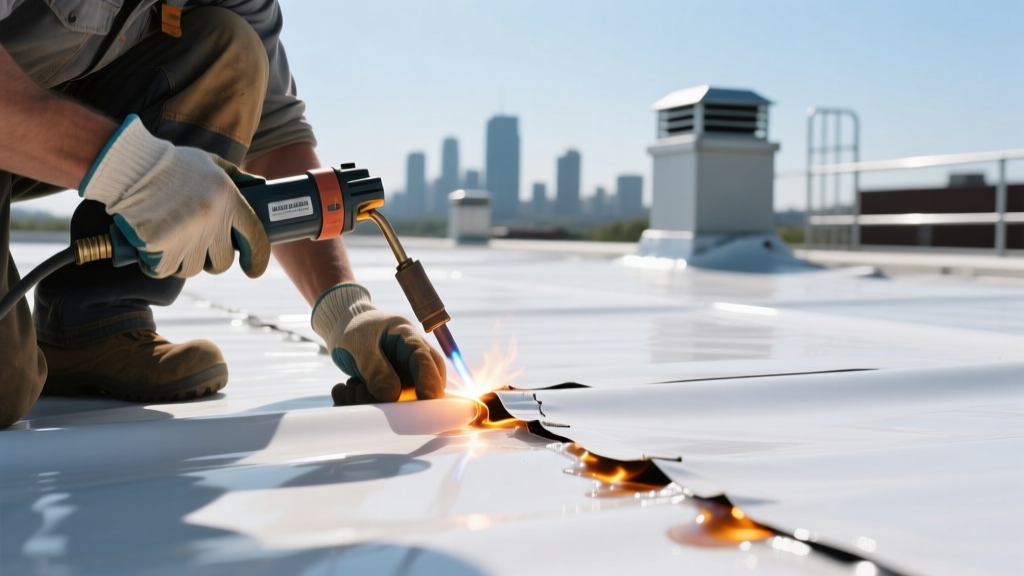
Thermoplastic membranes like TPO and PVC rely on hot-air welded seams rather than chemical adhesives. Seam splitting occurs when the weld fails to fuse the top ply of the lower sheet with the bottom ply of the upper sheet, often due to incorrect heat, speed, or pressure settings during installation, or subsequent plasticizer migration in PVC.
Pro Tip: Professional hot-air welding repairs typically cost $8.50 to $12.00 per linear foot. If a seam failure exceeds 50 linear feet in a single run, it is more cost-effective and structurally sound to overlay the entire seam with a 6-inch TPO patch rather than attempting to re-weld the original split.
Hot-Air Welding Repair Protocol
Repairing a split seam requires precision. The FEMA Technical Bulletins on building envelope waterproofing emphasize that thermoplastic repairs must match the original membrane's chemical composition to prevent galvanic or chemical degradation.
- Prep the Seam: Wipe the split area with TPO/PVC cleaner to remove dirt and oxidized plasticizers. Score the membrane lightly with a scouring pad to remove the glossy UV-degraded top layer.
- Set the Welder: For a hand-held welder (like a Leister Triac S), set the temperature between 1,050°F and 1,150°F (565°C - 620°C). Ambient temperature dictates the exact setting; colder days require higher heat.
- Execute the Weld: Feed a 3/4-inch strip of matching flexible waterproof material into the overlap. Move the welder at a steady pace of 10 to 15 feet per minute, maintaining 2.5 PSI of downward pressure with the silicone roller directly behind the nozzle.
- The Probe Test: Once cooled to ambient temperature, run a blunt seam probe along the edge of the weld at a 45-degree angle. If the probe catches or penetrates the seam, the weld is insufficient and must be re-executed.
Preventative Maintenance Matrix
Troubleshooting is reactive; maintenance is proactive. Implementing a structured inspection matrix extends the lifecycle of flexible waterproof materials by 30% to 40%. Below is a recommended maintenance schedule for commercial applications, with estimated costs based on 2026 industry averages for a 10,000 sq. ft. footprint.
| Interval | Inspection Focus | Action Required | Est. Cost (per 10k sq ft) |
|---|---|---|---|
| Bi-Annual (Spring/Fall) | Drains, scuppers, and termination bars | Clear debris; re-seal termination bar caps with polyurethane caulk. | $350 - $500 |
| Post-Severe Weather | Field seams, penetrations, and flashings | Check for wind uplift damage; perform probe test on 10% of seams. | $600 - $850 |
| Every 5 Years | Overall membrane plasticizer loss / UV degradation | Apply a 20-mil sacrificial silicone topcoat (for EPDM/TPO) to restore reflectivity and flexibility. | $12,000 - $18,000 |
For comprehensive material specifications and below-grade applications, refer to the Sika Concrete Waterproofing technical documentation, which provides detailed parameters for integrating flexible sheet membranes with liquid-applied detailing compounds at complex structural transitions. By adhering to strict diagnostic protocols and utilizing manufacturer-specified repair materials, facility managers can effectively neutralize membrane failures before they compromise the structural integrity of the building envelope.
Written by
David NakamuraDavid Nakamura is a licensed architect (AIA) and construction technology writer focused on sustainable building methods, mass timber engineering, and high-performance building envelopes. He holds a Master of Architecture from the University of Washington and is a certified Passive House Consultant (CPHC). David spent eight years at the Seattle firm Mithun, where he led the design of three LEED Platinum projects, before founding his own practice specializing in net-zero residential design. He serves on the editorial advisory board of GreenBuilder Magazine and has authored peer-reviewed papers on cross-laminated timber (CLT) connections for the Journal of Structural Engineering. In his spare time, David teaches woodworking at Pratt Fine Arts Center and kayaks the Puget Sound.
More from David Nakamura
View all
Construction Cost
Labor Cost to Build a Deck Per Sq Ft: 2026 Installation Guide
Discover the exact labor cost to build a deck per sq ft in 2026. This installation guide breaks down contractor rates, complexity factors, and hidden fees.
Aug 4, 2026

Construction Cost
How Much Does It Cost to Build a 3 Bedroom House? Financing Guide
Learn exactly how much it costs to build a 3 bedroom house and explore 2026 financing options, construction loan types, and budget frameworks for your build.
Aug 4, 2026

Construction Cost
Cost to Build a Tennis Court: 2026 Guide
How much does it cost to build a tennis court in 2026? Breakdowns for asphalt, concrete, and synthetic surfaces plus fencing and lighting.
Jul 30, 2026