Troubleshooting Moisture in Water Resistant Flooring Options
Diagnose and fix moisture failures in water resistant flooring options. Learn subfloor testing protocols, adhesive limits, and mitigation strategies.

The "Waterproof" Myth: Wear Layer vs. Subfloor Vulnerability
When contractors and homeowners select water resistant flooring options, a dangerous assumption often drives the purchase: the belief that a waterproof surface protects the entire flooring assembly. Materials like Stone Plastic Composite (SPC), Wood Plastic Composite (WPC), and porcelain tile are indeed impervious to surface spills. However, they are not moisture-management systems. When hydrostatic pressure, capillary action, or high ambient humidity introduces moisture from the subfloor, these "waterproof" surfaces trap it, creating a destructive microclimate that leads to adhesive failure, mold proliferation, and dimensional instability.
Symptom 1: Cupping, Peaking, and Edge Lifting in LVP and WPC
Luxury Vinyl Plank (LVP) and WPC floors are highly susceptible to dimensional changes when exposed to uneven moisture gradients. If the bottom of the plank absorbs moisture from a damp concrete slab while the top remains dry and climate-controlled, the plank will cup (edges rise) or peak (center rises). WPC, which contains a foamed polymer core and wood-plastic particulates, is particularly vulnerable to expansion compared to the denser, limestone-based core of SPC.
Diagnostic Checklist for Dimensional Failure
- Check the Perimeter: Remove baseboards to verify the 1/4-inch expansion gap. If the floor is tight against the drywall, thermal expansion mimicking moisture cupping may be the culprit.
- Inspect the Underlayment: If a vapor-permeable cork or foam underlayment was used over a below-grade concrete slab, moisture is wicking directly into the flooring backing.
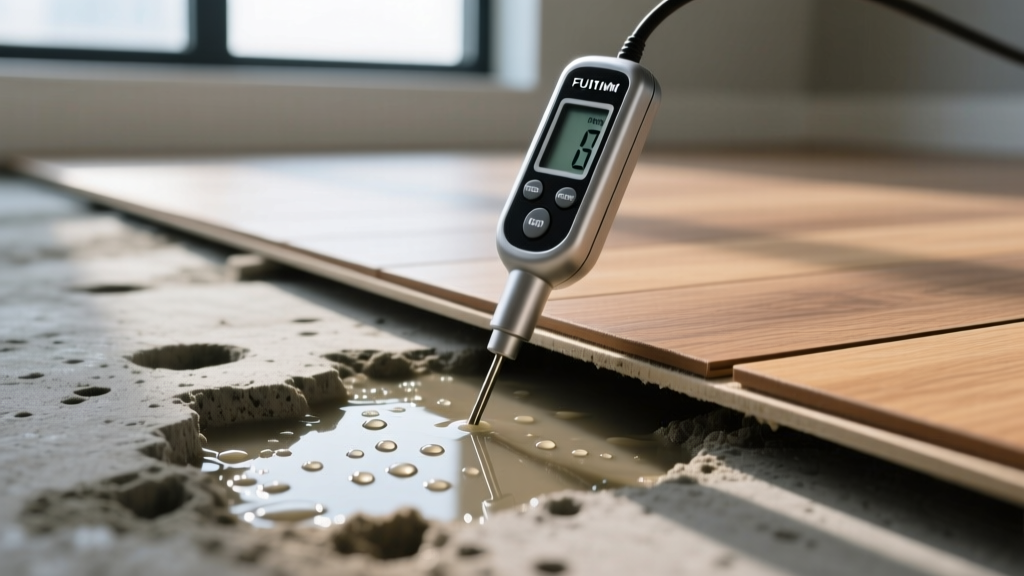
- Measure the Moisture Gradient: Use a pinless moisture meter on the flooring surface, then pull a plank and test the subfloor directly. A variance of more than 2-3% between the subfloor and the flooring backing indicates active moisture migration.
The Fix: Remove the affected planks. You must install a dedicated moisture mitigation system on the concrete before reinstalling. For slabs with high moisture, a 100% solids epoxy moisture barrier (such as Mapei Primer EP or Bostik GreenForce) is required to chemically seal the concrete pores before laying down a new closed-cell polyethylene underlayment.
Symptom 2: Adhesive Breakdown and Alkaline Salt Damage
Glue-down water resistant flooring options, including sheet vinyl and glue-down LVT, frequently fail in high-moisture environments not just because the adhesive gets wet, but because of a chemical reaction called saponification. When moisture moves through a concrete slab, it carries highly alkaline salts (calcium hydroxide) to the surface. When these salts mix with water and the acrylic polymers in flooring adhesives, they literally turn the adhesive into a soapy, non-bonding liquid.
According to guidelines published by the Concrete Network and resilient flooring manufacturers, ignoring subfloor alkalinity is the leading cause of glue-down floor failure in new construction.
| Test Parameter | ASTM Standard | Maximum Acceptable Limit | Failure Consequence |
|---|---|---|---|
| Moisture Vapor Emission Rate (MVER) | ASTM F1869 (Calcium Chloride) | 3.0 to 5.0 lbs / 1,000 sq ft / 24 hrs | Adhesive re-emulsification and bond loss |
| Relative Humidity (In-situ RH) | ASTM F2170 | 75% to 80% RH (depending on manufacturer) | Trapped vapor causing blistering and mold |
| Subfloor Alkalinity (pH Level) | ASTM F710 | pH 7.0 to 9.0 | Saponification (adhesive turns to soap) |
The Fix: If pH levels exceed 9.0, the slab must be treated with a mild acid wash (like muriatic acid diluted 10:1) and neutralized, followed by a thorough clean water rinse. If MVER or RH limits are exceeded, you must shot-blast the concrete to remove laitance and apply a two-part epoxy moisture mitigation primer to lock the alkaline salts below the surface.
Symptom 3: Efflorescence and Grout Degradation in Tile Installations
Porcelain and ceramic tile are the ultimate water resistant flooring options, completely impervious to liquid water. However, the grout lines are highly porous. When hydrostatic pressure pushes moisture up through a concrete slab, the water seeks the path of least resistance to evaporate—which is directly through the grout. As the water evaporates, it leaves behind white, crusty mineral deposits known as efflorescence. Over time, the continuous crystallization of salts inside the grout joints causes them to crack, crumble, and lose adhesion to the tile edges.
Mitigation Strategies for Tile Assemblies
To troubleshoot and prevent efflorescence in wet areas or below-grade installations, the tile assembly must be decoupled from the substrate's moisture profile.
- Install an Uncoupling Membrane: Products like Schluter-Ditra or Laticrete Hydro Ban Board provide a waterproof layer and a capillary break. The membrane's dovetail or grid structure allows moisture vapor to dissipate laterally without pushing up through the grout.
- Use Epoxy Grout: Switch from cementitious grout to a 100% solids epoxy grout (e.g., SpectraLOCK). Epoxy grout is completely non-porous, preventing water transmission and salt crystallization entirely.
- Apply a Penetrating Sealer: If cementitious grout is already installed, apply a silane/siloxane penetrating sealer. Unlike topical sealers that trap moisture inside the joint, siloxane sealers line the pores of the grout, repelling liquid water while allowing water vapor to escape.
The Subfloor Triage Protocol: Step-by-Step Moisture Testing
Before installing any water resistant flooring options over concrete, execute this triage protocol to establish a baseline and avoid catastrophic callbacks. The EPA emphasizes that controlling indoor moisture at the source is the only viable method for preventing long-term biological growth and material degradation.
- Condition the Space: Ensure the building's HVAC system has been running at normal occupancy levels (typically 65°F–75°F and 30%–50% RH) for at least 72 hours prior to testing.
- Drill for RH Probes (ASTM F2170): Drill holes into the concrete slab to a depth of 40% of the slab's total thickness (if drying from one side) or 20% (if drying from two sides). Insert the in-situ RH sleeves and let them equilibrate for 24 to 72 hours.
- Perform Calcium Chloride Tests (ASTM F1869): Place the pre-weighed calcium chloride dishes under sealed plastic domes on the slab surface for exactly 72 hours. Weigh them again to calculate the MVER.
- Test for Alkalinity: Distill a small puddle of deionized water on the concrete surface, wait 60 seconds, and touch a calibrated pH strip to the puddle. Record the reading.
Comparison Matrix: Water Resistant Flooring Options & Moisture Tolerance
Not all water resistant flooring options react to subfloor moisture in the same way. Use this matrix to select the right material and mitigation strategy based on your specific site conditions.
| Flooring Material | Water Resistance Level | Dimensional Stability | Subfloor Moisture Limit (RH) | Best Mitigation Strategy |
|---|---|---|---|---|
| SPC (Stone Plastic Composite) | 100% Waterproof Core | Extremely High (Limestone core) | Up to 85% RH (varies by brand) | Closed-cell IXPE pad; Epoxy primer if >85% |
| WPC (Wood Plastic Composite) | 100% Waterproof Core | Moderate (Foamed core expands) | 75% - 80% RH | Vapor barrier underlayment; strict RH limits |
| Glue-Down LVT / Sheet Vinyl | 100% Waterproof Surface | High (Conforms to subfloor) | 75% RH / MVER < 5 lbs | 100% solids epoxy moisture barrier; pH control |
| Porcelain / Ceramic Tile | Impervious (<0.5% absorption) | Absolute (No expansion) | Limit based on mortar/grout specs | Uncoupling membrane; Epoxy grout; Siloxane sealer |
Troubleshooting moisture failures requires looking past the marketing claims of the flooring surface and addressing the physics of the building envelope. By enforcing strict ASTM testing protocols, understanding the chemical limitations of acrylic adhesives, and selecting the correct mitigation membranes, you can ensure that water resistant flooring options perform flawlessly for decades, even in high-risk moisture environments.
Written by
David NakamuraDavid Nakamura is a licensed architect (AIA) and construction technology writer focused on sustainable building methods, mass timber engineering, and high-performance building envelopes. He holds a Master of Architecture from the University of Washington and is a certified Passive House Consultant (CPHC). David spent eight years at the Seattle firm Mithun, where he led the design of three LEED Platinum projects, before founding his own practice specializing in net-zero residential design. He serves on the editorial advisory board of GreenBuilder Magazine and has authored peer-reviewed papers on cross-laminated timber (CLT) connections for the Journal of Structural Engineering. In his spare time, David teaches woodworking at Pratt Fine Arts Center and kayaks the Puget Sound.
More from David Nakamura
View all
Construction Cost
Labor Cost to Build a Deck Per Sq Ft: 2026 Installation Guide
Discover the exact labor cost to build a deck per sq ft in 2026. This installation guide breaks down contractor rates, complexity factors, and hidden fees.
Aug 4, 2026

Construction Cost
How Much Does It Cost to Build a 3 Bedroom House? Financing Guide
Learn exactly how much it costs to build a 3 bedroom house and explore 2026 financing options, construction loan types, and budget frameworks for your build.
Aug 4, 2026

Construction Cost
Cost to Build a Tennis Court: 2026 Guide
How much does it cost to build a tennis court in 2026? Breakdowns for asphalt, concrete, and synthetic surfaces plus fencing and lighting.
Jul 30, 2026