Pro Application Techniques for Waterproof Flooring Materials
Learn professional application techniques for waterproof flooring materials, including moisture testing, seam sealing, and perimeter detailing to prevent water intrusion.

The Illusion of Waterproof: Why Application Technique Matters
Marketing materials for stone plastic composite (SPC), wood plastic composite (WPC), and fluid-applied resinous floors heavily emphasize their imperviousness to water. However, a waterproof material does not guarantee a waterproof flooring system. Water intrusion failures rarely occur because the flooring material itself degraded; they occur because moisture bypassed the material via unsealed perimeters, capillary action at micro-bevels, or hydrostatic pressure from an unmitigated subfloor.
Pre-Application: Subfloor Moisture Mitigation and Testing
Before installing any floating rigid core waterproof flooring materials or adhering fluid-applied systems, the concrete subfloor must be evaluated for Moisture Vapor Emission Rate (MVER). Trapping moisture beneath an impermeable SPC plank or epoxy coating creates a pressurized environment that leads to adhesive failure, subfloor spalling, and microbial growth.
Calcium Chloride vs. Relative Humidity (RH) Testing
While the Calcium Chloride test (ASTM F1869) measures surface emissions, it fails to capture the moisture deep within the slab that will eventually migrate upward once the floor is covered. As of 2026, the industry standard mandates in-situ Relative Humidity (RH) testing per ASTM F2170 guidelines. RH probes placed at 40% of the slab depth provide a predictive measurement of the slab's eventual equilibrium moisture level.
| Test Method | Standard | Typical Limit for Direct Adhesion | Cost per Test (2026) |
|---|---|---|---|
| Calcium Chloride (MVER) | ASTM F1869 | 3 to 5 lbs / 1,000 sq ft / 24 hrs | $15 - $25 |
| In-Situ Relative Humidity | ASTM F2170 | 75% to 80% RH (varies by adhesive) | $35 - $50 |
| Surface pH | ASTM F710 | 7 to 9 (neutral to slightly alkaline) | $5 - $10 |
If RH levels exceed the flooring manufacturer's limit (typically 85% for floating floors, 75% for glue-down), a moisture-mitigating primer like Bostik GreenForce or Mapei Eco Prim PU must be applied. These two-part epoxy or polyurethane primers penetrate the concrete pores and cure into an impermeable vapor barrier, costing approximately $1.80 to $2.50 per square foot installed.
Rigid Core (SPC/WPC) Application Techniques
Rigid core luxury vinyl is inherently waterproof, but the locking mechanisms and expansion gaps are highly vulnerable to water infiltration. Proper application requires treating the floor as a continuous membrane that must be sealed at its boundaries.
Perimeter Expansion and Sealant Selection
Floating waterproof flooring materials require a 1/4-inch expansion gap around the entire perimeter, including tubs, shower pans, and cabinetry. The critical application technique here is the selection and application of the perimeter sealant.
- Never use acrylic latex caulk. Acrylic caulk shrinks over time, loses adhesion in high-humidity environments, and allows water to seep under the planks.
- Specify 100% silicone or polyurethane sealant. Products like GE Silicone II or a high-grade polyurethane construction sealant maintain flexibility and adhesion even when submerged.
- Application depth: The sealant must fill the entire 1/4-inch gap and adhere to both the subfloor and the vertical surface (e.g., the drywall or tub flange), not just rest on top of the flooring edge.
Seam Locking and Micro-Bevel Waterproofing
When engaging the click-lock mechanisms of SPC planks, installers must ensure the joints are fully seated. A partially engaged joint creates a micro-channel where capillary action will draw surface water beneath the floor. For wet areas like bathrooms, professionals apply a thin bead of clear, waterproof seam sealer (such as Shaw's ClickGuard or a specialized polyvinyl acetate waterproof glue) into the groove before locking the next plank. This creates a hydrostatic seal at the joint without compromising the floating nature of the floor.
Fluid-Applied Waterproof Flooring (Epoxy and Polyurea)
For commercial kitchens, breweries, and residential garages, fluid-applied systems offer a seamless, monolithic waterproof barrier. The application technique for these materials dictates their longevity and resistance to hydrostatic pressure.
Surface Profiling (CSP Standards)
Fluid-applied waterproof flooring materials will delaminate if applied to a smooth, unprofiled concrete surface. The International Concrete Repair Institute (ICRI) mandates specific Concrete Surface Profiles (CSP) achieved via mechanical shot blasting or diamond grinding.
Moisture Vapor Transmission Rate (MVTR) Primers
When applying fluid systems over grade-level or below-grade slabs, a high-MVTR primer is non-negotiable. If water vapor pushes through the slab faster than the epoxy can resist, osmotic blistering will occur. Specialized moisture-mitigating epoxies (like VersaFlex FSS 45 DC) can withstand up to 20 lbs of MVER, effectively capping the slab before the decorative or structural topcoats are applied.
Detailing Penetrations and Transitions
The most common failure points in waterproof flooring systems are pipe penetrations (toilet flanges, dishwasher lines) and transitions to carpet or tile.
"A waterproof floor is only as strong as its weakest penetration. If a toilet flange sits on top of the finished floor, a failed wax ring will flood the subfloor. The flange must always be installed on top of the subfloor, with the flooring material cut tightly around it and sealed."
— National Kitchen & Bath Association (NKBA) Installation Guidelines
For transitions between a floating waterproof floor and an adjacent surface, use a specialized waterproof T-molding. Apply a bead of silicone under the track of the T-molding before snapping it into place to prevent water from migrating from the wet zone (bathroom) to the dry zone (hallway). In tile applications, integrating a membrane like Schluter-KERDI or DITRA ensures that the waterproofing layer is continuous beneath the tile and ties directly into the shower pan or wall membrane.
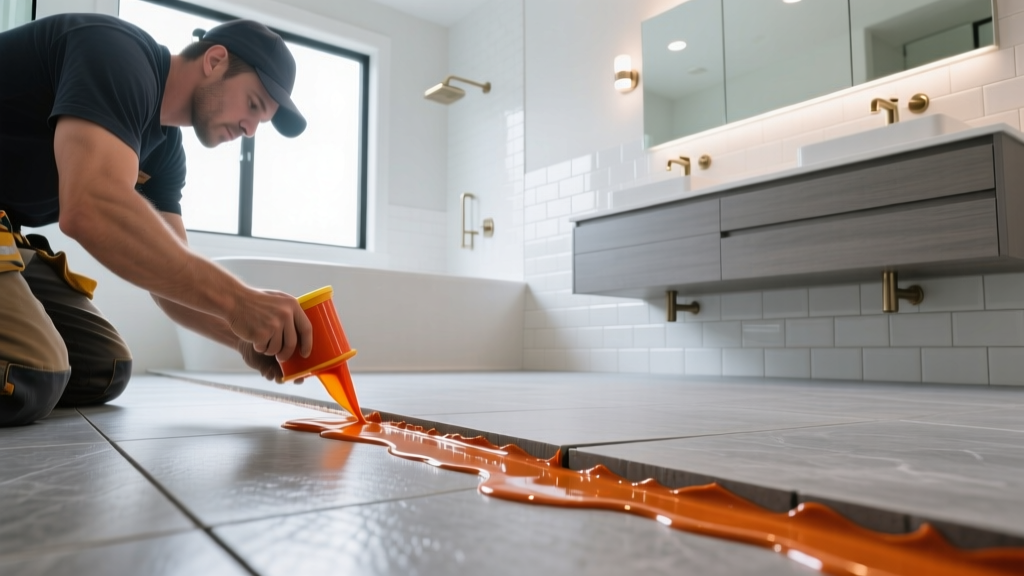
Common Application Failures and Troubleshooting Matrix
Even with premium waterproof flooring materials, installation errors manifest in specific ways. Use this diagnostic matrix to identify and correct application failures.
| Symptom | Root Cause | Corrective Application Technique |
|---|---|---|
| Osmotic blistering in epoxy/polyurea | High MVER; lack of vapor-blocking primer. | Grind off blisters, apply high-MVTR epoxy primer, and re-topcoat. |
| Cupping or edge-lifting in SPC planks | Perimeter expansion gap pinched by baseboards or cabinetry. | Remove baseboards, cut back planks to restore 1/4-inch gap, reinstall trim without nailing into the floor. |
| Dark staining / microbial odor under floating floor | Water infiltrated via unsealed perimeter or pipe penetration. | Remove affected planks, remediate mold, dry subfloor, and re-install using 100% silicone perimeter sealant. |
| White, chalky residue at SPC plank seams | Alkaline moisture migrating through micro-gaps in the click-lock. | Apply waterproof seam sealer to all joints in wet areas during initial installation. |
Mastering the application of waterproof flooring materials requires shifting focus from the product's inherent properties to the holistic system design. By rigorously testing subfloor moisture, specifying the correct chemical sealants for perimeters, and adhering to strict surface profiling standards, installers can deliver truly impervious flooring systems that perform flawlessly in high-moisture environments.
Written by
David NakamuraDavid Nakamura is a licensed architect (AIA) and construction technology writer focused on sustainable building methods, mass timber engineering, and high-performance building envelopes. He holds a Master of Architecture from the University of Washington and is a certified Passive House Consultant (CPHC). David spent eight years at the Seattle firm Mithun, where he led the design of three LEED Platinum projects, before founding his own practice specializing in net-zero residential design. He serves on the editorial advisory board of GreenBuilder Magazine and has authored peer-reviewed papers on cross-laminated timber (CLT) connections for the Journal of Structural Engineering. In his spare time, David teaches woodworking at Pratt Fine Arts Center and kayaks the Puget Sound.
More from David Nakamura
View all
Construction Cost
Labor Cost to Build a Deck Per Sq Ft: 2026 Installation Guide
Discover the exact labor cost to build a deck per sq ft in 2026. This installation guide breaks down contractor rates, complexity factors, and hidden fees.
Aug 4, 2026

Construction Cost
How Much Does It Cost to Build a 3 Bedroom House? Financing Guide
Learn exactly how much it costs to build a 3 bedroom house and explore 2026 financing options, construction loan types, and budget frameworks for your build.
Aug 4, 2026

Construction Cost
Cost to Build a Tennis Court: 2026 Guide
How much does it cost to build a tennis court in 2026? Breakdowns for asphalt, concrete, and synthetic surfaces plus fencing and lighting.
Jul 30, 2026