Installing High Temperature Insulation Material on Industrial Piping
Learn precise installation techniques for high temperature insulation material on industrial piping, including ceramic fiber and calcium silicate systems.

Engineering High-Heat Thermal Envelopes
Standard building insulation fails catastrophically when exposed to the extreme thermal loads of industrial steam lines, exhaust ducts, and process piping. When surface temperatures exceed 850°F (454°C), contractors must transition to specialized refractory and high-temperature systems. Properly installing high temperature insulation material requires a fundamental shift from residential framing techniques to industrial mechanical detailing, where thermal expansion, vibration, and corrosion under insulation (CUI) dictate the methodology.
Material Selection and Fastening Matrix
Choosing the correct high temperature insulation material depends on the operating temperature, pipe diameter, and mechanical vibration of the system. Below is a comparative matrix of the three most common industrial high-heat insulations and their required fastening techniques.
| Material Type | Max Temp Limit | Primary Application | Fastening Method |
|---|---|---|---|
| Ceramic Fiber Blanket (e.g., Superwool HT) |
2300°F (1260°C) | Kilns, furnaces, exhaust manifolds | Weld pins with speed clips |
| Calcium Silicate Board (e.g., Thermo-12 Gold) |
1200°F (650°C) | High-pressure steam piping | Steel banding and mastic |
| Microporous Silica (e.g., Pyrogel XT-E) |
1200°F (650°C) | Space-constrained offshore/ducting | High-temp adhesive + strapping |
Installation Technique 1: Ceramic Fiber Blanket (Weld Pin Method)
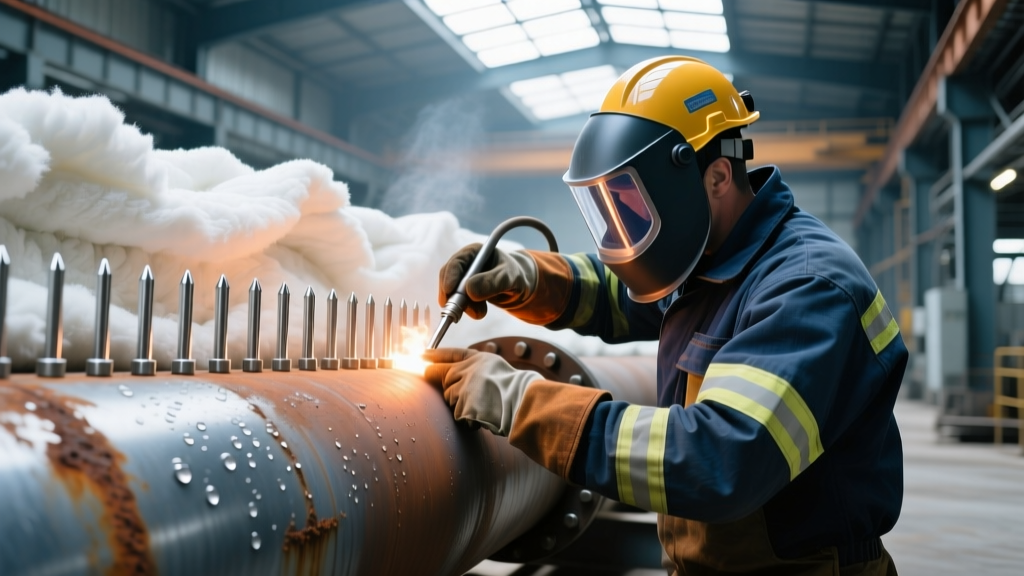
Ceramic fiber blankets are highly flexible and excel on irregular surfaces or vibrating equipment. However, they are prone to sagging and thermal compression if not mechanically secured to exact specifications. The industry standard for securing blankets to steel piping and vessels is the welded pin and speed clip method, governed by National Insulation Association (NIA) standards.
Step 1: Surface Preparation and Pin Welding
Before welding, the pipe surface must be blasted or wire-brushed to bare metal to ensure proper arc strike and weld penetration. Moisture or rust will cause the weld pin to snap under tension.
- Pin Material: Use 10-gauge mild steel pins for operating temperatures below 800°F. For temperatures exceeding 800°F, you must upgrade to 12-gauge 304 Stainless Steel pins to prevent oxidation and shear failure.
- Spacing Requirements: Weld pins at a maximum of 12 inches on center (O.C.) for horizontal runs, and tighten to 9 inches O.C. for vertical runs to combat gravity-induced sagging.
- Pin Length: The pin must extend at least 1/2 inch beyond the compressed thickness of the insulation to allow the speed clip to lock securely.
Step 2: Impaling and Compression
Cut the blanket using a heavy-duty utility knife with a fresh blade. Never tear the blanket, as this destroys the interlocking fiber matrix and creates thermal weak points. Impale the blanket over the weld pins. Ceramic fiber requires a deliberate compression ratio—typically 20% to 30% of its nominal thickness—to maintain its structural integrity and prevent gaps from opening during thermal cycling. Once impaled, push a cupped washer (speed clip) down the pin until it bites into the blanket, then bend the exposed pin tip flat over the washer using side-cutting pliers.
Installation Technique 2: Rigid Calcium Silicate Boarding
For high-pressure steam lines operating between 400°F and 1200°F, rigid calcium silicate (such as Johns Manville Thermo-12 Gold) provides superior compressive strength and abuse resistance. Unlike flexible blankets, rigid boards require precise cutting and expansion joint management.
Managing Thermal Expansion Joints
Calcium silicate expands when heated. If installed tightly end-to-end on a 200-foot steam run, the boards will buckle and shatter when the pipe reaches operating temperature.
- Cutting: Use a fine-tooth carbide-tipped wood blade on a circular saw to cut the boards. Score-and-snap methods result in uneven edges that leave air gaps.
- Staggering: Stagger all longitudinal and circumferential joints by a minimum of 6 inches to prevent continuous thermal bridges.
- Expansion Gaps: Leave a 1/4-inch gap at every 10-foot interval along the pipe run. Pack this gap tightly with ceramic fiber rope (minimum 8-pcf density) and seal the exterior with a high-temperature silicone sealant rated for 600°F, such as GE Silicone 9000.
Contractor Insight: When applying stainless steel banding over calcium silicate, use 0.020-inch thick, 3/4-inch wide bands spaced at 18-inch intervals. Over-tensioning the banding will crush the board edges, creating a divot where water can pool under the metal jacketing.
Preventing Corrosion Under Insulation (CUI)
The leading cause of failure in high-temperature piping systems is not thermal loss, but CUI. When high-heat pipes cycle down to ambient temperatures, they draw moisture into the insulation envelope. If the high temperature insulation material remains wet during the next heat-up cycle, it traps corrosive chlorides against the carbon steel pipe.
- Install weep holes (3/8-inch diameter) at the 6 o'clock position on all horizontal pipe runs every 20 feet.
- Drill weep holes at the absolute lowest points of all vertical drops and expansion loops.
- Apply a high-build, high-temperature epoxy phenolic coating (e.g., International Interchar 1260) to the pipe surface before insulation is applied.
- Never install insulation on a pipe that is currently cold and wet from hydro-testing; the pipe must be heated to minimum 212°F to drive off surface moisture before the envelope is closed.
Cladding and Weatherproofing the Envelope
High-temperature insulation materials are highly porous and will lose up to 80% of their thermal resistance if saturated by rain. The final step in the installation process is applying metal jacketing. Use 0.016-inch thick aluminum or 0.010-inch stainless steel roll jacketing. Overlap all longitudinal seams by a minimum of 2 inches, ensuring the overlap sheds water downward (like shingles). Secure the seams with 3/4-inch stainless steel screws spaced every 6 inches, and seal the top edge of horizontal overlaps with a continuous bead of UV-stable, high-temp exterior silicone.
Labor and Cost Estimates for 2026 Projects
Budgeting for high-heat insulation requires accounting for specialized labor, welding equipment, and premium material costs. The following data reflects current industrial contractor averages for fully installed systems (material, labor, and jacketing) on standard NPS 6 to NPS 12 piping.
| System Type | Material Cost (per sq. ft.) | Installed Cost (per sq. ft.) | Labor Productivity |
|---|---|---|---|
| 4-inch Ceramic Fiber + Jacketing | $4.50 - $6.00 | $16.00 - $22.00 | 35 sq. ft. / man-hour |
| 3-inch Calcium Silicate + Jacketing | $8.00 - $11.00 | $24.00 - $32.00 | 20 sq. ft. / man-hour |
| 2-inch Aerogel Blanket + Jacketing | $28.00 - $35.00 | $45.00 - $58.00 | 40 sq. ft. / man-hour |
Adhering strictly to ASTM C547 specifications for mineral fiber and calcium silicate applications ensures that the thermal envelope will survive the brutal expansion, contraction, and vibration cycles inherent in industrial high-heat operations. For comprehensive material specifications, always consult the ASTM C547 standard documentation prior to procurement.
Written by
Elena RodriguezElena Rodriguez is a civil engineer and technical writer specializing in concrete technology, masonry systems, and ASTM/ACI compliance. She earned her B.S. in Civil Engineering from Texas A&M University and spent a decade at a materials testing laboratory, performing over 2,000 concrete compressive strength tests and masonry prism evaluations. Elena is an ACI-certified Field Testing Technician (Grade I) and a member of ASTM Committee C12 on Natural Building Stone. She currently consults on forensic engineering cases involving concrete failures and moisture intrusion. Based in San Antonio, TX, Elena is a proud member of the Society of Women Engineers (SWE) and coaches her daughter's FIRST Robotics team.
More from Elena Rodriguez
View all
Walls & Panels
Cost Analysis: Light Gauge Steel Framing Advantages and Disadvantages
Evaluate light gauge steel framing advantages and disadvantages through a strict cost analysis lens, comparing material, labor, and lifecycle expenses.
Aug 4, 2026

Walls & Panels
Gypsum Board Types: Exact Specifications, Thickness & Dimensions
Compare standard, Type X, and moisture-resistant gypsum board types. Get exact specifications, thicknesses, dimensions, and ASTM standards for your project.
Aug 4, 2026

Fire Resistance
Best Fire-Resistant Outdoor Decking Materials: 2026 Buyer Guide
Discover the best fire-resistant outdoor decking materials for 2026. Compare Class A PVC, aluminum, and hardwood options for WUI compliance and safety.
Aug 4, 2026