Choosing Home Sound Insulation Materials: A Selection Framework
Master our selection framework for home sound insulation materials. Compare STC ratings, costs, and applications for mineral wool, mass loaded vinyl, and more.

The Core Metrics: Decoding STC and IIC Ratings
Selecting the correct home sound insulation materials requires moving beyond generic product labels and understanding the physics of acoustic transmission. The EPA guidelines on noise pollution emphasize that prolonged exposure to indoor noise above 45 decibels disrupts sleep and cognitive function. To mitigate this, architects and builders rely on two primary metrics:
- Sound Transmission Class (STC): Measures a partition's ability to block airborne sound (voices, television, traffic). A standard interior wall with R-13 fiberglass and single-layer drywall yields an STC of roughly 33. For true privacy, you need an STC of 50 or higher.
- Impact Insulation Class (IIC): Measures resistance to structure-borne impact noise (footsteps, dropped objects, vibrating HVAC units). This is critical for floor/ceiling assemblies in multi-story homes.
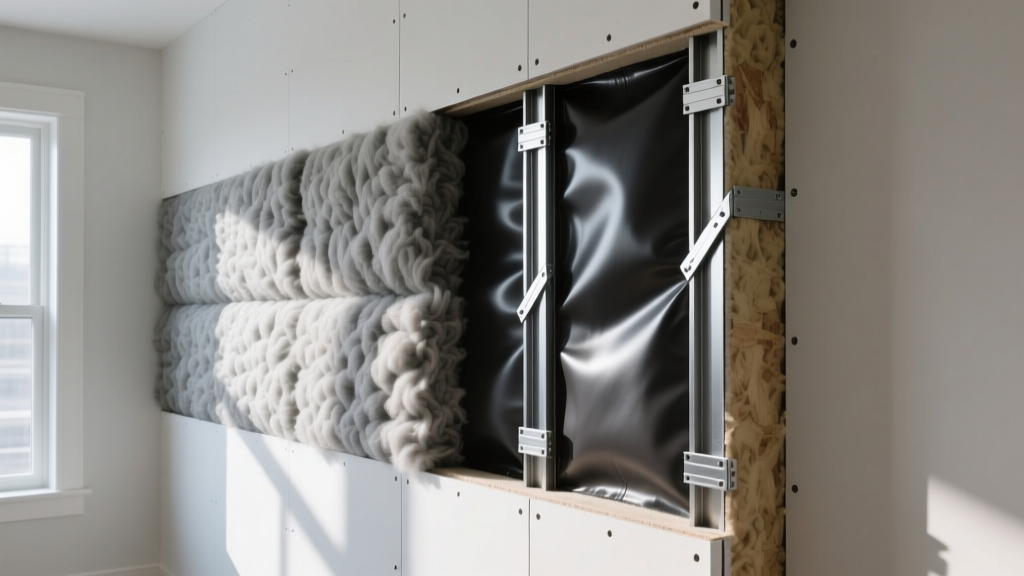
The 4-Step Selection Framework for Acoustic Materials
Step 1: Identify the Noise Profile
Before purchasing materials, categorize the noise you are trying to block:
- Airborne Noise: Conversations, music, and television. Requires mass and damping (e.g., Mass Loaded Vinyl, Green Glue, extra drywall).
- Impact Noise: Footsteps and mechanical vibrations. Requires decoupling and resilient underlayments (e.g., acoustic mats, isolation clips).
- Flanking Noise: Sound traveling through indirect paths like shared floor joists, HVAC ducts, or back-to-back electrical boxes. Requires acoustic sealants and putty pads.
Step 2: Determine the Assembly Type
The physical space dictates your material constraints. A 2x4 wall cavity limits you to 3.5-inch batts, whereas a floor joist system can accommodate thicker, denser materials. Always measure your cavity depth precisely before ordering insulation.
Step 3: Select the Primary Material Matrix
Use the following comparison matrix to match materials to your specific acoustic needs and 2026 budget constraints. According to Rockwool's building acoustics research, combining absorptive cavity fill with surface damping yields the highest ROI for residential soundproofing.
| Material Category | Specific Product Example | Thickness | Est. Cost / Sq Ft (2026) | Primary Function | STC Impact |
|---|---|---|---|---|---|
| Mineral Wool Batts | Rockwool Safe'n'Sound | 3.5" | $1.15 | Cavity absorption, mid/high-frequency trapping | +6 to +9 STC |
| Mass Loaded Vinyl (MLV) | Soundsulate 1 lb/sqft | 1/8" | $3.25 | Adding limp mass to block low frequencies | +5 to +7 STC |
| Damping Compound | Green Glue Noiseproofing | Viscous layer | $1.75 | Converting sound energy to low-grade heat | +8 to +10 STC |
| Decoupling Clips | Kinetics IsoMax / WhisperClips | 5/8" standoff | $4.50 (per clip) | Breaking structural vibration paths | +12 to +15 STC |
| Acoustic Sealant | OSI Pro-Series Acoustic | N/A | $8.50 (per tube) | Sealing flanking gaps and perimeter edges | Preserves baseline STC |
Step 4: Address Flanking and Decoupling
The most expensive home sound insulation materials will fail if flanking paths are ignored. Sound behaves like water; it will exploit the smallest gap. A 1% gap in an acoustic barrier can reduce its overall STC rating by up to 5 points. Always use acoustic sealant at the top and bottom plates of your walls, and wrap back-to-back electrical outlets in acoustic putty pads.
Application-Specific Decision Trees
Interior Partition Walls (Bedrooms and Home Offices)
For standard privacy between interior rooms where space is limited to a 2x4 stud cavity, follow this optimized sequence:
- Cavity Fill: Install 3.5-inch mineral wool batts (e.g., Rockwool Safe'n'Sound). Do not compress them; friction-fit them snugly between the studs.
- First Layer: Install a standard 5/8-inch Type X gypsum board on one side of the wall.
- Damping: Apply two tubes of Green Glue damping compound per 4x8 sheet of the second drywall layer.
- Second Layer: Screw the second 5/8-inch drywall layer directly into the first layer (not the studs), sandwiching the Green Glue.
- Sealing: Run a continuous bead of acoustic sealant along the floor, ceiling, and corner joints.
Expected Result: STC 52-55. Normal speech will be completely inaudible.
Floor and Ceiling Assemblies (Multi-Story Homes)
Impact noise requires decoupling the finished floor from the structural joists. If you are soundproofing a ceiling below a living space:
- Cavity Fill: Fill the floor joist bays with unfaced mineral wool to absorb airborne cavity resonance.
- Decoupling: Install resilient isolation clips (like Kinetics IsoMax) to the sides of the joists, snapping in 7/8-inch furring channels (hat channels).
- Mass & Damping: Attach a layer of 5/8-inch drywall to the hat channels, apply Green Glue, and attach a second layer of drywall.
- Top Side Treatment: On the floor above, install a 5mm acoustic underlayment (like Acousti-Mat 3) beneath the finished flooring to improve the IIC rating.
Common Selection Mistakes and Edge Cases
Many builders default to standard pink fiberglass batts because they are cheap and readily available. While R-13 fiberglass provides thermal resistance, its low density allows low-frequency sound (bass, heavy footsteps, HVAC rumble) to pass right through. For acoustic applications, the higher density and non-directional fibers of mineral wool are non-negotiable.
- Mistake 1: Compressing Insulation. Stuffing a 6-inch batt into a 3.5-inch cavity does not increase soundproofing. It destroys the material's acoustic matrix and lowers its effectiveness. Always buy the exact thickness matching your cavity depth.
- Mistake 2: Ignoring Electrical Boxes. If two electrical outlets are installed back-to-back on a shared stud bay, they create a massive acoustic short-circuit. Fix: Stagger outlets by at least 24 inches, or wrap them in TradeService acoustic putty pads.
- Mistake 3: Using Standard Drywall Screws for Decoupled Walls. If you use screws that are too long when attaching drywall to resilient channels or hat channels, the screw will penetrate the channel and bite into the wood stud, completely ruining the decoupling effect. Use fine-thread screws specifically sized for the channel depth.
Sourcing, Costs, and Installation Best Practices
Budgeting for acoustic upgrades requires looking at the assembly as a whole. For a standard 12x12 bedroom (approx. 450 sq ft of wall space), upgrading from a standard STC 33 wall to an STC 52 wall using mineral wool, Green Glue, and double drywall will cost approximately $1,400 to $1,800 in materials alone in 2026. This represents a premium of roughly $3.00 to $4.00 per square foot over standard construction.
When sourcing materials, consult specialized acoustic distributors rather than general big-box hardware stores, as the latter often lack specific damping compounds and isolation clips. For comprehensive STC testing data and assembly diagrams, refer to the Soundproof Cow STC rating charts, which provide empirical laboratory test results for various material combinations.
Ultimately, the most effective home sound insulation materials are those applied systematically. Mass blocks sound, damping dissipates it, and decoupling isolates it. By applying this framework, you can engineer a residential space that guarantees acoustic privacy and long-term comfort.
Written by
Elena RodriguezElena Rodriguez is a civil engineer and technical writer specializing in concrete technology, masonry systems, and ASTM/ACI compliance. She earned her B.S. in Civil Engineering from Texas A&M University and spent a decade at a materials testing laboratory, performing over 2,000 concrete compressive strength tests and masonry prism evaluations. Elena is an ACI-certified Field Testing Technician (Grade I) and a member of ASTM Committee C12 on Natural Building Stone. She currently consults on forensic engineering cases involving concrete failures and moisture intrusion. Based in San Antonio, TX, Elena is a proud member of the Society of Women Engineers (SWE) and coaches her daughter's FIRST Robotics team.
More from Elena Rodriguez
View all
Walls & Panels
Cost Analysis: Light Gauge Steel Framing Advantages and Disadvantages
Evaluate light gauge steel framing advantages and disadvantages through a strict cost analysis lens, comparing material, labor, and lifecycle expenses.
Aug 4, 2026

Walls & Panels
Gypsum Board Types: Exact Specifications, Thickness & Dimensions
Compare standard, Type X, and moisture-resistant gypsum board types. Get exact specifications, thicknesses, dimensions, and ASTM standards for your project.
Aug 4, 2026

Fire Resistance
Best Fire-Resistant Outdoor Decking Materials: 2026 Buyer Guide
Discover the best fire-resistant outdoor decking materials for 2026. Compare Class A PVC, aluminum, and hardwood options for WUI compliance and safety.
Aug 4, 2026