How to Install Floor Sound Insulation Materials for Maximum IIC and STC Ratings
Master the installation of floor sound insulation materials. Learn step-by-step techniques to maximize IIC and STC ratings and eliminate flanking noise.

Understanding Acoustic Metrics: IIC vs. STC in Floor Assemblies
Before unrolling any underlayment, installers must understand the two distinct metrics governing floor acoustics. The International Building Code (IBC) mandates minimum thresholds for both, but luxury residential and high-end commercial projects demand significantly higher performance.
- Impact Insulation Class (IIC): Measures structure-borne noise, such as footsteps, dropped objects, and furniture dragging. The IBC minimum is 50, but premium multi-family builds target an IIC of 60 or higher.
- Sound Transmission Class (STC): Measures airborne noise, including voices, televisions, and music. The baseline requirement is STC 50, with high-performance assemblies aiming for STC 60+.
Floor sound insulation materials must address both metrics simultaneously. A thick rubber mat might yield an excellent IIC rating by dampening impact vibrations, but without sufficient mass, it will fail to block low-frequency airborne bass. This is why professional installations rely on composite assemblies rather than single-material solutions.
Selecting the Right Floor Sound Insulation Materials
The effectiveness of your installation hinges on matching the material properties to the specific acoustic challenges of the substrate. Below is a technical comparison of the primary materials used in modern floating floor and decoupled assemblies.
| Material Type | Brand Examples | Primary Acoustic Function | Typical Thickness | Cost per Sq. Ft. (2026) |
|---|---|---|---|---|
| Recycled Rubber Underlayment | Regupol SonusCore, RubberCal | Impact isolation (IIC), vibration damping | 3mm - 12mm | $1.20 - $2.80 |
| Acoustic Cork | AcoustiCork, Amorim | Impact isolation, thermal resistance | 4mm - 12mm | $1.80 - $3.50 |
| Mass Loaded Vinyl (MLV) | Soundsulate, TMS | Airborne noise blocking (STC), adds mass | 1/8" (1 lb) - 1/4" (2 lb) | $2.50 - $5.00 |
| Acoustic Sealant & Tape | Tremco, OSI Pro Series | Flanking noise prevention, air sealing | N/A | $8.00 - $12.00 / tube |
For maximum acoustic decoupling, treat the floor assembly as a mass-spring-mass system. The structural subfloor is the first mass, the resilient underlayment (rubber or cork) acts as the spring, and the finished floor (or a poured gypsum underlayment) acts as the second mass. Compressing the 'spring' by placing excessively heavy static loads on a thin underlayment will bottom it out, destroying its IIC rating.
Step-by-Step Installation: Floating Floor with Acoustic Underlayment
The most common and cost-effective method for improving floor acoustics in wood-frame and concrete multi-family construction is the floating floor assembly. Follow these precise installation steps to ensure the acoustic membrane performs as tested.
Step 1: Subfloor Preparation and Tolerances
Acoustic underlayments are highly susceptible to puncture and compression failure if the subfloor is uneven.
- Grind down all concrete high spots and protruding fasteners on wood subfloors.
- Fill low spots using a Portland cement-based self-leveling underlayment. The industry tolerance is strictly 3/16-inch over a 10-foot radius.
- Vacuum the substrate thoroughly. Even small debris like drywall screws or pebbles will create hard contact points that transmit impact noise directly through the acoustic layer.
Step 2: Perimeter Isolation (The Most Critical Step)
Flanking noise occurs when sound vibrations travel through the floor assembly and bypass the insulation by traveling down the walls. To prevent this, the floating floor must never touch the vertical walls or structural columns.
- Install a 1/4-inch to 3/8-inch thick closed-cell polyethylene perimeter isolation tape (e.g., Whisper Step) around the entire room perimeter.
- Wrap the tape up the wall to a height slightly above the finished floor level.
- Wrap all structural columns, pipe penetrations, and HVAC registers with the same isolation material.
Step 3: Deploying the Acoustic Membrane
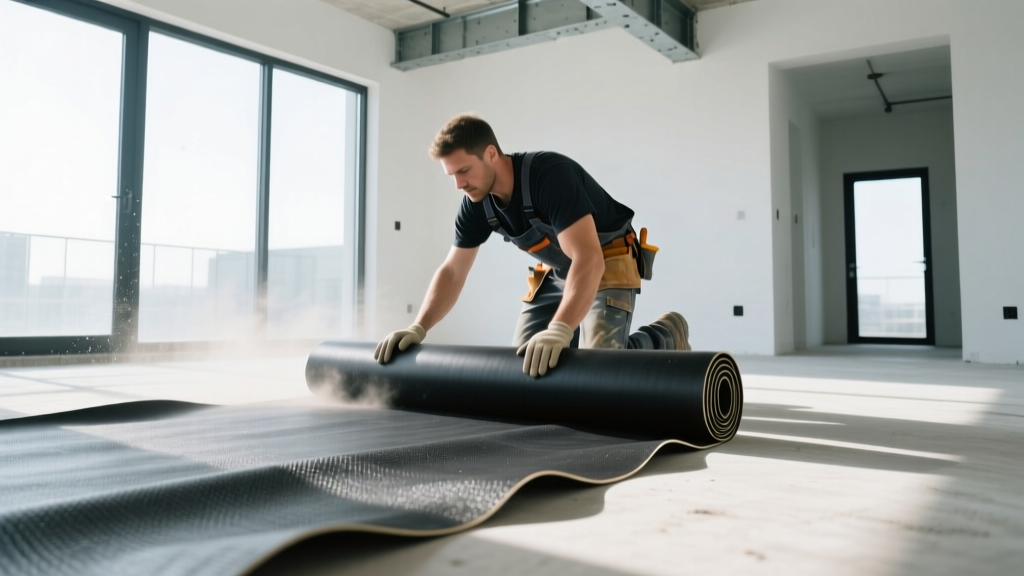
Roll out the rubber or cork underlayment perpendicular to the direction of the finished flooring.
- Seams: Butt the edges tightly together. Do not overlap the underlayment, as this creates a rigid ridge that telegraphs through the finished floor and compromises the decoupling effect.
- Taping: Seal all seams with 2-inch acoustic seam tape to prevent self-leveling compounds or liquid adhesives from seeping through and bonding the floating floor to the structural subfloor.
Step 4: Installing Mass Loaded Vinyl (MLV) for Airborne Noise
If the assembly requires an STC boost (common in units above home theaters or loud living spaces), MLV is deployed over the primary underlayment.
- Roll the MLV out flat. Because MLV is heavy and prone to memory curling, allow it to acclimate and relax in the room for 24 hours before installation.
- Overlap all MLV seams by a minimum of 2 inches.
- Seal the overlaps with acoustic caulk to ensure an airtight, continuous mass barrier. Sound behaves like water; it will exploit any unsealed pinhole.
A single rigid connection can reduce an assembly's IIC rating by 10 to 15 points. Never drive nails or screws through the finished floor and acoustic membrane into the structural subfloor. If you must secure a kitchen island or heavy cabinetry, install structural blocking beneath the subfloor before the acoustic layer is laid, or use surface-weighted designs that do not require mechanical fastening to the slab.
Critical Failure Points: Why Floor Soundproofing Fails
According to field testing data compiled by Riverbank Acoustics, the vast majority of acoustic failures in the field are not due to defective materials, but rather installation errors that create acoustic bridges. Inspect your site for these common failure points:
- Baseboard Trim Contact: If wood baseboards or MDF shoe molding are nailed directly into the floor, or if they rest tightly against the finished floor without a caulk joint, impact vibrations will travel up the wall. Always leave a 1/8-inch gap between the finished floor and the baseboard, and fill it with a flexible, paintable acoustic sealant like OSI SC-175.
- Back-to-Back Electrical Boxes: In multi-story wood framing, electrical outlets placed back-to-back on opposite sides of a partition wall create a massive flanking path. Ensure floor penetrations for electrical conduits are wrapped in acoustic putty pads.
- Unisolated HVAC Ducts: Rigid sheet metal ducts penetrating the floor assembly will transmit low-frequency mechanical noise. Use flexible canvas duct connectors at all floor penetration points.
Advanced Decoupling: Sleeper Systems for Hardwood Floors
When installing solid hardwood or heavy stone tile over a concrete slab, standard thin underlayments are insufficient. A sleeper system provides the necessary mass and decoupling depth.
Constructing the Sleeper Assembly
- Lay a 6-mil polyethylene vapor barrier directly over the concrete slab.
- Install 1/2-inch thick acoustic cork or rubber strips (sleepers) spaced 12 to 16 inches on center. Do not use continuous sheets; the gaps allow for airflow and reduce material compression.
- Place a layer of 1 lb or 2 lb MLV over the entire sleeper grid, draping it into the gaps to create a continuous mass layer.
- Install a 3/4-inch plywood subfloor over the sleepers, screwing only into the sleepers, ensuring the screws are exactly the right length to avoid piercing the MLV and vapor barrier into the concrete.
- Install the finished hardwood flooring over the plywood.
This assembly routinely achieves IIC ratings above 65 and STC ratings above 60, meeting the stringent HUD Design Guidelines for Noise Control in high-end residential developments.
Cost and ROI Analysis for Multi-Family Retrofits
Upgrading floor sound insulation materials in existing structures requires removing the finished floor, which significantly impacts labor costs. For a standard 1,000-square-foot multi-family unit retrofit in 2026, expect the following material and labor breakdown:
Retrofit Cost Estimate (1,000 Sq. Ft.)
- Demo & Disposal of Existing Floor: $1,200 - $1,800
- Subfloor Leveling & Prep: $800 - $1,500
- Premium Rubber Underlayment (12mm): $2,200
- Perimeter Isolation & Sealants: $350
- Labor for Acoustic Installation: $1,500 - $2,200
- Total Acoustic Upgrade Cost: $6,050 - $8,050 (Excluding new finished flooring)
ROI Note: Upgrading from a code-minimum IIC 50 to a luxury IIC 65 assembly can justify a 5% to 8% premium in rental rates or resale value in competitive urban markets, often yielding a payback period of under 24 months.
Frequently Asked Questions
Can I install floor sound insulation materials over existing tile?
Yes, but with caveats. You must first ensure the existing tile is firmly bonded to the subfloor. Any loose tiles will create a rattling effect that amplifies impact noise. Scarify the tile surface to remove glaze, apply a self-leveling compound to grout lines to create a flat plane, and then install your acoustic underlayment. Be aware that this will raise the floor height by at least 3/4-inch, requiring door undercutting and transition adjustments.
Does spray foam insulation work for floor soundproofing?
No. Closed-cell spray foam is highly rigid and actually acts as an acoustic bridge, transmitting structure-borne vibrations efficiently between the subfloor and the finished floor. Open-cell spray foam offers slight airborne damping in wall cavities but lacks the compression resistance required to support a floor load. Always use resilient, compressible materials like rubber, cork, or specialized acoustic fiberglass for floor assemblies. For comprehensive assembly designs, refer to the USG Sound Control guidelines.
How do I test the acoustic performance after installation?
Field testing is conducted using a tapping machine (a standardized device with steel hammers that drop onto the floor) and a calibrated sound level meter in the room below. This yields the Field-IIC (FIIC) rating. Hire an independent acoustical consultant certified by the Acoustical Society of America (ASA) to perform ASTM E1007 and ASTM E336 testing to verify compliance before closing up ceilings below.
Written by
Sarah WhitfieldSarah Whitfield is a chartered quantity surveyor (MRICS) and construction cost analyst with 15 years of experience in material pricing, procurement strategy, and project budgeting. She earned her degree in Construction Management from the University of Reading (UK) and has worked on projects ranging from $2M custom homes to $180M mixed-use developments across North America and Europe. Sarah currently leads cost estimating for BuildMat Insight, maintaining a proprietary database of 4,000+ material price points updated quarterly. She is a frequent contributor to RSMeans cost data panels and has presented at the International Cost Engineering Council (ICEC) congress. Based in Denver, CO, Sarah is an avid trail runner and volunteer mentor for Women in Construction.
More from Sarah Whitfield
View all
Wood & Lumber
What Are the Different Types of Wood? A Builder's Guide
Compare structural softwoods, finish hardwoods, and engineered lumber. Analyze Janka ratings, MOE values, and 2026 pricing for construction.
Aug 4, 2026

Walls & Panels
Steel Framing vs Wood Framing: Corrosion and Moisture Defense
Compare steel framing vs wood framing for moisture resistance. Learn about galvanized coatings, condensation risks, and corrosion protection strategies.
Jul 21, 2026

Stone & Masonry
How to Cut Stone Veneer: Wet Saw vs Grinder Comparison
Compare the best tools for cutting stone veneer. We review wet saws, angle grinders, and chop saws to help you achieve clean, chip-free cuts.
Jul 21, 2026