Pro Installation Guide for Insulating Curtain Material Systems
Master the installation of insulating curtain material with expert mounting, edge-sealing, and overlap techniques to maximize window R-value and stop drafts.

The Physics of Window Heat Loss and Curtain Sealing
The thermal performance of insulating curtain material is entirely dependent on the dead air space it creates between the fabric and the window glass. When warm room air contacts cold single-pane or poorly sealed double-pane glass, it cools, increases in density, and sinks. This draws more warm air over the top of the curtain, creating a continuous convective loop. According to the U.S. Department of Energy, this convective action can reduce the effective R-value of a thermal drape by up to 50% if the edges are left unsealed. Proper installation transforms the curtain from a simple radiant barrier into a sealed thermal envelope, effectively trapping the insulating air layer and stopping the convective loop.
If your insulating curtain material touches the window glass at any point, or if there is a gap larger than 1 inch at the top header, the thermal envelope is compromised. The fabric will act as a thermal bridge, transferring cold directly into the room and potentially causing interior condensation.
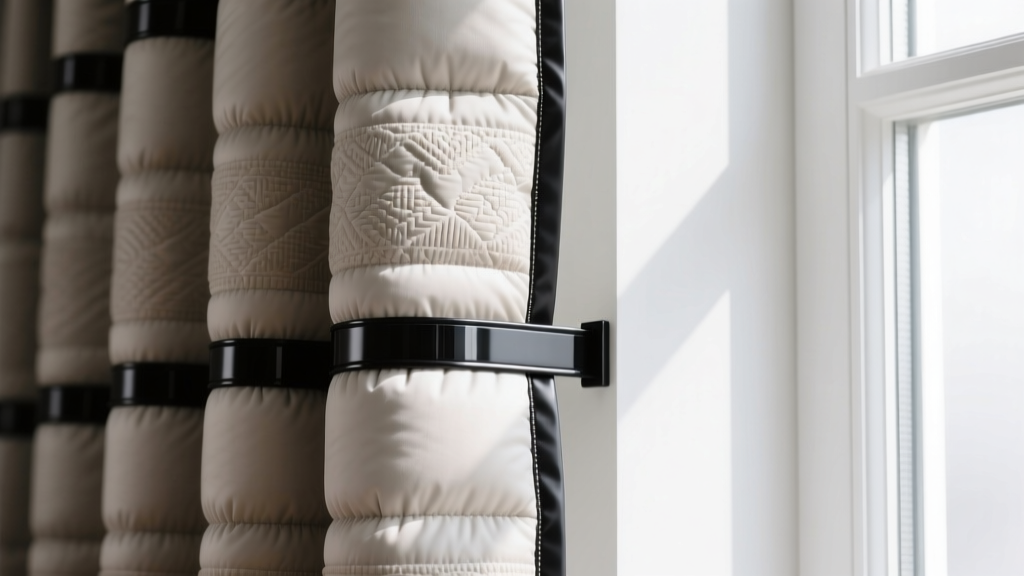
Pre-Installation: Measuring for Thermal Overlap
Standard decorative curtains typically overlap the window casing by 2 to 3 inches. For high-performance insulating curtain material, these dimensions are insufficient to prevent air infiltration. You must calculate specific overlap margins based on the window's orientation and the prevailing draft vectors.
- Side Overlaps: Extend the curtain rod or track a minimum of 4 inches beyond the window casing on both the left and right sides. This ensures the fabric rests flat against the drywall or plaster, blocking lateral drafts.
- Top Overlap (Header): Mount the rod or track at least 6 inches above the top window casing. Better yet, install a rigid pelmet box (valance) at the ceiling line. A pelmet completely eliminates the top-gap intake that feeds the convective loop.
- Bottom Sill Clearance: For thermal drapes, the hem should either lightly "puddle" on the floor (adding 2 inches to the drop length) or overlap the window sill by at least 4 inches for apron-mounted windows. Cellular shades require an exact 0.25-inch deduction from the sill height to allow smooth operation while minimizing the bottom gap.
Hardware Selection and Structural Mounting
Multi-layer insulating curtain material—such as triple-weave blackout fabrics with acrylic foam backing or mass-loaded vinyl (MLV) acoustic cores—is exceptionally heavy. These materials typically weigh between 3.5 and 6.0 pounds per linear foot. Standard drywall anchors and lightweight decorative tension rods will inevitably fail, leading to sagging headers that break the top thermal seal.
Step-by-Step Heavy-Duty Mounting
- Locate Structural Framing: Use a magnetic stud finder to locate the wooden or metal studs framing the window. Mark the center of each stud.
- Select Fasteners: For wood studs, use 2.5-inch #10 wood screws. For metal studs, use 2-inch self-drilling toggle straps or snap toggles rated for 150 lbs of shear load.
- Drywall Fallback: If a bracket must be placed where no stud exists, use 1/4-inch steel toggle bolts. Do not use plastic expansion anchors; the dynamic weight of heavy curtains being opened and closed will pulverize the drywall paper over time.
- Install Center Supports: For curtain rods spanning wider than 48 inches, a center support bracket is mandatory to prevent bowing. Mount this bracket flush against the wall to act as a draft baffle.
Edge Sealing Matrix: Magnetic vs. Track Systems
To achieve maximum R-value and acoustic dampening, the lateral edges of the insulating curtain material must be sealed to the wall. The ENERGY STAR program notes that reducing air infiltration around windows is just as critical as improving the window's baseline U-factor. Below is a comparison of the three primary edge-sealing techniques used in professional installations.
| Sealing Method | Material Cost (per LF) | Air Infiltration Reduction | Best Application |
|---|---|---|---|
| Magnetic Tape (MagSeal) | $2.50 - $4.00 | 85% - 90% | Retrofit thermal drapes on painted drywall or metal frames. |
| Hook-and-Loop (Velcro) | $0.80 - $1.50 | 60% - 75% | Temporary seasonal installations; lightweight cellular shades. |
| Rigid PVC Side Tracks | $5.00 - $8.50 | 95% - 99% | Permanent acoustic/thermal studio builds; high-wind draft zones. |
For residential retrofits, adhesive-backed magnetic tape offers the highest return on investment. Apply the steel-receptive tape to the window casing and the flexible magnetic strip to the hemmed edge of the curtain. When drawn, the curtain snaps to the casing, creating an airtight seal that rivals rigid foam insulation.
Managing Condensation and Moisture Traps
A critical, often overlooked edge case in sealing insulating curtain material is interior condensation. When you create a perfect airtight seal around a window in a high-humidity environment (e.g., bathrooms, kitchens, or homes in marine climates), moisture from the room can become trapped against the cold glass. Over a heating season, this leads to severe mold growth on the window sill and rotting of wooden casings.
Expert Troubleshooting Rule: If your indoor relative humidity consistently exceeds 45% during winter, do not use a 100% airtight bottom seal. Instead, employ the "weep gap" technique: leave a deliberate 0.5-inch gap between the bottom of the curtain hem and the window sill. This allows a micro-current of room air to circulate behind the drape, carrying moisture away from the glass while sacrificing less than 4% of the overall thermal R-value.
Acoustic vs. Thermal Mounting Differences
While thermal insulating curtain material focuses on trapping dead air, acoustic insulating curtain material (often incorporating MLV or dense fiberglass cores) focuses on mass and decoupling. The installation techniques diverge significantly at the mounting phase.
Compression Mounting for Soundproofing
Sound waves will flank through any gap, no matter how small. A 1% gap in the perimeter of an acoustic curtain will reduce its Sound Transmission Class (STC) rating by up to 50%. When installing acoustic curtains, the side tracks must be designed to compress the fabric edge. Use U-channel PVC tracks that are 0.25 inches narrower than the folded fabric hem. As the curtain is drawn into the track, the fabric compresses, creating a mechanical gasket that blocks sound flanking. Furthermore, acoustic ceiling tracks should be mounted directly to the structural ceiling joists, bypassing the drywall entirely, to prevent sound vibration from transferring through the plaster.
Final Inspection Checklist
Before considering the installation complete, perform this physical verification to ensure the insulating curtain material is performing to specification:
- The Flashlight Test: Turn off the room lights at night and shine a high-lumen flashlight from the outside perimeter of the window. Inside the room, check for light bleeding through the side hems, top header, or center overlap. Any light penetration indicates an air gap that will compromise thermal performance.
- The Draft Gauge: Use a digital anemometer or a simple lit incense stick along the sealed edges on a windy day. If the smoke wavers or the anemometer registers airflow above 0.1 m/s, re-apply the magnetic tape or adjust the PVC track alignment.
- Hardware Deflection Check: Fully extend the curtains and measure the rod deflection at the center point. If the rod bows more than 0.5 inches, the structural integrity is failing, which will eventually pull the top header away from the wall and break the thermal seal.
Written by
Marcus ChenMarcus Chen is a licensed structural engineer (PE) and building materials analyst with over 12 years of experience across residential, commercial, and industrial construction. He holds a Master of Science in Civil Engineering from UC Berkeley and spent six years at Thornton Tomasetti before transitioning to independent consulting and technical writing. Marcus specializes in material selection for seismic-prone regions, concrete reinforcement strategies, and lifecycle cost analysis. His work has been cited by the American Concrete Institute (ACI) and the Structural Engineers Association of California (SEAOC). When he is not on a job site or at his desk, you will find him hiking the Sierra Nevada or restoring a 1920s craftsman bungalow in Oakland, CA.
More from Marcus Chen
View all
Construction Cost
How Much Did the Eiffel Tower Cost to Build?
How much did the Eiffel Tower cost to build in 1889? We adjust for inflation and compare its budget to modern skyscraper construction.
Aug 4, 2026

Fire Resistance
What Is a Fire Resistant Material? Testing & Certification Guide
Discover what is a fire resistant material through ASTM and UL testing. Learn how fire ratings, certifications, and assemblies work in construction.
Aug 4, 2026

Construction Cost
How Much Did the Burj Khalifa Cost to Build?
How much did the Burj Khalifa cost to build? We break down the $1.5B project and extract 5 money-saving strategies for your next build.
Jul 30, 2026