How to Find Suppliers That Create Custom-Blend Architectural Stone Veneer and Install It
Discover top suppliers that create custom-blend architectural stone veneer and master the specialized installation techniques required for bespoke masonry.

Identifying Suppliers That Create Custom-Blend Architectural Stone Veneer
Sourcing bespoke masonry requires looking beyond standard catalog offerings. When architects and restoration specialists need to match historic facades or execute highly specific color palettes, they must find suppliers that create custom-blend architectural stone veneer. The market is divided into two primary tiers: national manufacturers with dedicated custom programs and regional architectural casting studios.
National leaders like Eldorado Stone and Boral (Cultured Stone) operate specialized 'Custom Color' and 'Bespoke Run' divisions. These programs utilize industrial spectrophotometers to analyze physical substrate samples, adjusting iron oxide pigments and aggregate exposures to replicate specific geologic profiles. Alternatively, regional Glass Fiber Reinforced Concrete (GFRC) and architectural precast studios offer lower minimums and highly specialized texturing, often hand-carving molds from actual historic stone to capture exact tooling marks.
The Sourcing Protocol: Securing Your Bespoke Run
Ordering a custom blend is not a simple e-commerce transaction; it is a collaborative manufacturing process. Follow this strict protocol to ensure the final product matches your architectural intent.
- Substrate Sampling: Ship physical samples of the existing masonry or target material to the manufacturer. Do not rely on digital photographs, as screen calibration and ambient lighting will skew the factory's color matching.
- Spectrophotometer Analysis & Formulation: The supplier's lab will map the color profile and aggregate distribution. For heritage restorations, reference the National Park Service Preservation Briefs to ensure your custom blend aligns with historic masonry preservation standards regarding porosity and vapor transmission.
- Strike-Off Approval: The factory will produce a 2x2 foot 'strike-off' panel. Evaluate this panel outdoors in both direct sunlight and overcast conditions. Check for aggregate pop-out, color depth, and surface texture.
- Production Run & Pallet Mapping: Once approved, the factory will cast the run. Require the supplier to map the pallets by pour date to help you manage slight batch variations during installation.
Pre-Installation Site Prep for Custom Blends
Installing custom-blend veneer introduces unique challenges, primarily the risk of 'banding' or visible color shifts if pallets are not properly integrated. Because custom runs are poured in discrete batches, slight pigment variations between pallets are inevitable.
The Three-Pallet Blending Rule
Never install directly from a single pallet. Always open a minimum of three pallets simultaneously. The mason must pull stones from all three pallets in a randomized pattern. This on-site dry-blending technique diffuses minor batch variations across the wall, creating a natural, organic color transition rather than stark horizontal lines.
Substrate and Lath Preparation
Proper substrate preparation is non-negotiable. For exterior wood-frame construction, apply a weather-resistive barrier (WRB) followed by a 2.5 lb/yd² self-furring galvanized wire lath. Secure the lath with corrosion-resistant fasteners penetrating the structural studs every 6 inches on center. Overlap all lath seams by a minimum of 1 inch horizontally and 2 inches vertically. According to guidelines supported by The Masonry Society, failing to properly overlap and fasten the lath is the leading cause of veneer delamination and structural failure.
Mortar Formulation and Jointing Matrices
The mortar joint accounts for up to 20% of a stone veneer's visible surface area. With custom-blend stone, the mortar color must be precisely calibrated to either contrast or blend with the bespoke stone palette. Use integral liquid or powder pigments (such as Davis Colors or Solomon Colors) mixed directly into the mortar.
| Mortar Type | Mix Ratio (Cement:Lime:Sand) | Best Application for Custom Blends |
|---|---|---|
| Type N | 1 : 1 : 6 | Preferred for most veneers. Lower compressive strength allows for thermal expansion without cracking the custom stone. |
| Type S | 1 : 0.5 : 4.5 | Use only for below-grade applications or high-wind seismic zones where higher bond strength is structurally mandated. |
Always perform a mortar test board 48 hours before the main installation. Mortar colors lighten significantly as they cure and carbonates. The test board must be fully cured to verify the final pigment intensity against the custom stone.
Step-by-Step Installation Execution
- Apply the Scratch Coat: Trowel a 1/2-inch to 3/4-inch layer of Type N or Type S mortar over the wire lath. Before it sets, score the surface horizontally with a coarse rake to create a mechanical key for the setting bed.
- Layout and Dry-Fit: Snap chalk lines to establish horizontal coursing. Dry-fit corner pieces first, as they dictate the rhythm of the wall. Custom blends often include specialized corner returns that must be staggered in a running bond pattern.
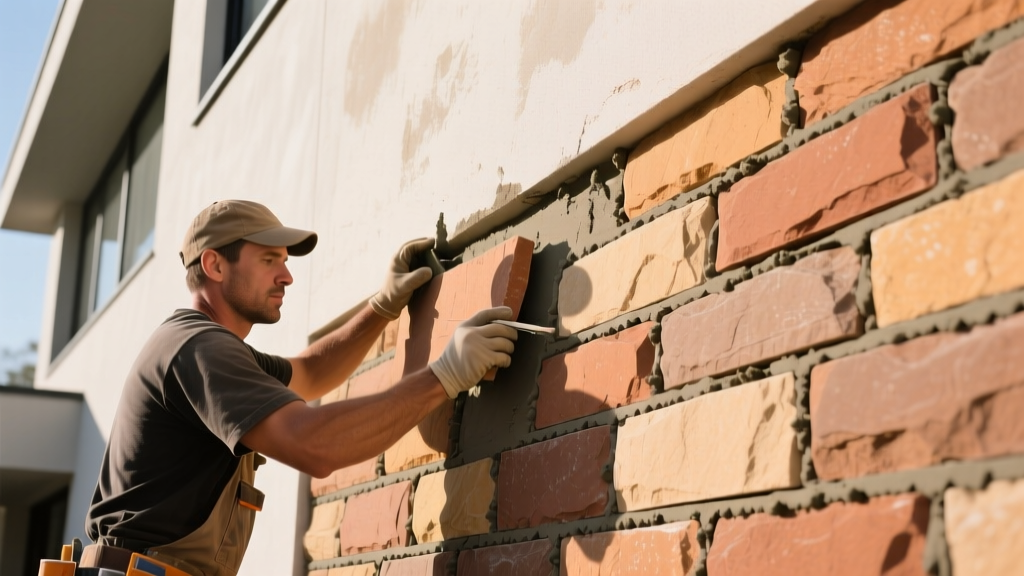
- Butter and Press: Apply a 1/2-inch layer of fresh mortar to the back of the stone (buttering). Press the stone firmly into the scratch coat, wiggling it slightly to squeeze out excess mortar and ensure a 100% bond. Do not tap the stone with a trowel handle, as this can break the micro-bond.
- Jointing and Tooling: Maintain consistent 1/2-inch to 1-inch joints. Once the mortar becomes thumbprint-hard (usually 30 to 45 minutes depending on ambient humidity), tool the joints with a concave jointer to compress the mortar and seal the edges against water infiltration.
Troubleshooting Bespoke Veneer Failures
Custom-blend architectural stone requires specialized maintenance during and immediately after installation. Avoid these common critical errors:
- Acid Etching: Never use muriatic acid or harsh masonry cleaners to remove mortar smears from custom-colored stone. The acid will react with the iron oxide pigments and the Portland cement matrix, permanently bleaching the bespoke color. Instead, use a stiff natural-bristle brush and a pH-neutral masonry cleaner while the mortar smears are still semi-fresh.
- Efflorescence Trapping: If the wall is sealed with a non-breathable acrylic sealer before the masonry has fully cured (minimum 28 days), trapped moisture will cause severe efflorescence (white salt deposits) behind the sealer, ruining the custom color profile. Always use a silane/siloxane penetrating breathable sealer.
- Shadow Banding: If the installer fails to maintain a consistent mortar depth, recessed joints will cast deep shadows, artificially darkening sections of the wall and destroying the carefully calibrated custom blend.
2026 Cost Matrix: Custom Sourcing vs. Standard Installation
Budgeting for custom-blend architectural stone veneer requires accounting for both the premium manufacturing costs and the specialized labor required for proper on-site blending and pigment-matched jointing.
| Cost Category | Standard Catalog Veneer (2026) | Custom-Blend Veneer (2026) |
|---|---|---|
| Material Cost (per sq. ft.) | $8.50 - $14.00 | $18.00 - $32.00 |
| Custom Formulation / Strike-off Fees | $0 | $500 - $1,500 (often credited toward final order) |
| Specialty Pigmented Mortar (per bag) | $12.00 (Standard Gray) | $28.00 - $45.00 (Integral Color) |
| Labor Installation (per sq. ft.) | $15.00 - $22.00 | $24.00 - $35.00 (includes 3-pallet blending protocol) |
| Lead Time | 1 - 3 Weeks | 8 - 14 Weeks |
By understanding both the sourcing mechanisms and the rigorous installation protocols, project managers and masons can successfully execute custom-blend architectural stone veneer projects that deliver unmatched aesthetic precision and long-term structural durability.
Written by
Elena RodriguezElena Rodriguez is a civil engineer and technical writer specializing in concrete technology, masonry systems, and ASTM/ACI compliance. She earned her B.S. in Civil Engineering from Texas A&M University and spent a decade at a materials testing laboratory, performing over 2,000 concrete compressive strength tests and masonry prism evaluations. Elena is an ACI-certified Field Testing Technician (Grade I) and a member of ASTM Committee C12 on Natural Building Stone. She currently consults on forensic engineering cases involving concrete failures and moisture intrusion. Based in San Antonio, TX, Elena is a proud member of the Society of Women Engineers (SWE) and coaches her daughter's FIRST Robotics team.
More from Elena Rodriguez
View all
Walls & Panels
Cost Analysis: Light Gauge Steel Framing Advantages and Disadvantages
Evaluate light gauge steel framing advantages and disadvantages through a strict cost analysis lens, comparing material, labor, and lifecycle expenses.
Aug 4, 2026

Walls & Panels
Gypsum Board Types: Exact Specifications, Thickness & Dimensions
Compare standard, Type X, and moisture-resistant gypsum board types. Get exact specifications, thicknesses, dimensions, and ASTM standards for your project.
Aug 4, 2026

Fire Resistance
Best Fire-Resistant Outdoor Decking Materials: 2026 Buyer Guide
Discover the best fire-resistant outdoor decking materials for 2026. Compare Class A PVC, aluminum, and hardwood options for WUI compliance and safety.
Aug 4, 2026