Natural Stone Veneer Cost Breakdown and Installation Steps
Analyze the true natural stone veneer cost per square foot and follow our expert step-by-step installation guide for mortar, lath, and setting.

The True Natural Stone Veneer Cost Breakdown
Calculating the accurate natural stone veneer cost requires looking beyond the price per square foot of the stone itself. Natural stone is significantly heavier and denser than manufactured alternatives, demanding robust substrate preparation, specialized mortars, and precise labor. Below is a detailed cost matrix reflecting current market rates for materials and professional labor.
| Cost Category | Material / Component | Estimated Cost (Per Sq. Ft.) |
|---|---|---|
| Stone Material | Natural Fieldstone, Ledge, or Granite Veneer | $9.00 - $18.00 |
| Substrate Prep | WRB (Housewrap), 2.5lb Galvanized Lath, Weep Screed | $2.50 - $4.50 |
| Mortar & Grout | Type S Masonry Cement, Polymer-Modified Setting Bed | $1.50 - $3.00 |
| Professional Labor | Masonry Contractor (Prep, Setting, Pointing) | $14.00 - $28.00 |
| Sealer & Extras | Silane/Siloxane Penetrating Sealer, Waste Factor (10%) | $1.00 - $2.50 |
| Total DIY Cost | Materials Only (Excluding Tool Rental) | $13.00 - $25.50 |
| Total Pro Cost | Fully Installed and Sealed | $27.00 - $53.50 |
Phase 1: Substrate Preparation and Moisture Management
The most common cause of natural stone veneer failure is moisture entrapment leading to efflorescence or freeze-thaw spalling. Proper moisture management is non-negotiable.
Installing the Weather Resistive Barrier (WRB)
Begin by applying two layers of Grade D building paper or a high-quality breathable housewrap over the exterior sheathing (OSB or plywood). The dual-layer system creates a capillary break, allowing any moisture that penetrates the mortar bed to drain downward. Overlap horizontal seams by a minimum of 2 inches and vertical seams by 6 inches.
Weep Screed Placement
Install a galvanized or PVC weep screed at the absolute base of the wall system. The weep screed must be positioned at least 4 inches above final soil grade or 2 inches above paved concrete surfaces. This gap prevents ground moisture from wicking up into the stone and provides an exit point for water draining behind the veneer.
Phase 2: Lath and Scratch Coat Application
Natural stone requires a mechanical bond; mortar alone will not adhere reliably to flat sheathing or painted surfaces over time.
Hanging the Metal Lath
Use 2.5 lb galvanized expanded metal lath. Fasten it using 1-1/4 inch galvanized roofing nails or heavy-duty staples, penetrating directly into the wall studs (not just the sheathing). Space fasteners 6 inches on center vertically and 16 inches horizontally. Overlap lath seams by 1 inch horizontally and 2 inches vertically, ensuring the cups of the expanded metal face upward to catch the mortar.
Mixing and Applying the Scratch Coat
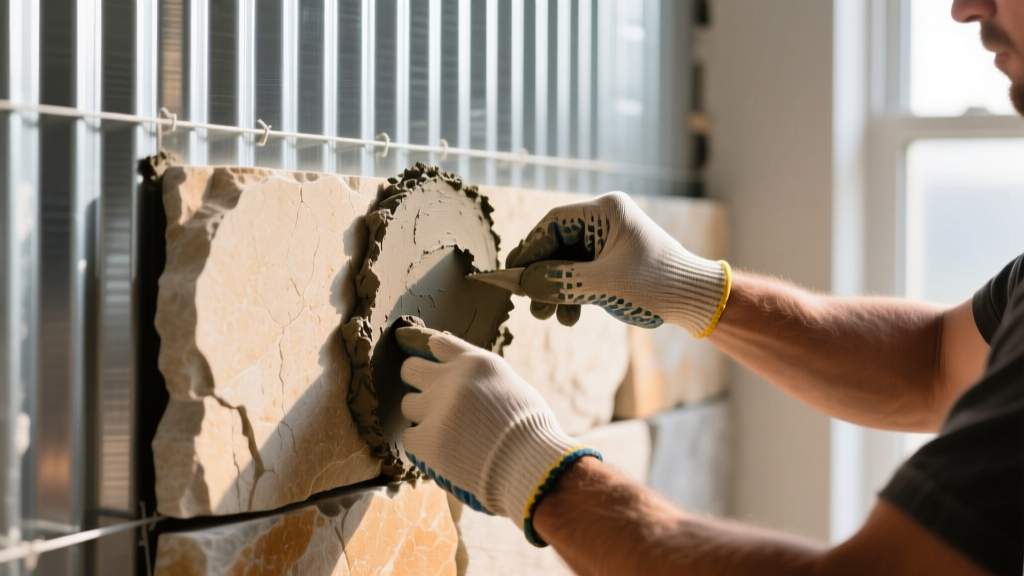
Mix a Type S masonry cement (compliant with ASTM C91) to a consistency resembling thick peanut butter. The Portland Cement Association recommends a scratch coat thickness of exactly 1/2 inch. Press the mortar firmly into the lath using a flat trowel to eliminate air pockets. Before the mortar sets, score the surface horizontally with a coarse rake to create deep grooves. This scratch profile provides the mechanical grip for the final setting bed. Mist the scratch coat with water twice daily for 48 hours to ensure proper hydration and prevent shrinkage cracking.
Phase 3: Setting the Natural Stone
Setting natural stone is a deliberate process that prioritizes structural adhesion and aesthetic blending.
Pro Layout Tip: Never pull stones directly from a single pallet and install them sequentially. Open 3 to 4 pallets and dry-fit the stones on the ground to blend color variations, thicknesses, and textures. This prevents distinct "bands" of color from appearing on your finished wall.
The Buttering Technique
Apply a 1/2 inch to 1 inch layer of fresh mortar to the wall surface. Next, "butter" the back of the individual stone with a 1/4 inch layer of mortar, ensuring the edges are fully coated. Press the stone into the wall bed with a slight twisting motion until mortar squeezes out slightly at the edges. This dual-application method guarantees 100% coverage and eliminates hollow voids behind the stone where water could pool and freeze.
Maintaining Joint Spacing
Unless you are installing a specific dry-stack profile, maintain a consistent 1/2 inch to 1 inch joint between stones. Use small wooden shims or spare stone chips to hold heavy pieces in place while the mortar cures. Remove the shims before pointing.
Phase 4: Pointing, Grouting, and Sealing
The final aesthetic and weatherproofing layers require specific tools and timing.
Grouting the Joints
Wait until the setting mortar is thumbprint-hard (usually 24 hours). Load a canvas grout bag with a slightly wetter mortar mix and pipe it into the joints, filling them completely. Avoid smearing mortar on the face of the stone; natural stones like limestone and sandstone are highly porous and will permanently stain if mortar is wiped across their surface. Once the grout in the joints becomes firm, use a stiff-bristled brush or a pointing tool to compress and smooth the joints, creating a slight concave profile that sheds water.
Applying the Correct Sealer
After a full 28-day curing period, apply a breathable, penetrating silane/siloxane sealer. Never use film-forming acrylic sealers. Acrylics trap moisture vapor inside the stone, leading to sub-surface pressure buildup and eventual spalling (chipping) during freeze-thaw cycles.
Hidden Cost Traps and Failure Modes to Avoid
- Diamond Blade Consumption: Cutting hard natural stones like granite or quartzite burns through standard masonry blades rapidly. Budget $50 to $90 per premium continuous-rim diamond blade designed specifically for hard natural stone, and expect to use multiple blades on a large project.
- Scaffolding Rentals: Working above 6 feet requires safe staging. Pump-jack scaffolding or frame scaffolding rentals typically add $150 to $400 per week to your natural stone veneer cost, a line item frequently omitted from initial DIY estimates.
- Mortar Desiccation: Applying setting mortar to a hot, dry, or highly absorbent scratch coat will cause the base to suck the moisture out of the fresh mortar before it can cure. This results in a chalky, weak bond and eventual delamination. Always mist the scratch coat with water immediately before applying the setting bed.
- Efflorescence Remediation: If white, powdery salt deposits appear on the stone after installation, it indicates moisture is moving through the wall and evaporating on the surface. While it can be cleaned with a diluted muriatic acid solution or specialized efflorescence remover, the root cause (missing weep screed or inadequate WRB) must be addressed, or the deposits will return.
Written by
Sarah WhitfieldSarah Whitfield is a chartered quantity surveyor (MRICS) and construction cost analyst with 15 years of experience in material pricing, procurement strategy, and project budgeting. She earned her degree in Construction Management from the University of Reading (UK) and has worked on projects ranging from $2M custom homes to $180M mixed-use developments across North America and Europe. Sarah currently leads cost estimating for BuildMat Insight, maintaining a proprietary database of 4,000+ material price points updated quarterly. She is a frequent contributor to RSMeans cost data panels and has presented at the International Cost Engineering Council (ICEC) congress. Based in Denver, CO, Sarah is an avid trail runner and volunteer mentor for Women in Construction.
More from Sarah Whitfield
View all
Wood & Lumber
What Are the Different Types of Wood? A Builder's Guide
Compare structural softwoods, finish hardwoods, and engineered lumber. Analyze Janka ratings, MOE values, and 2026 pricing for construction.
Aug 4, 2026

Walls & Panels
Steel Framing vs Wood Framing: Corrosion and Moisture Defense
Compare steel framing vs wood framing for moisture resistance. Learn about galvanized coatings, condensation risks, and corrosion protection strategies.
Jul 21, 2026

Stone & Masonry
How to Cut Stone Veneer: Wet Saw vs Grinder Comparison
Compare the best tools for cutting stone veneer. We review wet saws, angle grinders, and chop saws to help you achieve clean, chip-free cuts.
Jul 21, 2026