How to Install Stacked Stone Veneer Interior Accent Walls
Master your stacked stone veneer interior installation with our expert guide. Learn substrate prep, mortar choices, and drystack illusion techniques.

The Physics of Interior Stone: Why Substrate is Everything
Installing a stacked stone veneer interior accent wall transforms a flat, monotonous room into a space with profound architectural depth. However, the most common point of catastrophic failure in DIY and even contractor-led interior stone projects is substrate delamination. Manufactured and natural stone veneers typically weigh between 10 and 15 pounds per square foot. Standard 1/2-inch gypsum drywall is rated to hold only about 1.5 pounds per square foot of shear load before the paper facing tears away from the gypsum core.
According to Cultured Stone substrate preparation standards, any interior wall receiving masonry veneer must be rigid, dimensionally stable, and free of moisture barriers that could trap condensation inside the wall cavity. For interior accent walls (like fireplace surrounds or media wall backdrops), 1/2-inch fiber cement board or glass-mat water-resistant gypsum board (like DensShield) is the mandatory baseline.
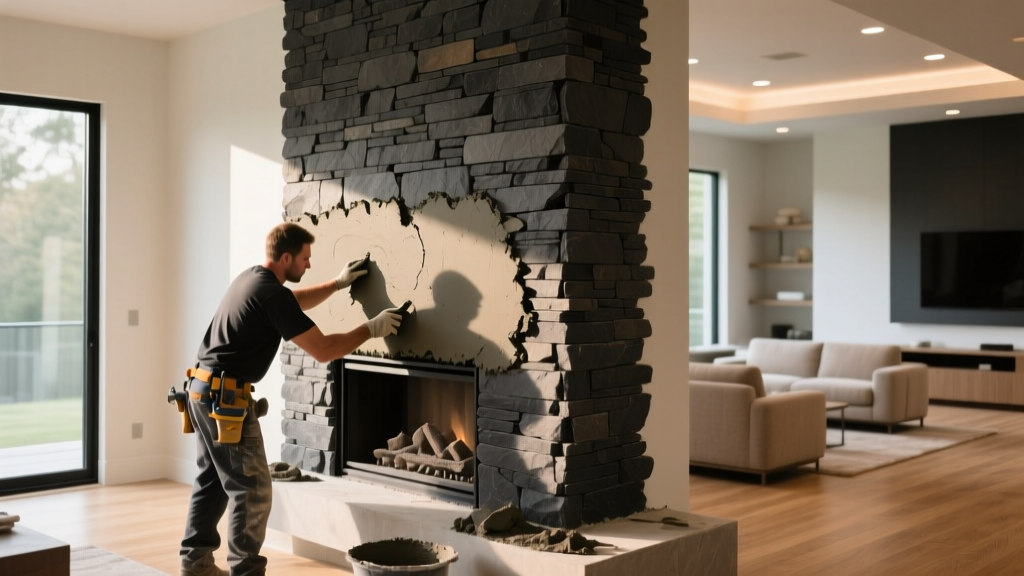
Material & Tool Manifest
Before mixing mortar, ensure you have procured the correct materials. Using standard thin-set meant for porcelain tile will result in poor adhesion and eventual slippage due to the weight and porosity of the stone.
| Material / Tool | Specification & Purpose | Est. Cost (2026) |
|---|---|---|
| Ledger Stone Panels | 6" x 24" Interlocking Z-Clip (Natural or Manufactured) | $9.00 - $18.00 / sq ft |
| Polymer-Modified Mortar | Type S or ANSI A118.15 (e.g., LATICRETE 254 Platinum) | $45.00 - $65.00 / 50lb bag |
| Substrate | 1/2" Cement Board (Durock / HardieBacker) | $14.00 / 3x5 sheet |
| Fasteners | 1-1/4" Alkaline-Resistant Cement Board Screws | $9.00 / box |
| Wet Saw | 10" Tile Saw with Continuous Rim Diamond Blade | $150 (Rental: $75/day) |
| Trowel | 1/2" x 1/2" Square Notch Stainless Steel | $18.00 |
Step-by-Step Installation Protocol
Step 1: Substrate Reinforcement and Layout Lines
Secure your 1/2-inch cement board to the wall studs using alkaline-resistant screws spaced every 8 inches along the studs. Do not use standard drywall screws; the alkalinity in cement board will corrode them over time, compromising the hold. Tape the seams with alkali-resistant fiberglass mesh tape and embed it in a thin layer of your mortar. Once cured, snap horizontal chalk lines every 6 inches up the wall. Because stacked stone veneer interior panels are typically 6 inches tall, these lines will serve as your absolute guide to prevent 'stair-stepping' (where the stone slowly drifts out of level across a long wall).
Step 2: The Dry-Layout Strategy
Never pull stone directly from the box and stick it to the wall. Manufactured ledger panels have repeating color and texture patterns. Unbox at least 10 square feet of stone onto the floor and dry-fit the pieces. Blend stones from different pallets to distribute color variations evenly. If you are wrapping an outside corner, identify your corner pieces first. If your stone system does not include pre-cast L-shaped corners, you will need to miter-cut the stone edges at a 45-degree angle using a continuous rim diamond blade on a wet saw to create a seamless wrap.
Step 3: Mortar Mixing and Slaking
Mix your polymer-modified mortar to a 'peanut butter' consistency. It must be thick enough to hold a 1/2-inch ridge without slumping, but wet enough to wet-out the back of the stone. Once mixed, let the mortar 'slake' (rest) for 10 minutes. This allows the polymers to fully activate and the aggregate to absorb moisture. Remix briefly without adding water. According to Eldorado Stone's official installation guidelines, skipping the slaking process is a primary cause of premature mortar curing and weak bond strength.
Step 4: Back-Buttering and Setting
Using the flat side of your trowel, key a layer of mortar into the cement board, then comb it with the 1/2-inch notched side in a single horizontal direction. Next, 'back-butter' the stone panel by applying a thin, flat coat of mortar to the entire back surface of the veneer. Press the stone firmly into the wall mortar, wiggling it slightly to collapse the ridges and ensure 95%+ mortar coverage. For interior stacked stone, maintain a 1/16-inch gap between the bottom of the first course and the floor or hearth to prevent moisture wicking.
Hiding the Mortar: The Drystack Illusion
The defining characteristic of modern stacked stone is the 'drystack' or mortarless look. The goal is to make the stone appear as though it is dry-stacked without any adhesive. When you press mortar-backed stone against the wall, the mortar will inevitably squeeze out into the tight horizontal joints between the 6-inch panels.
To preserve the drystack illusion:
- The Recessed Bed Method: When combing mortar on the wall, stop 1/4-inch short of the top edge of your chalk line. When you press the stone in, the mortar will expand upward but stop just below the top lip of the stone, leaving the joint visually empty.
- The Zip-Brush Technique: Keep a stiff-bristled 'zip brush' and a slightly damp sponge nearby. The moment mortar squeezes into the joint, drag the brush horizontally across the seam to pull the mortar back, then lightly dab the stone edge with the sponge to remove the haze. Do not wait for the mortar to skin over; you must clean the joints within 3 minutes of setting the panel.
Interior Edge Cases & Troubleshooting
Dealing with Stone Slippage
If you find your ledger panels are sliding down the wall before the mortar cures, your mortar mix is too wet, or you are working in a room that is too cold. Polymer-modified mortars require an ambient temperature of at least 50°F (10°C) to cure properly. If slippage occurs, use blue painter's tape to pin the stone to the adjacent, already-cured stone or the substrate until the initial set takes hold (usually 45 to 60 minutes).
Managing Silica Dust Indoors
Cutting natural or manufactured stone generates massive amounts of respirable crystalline silica dust. In an interior environment, this dust will coat furniture, HVAC returns, and your lungs. Never dry-cut stone indoors. Always use a wet saw connected to a GFCI-protected outlet, and if you must use an angle grinder for trim cuts, attach a shroud connected to a HEPA-filtered dust extractor. The Tile Council of North America (TCNA) handbook strictly mandates wet-cutting or HEPA extraction for all interior masonry cutting to comply with OSHA silica regulations.
Efflorescence on Interior Walls
Efflorescence (the white, powdery salt deposit) is rare on purely interior walls, but it can occur if the accent wall is built on an uninsulated exterior wall in a cold climate. Moisture from the interior room migrates through the cement board, hits the freezing exterior sheathing, and pushes salts from the mortar to the surface of the stone. To prevent this, ensure the exterior wall cavity has a proper vapor retarder, and use a high-quality penetrating sealer on the stone veneer after the mortar has fully cured for 28 days.
"The success of an interior stone veneer installation is determined before the first piece of stone is ever pulled from the box. If your substrate is flawless, your mortar is properly slaked, and your layout lines are true, the physical act of setting the stone becomes a simple, rhythmic process. Rush the prep, and you will fight the wall for every inch."
Written by
Elena RodriguezElena Rodriguez is a civil engineer and technical writer specializing in concrete technology, masonry systems, and ASTM/ACI compliance. She earned her B.S. in Civil Engineering from Texas A&M University and spent a decade at a materials testing laboratory, performing over 2,000 concrete compressive strength tests and masonry prism evaluations. Elena is an ACI-certified Field Testing Technician (Grade I) and a member of ASTM Committee C12 on Natural Building Stone. She currently consults on forensic engineering cases involving concrete failures and moisture intrusion. Based in San Antonio, TX, Elena is a proud member of the Society of Women Engineers (SWE) and coaches her daughter's FIRST Robotics team.
More from Elena Rodriguez
View all
Walls & Panels
Cost Analysis: Light Gauge Steel Framing Advantages and Disadvantages
Evaluate light gauge steel framing advantages and disadvantages through a strict cost analysis lens, comparing material, labor, and lifecycle expenses.
Aug 4, 2026

Walls & Panels
Gypsum Board Types: Exact Specifications, Thickness & Dimensions
Compare standard, Type X, and moisture-resistant gypsum board types. Get exact specifications, thicknesses, dimensions, and ASTM standards for your project.
Aug 4, 2026

Fire Resistance
Best Fire-Resistant Outdoor Decking Materials: 2026 Buyer Guide
Discover the best fire-resistant outdoor decking materials for 2026. Compare Class A PVC, aluminum, and hardwood options for WUI compliance and safety.
Aug 4, 2026