Best Peel and Stick Stone Veneer Panels: 2026 Buyer Guide
Compare the best peel and stick stone veneer panels for 2026. Explore costs, top brands like Aspect, surface prep, and installation limits.

The Adhesive Technology: What You Are Actually Sticking
Peel and stick stone veneer has evolved significantly from the thin, flexible vinyl sheets of the early 2010s. In 2026, the market is dominated by two distinct adhesive technologies: pressure-sensitive acrylic adhesives (PSA) and pre-applied polyurethane foam tapes. Understanding the difference is critical for long-term adhesion.
Panels utilizing PSA require a chemical bond that cures over 48 to 72 hours. During this window, the adhesive flows into the microscopic pores of the primed substrate. Conversely, foam tape adhesives offer immediate grab but lack the long-term shear strength of cured acrylics, making them better suited for lightweight polyurethane faux stone rather than genuine stone slices. According to Home Depot's Stone Veneer Buying Guide, proper substrate preparation is universally required for both adhesive types to prevent delamination.
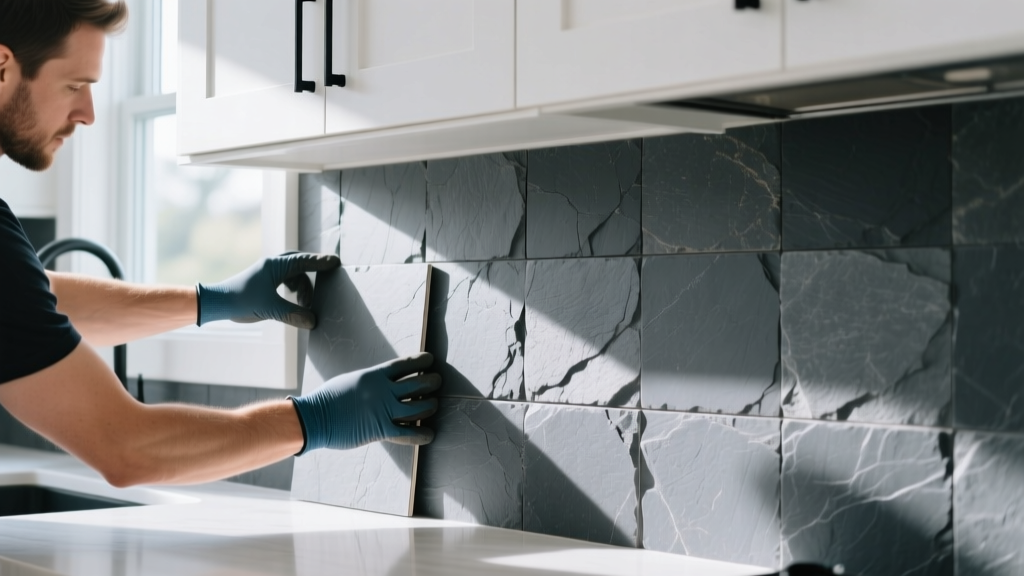
2026 Brand Comparison Matrix
Not all adhesive-backed stone is created equal. The matrix below breaks down the leading options based on material composition, thickness, and ideal use cases.
| Brand / Product Line | Material Composition | Thickness | Price (per sq. ft.) | Best Application |
|---|---|---|---|---|
| Aspect Peel & Stick Stone | Real quarried stone slices | 0.25 in. | $12.00 - $16.00 | Kitchen backsplashes, accent walls |
| MSI Everstone DIY | Natural stone on flexible mesh | 0.375 in. | $14.00 - $18.00 | Fireplace surrounds, high-end feature walls |
| SmartStone Interlocking | High-density polyurethane (PU) | 0.50 in. | $6.00 - $9.00 | Basement walls, exterior wainscoting (covered) |
| Art3d Stone Composite | PVC and stone dust composite | 0.15 in. | $3.00 - $5.00 | Rental property flips, budget backsplashes |
Material Reality Check
If you are seeking the thermal mass and authentic light refraction of real rock, Aspect and MSI Everstone are your only viable choices. Polyurethane options like SmartStone excel in weight reduction (weighing roughly 1 lb per square foot compared to 4-6 lbs for real stone), but they will melt or warp if exposed to direct high heat.
True Cost Analysis: Peel & Stick vs. Mortar-Bed Veneer
When evaluating Lowe's Stone Veneer Buying Guide data, traditional mortar-set stone veneer requires a multi-step process: installing metal lath, applying a scratch coat of mortar, buttering each stone, and pointing the joints. This drives professional installation costs to $25.00 - $45.00 per square foot.
Peel and stick systems eliminate the need for lath, mortar, masonry trowels, and specialized labor. While the material cost per square foot for premium real-stick veneer ($14.00) can sometimes match the raw material cost of traditional stone, the total project cost drops by 60% to 75% because the labor is entirely DIY-friendly. A 30-square-foot fireplace surround that would cost $1,200 with a mason can be completed for $420 in materials over a single weekend.
Surface Preparation Protocol
Adhesive failure is almost never the fault of the glue; it is the fault of the substrate. Follow this exact preparation sequence to ensure a permanent bond:
- Degrease and Clean: Wash the wall with a TSP (Trisodium Phosphate) solution to remove cooking oils, drywall dust, and fingerprints. Rinse with clean water and let dry for 24 hours.
- Prime the Substrate: Apply one coat of Zinsser B-I-N (shellac-based) or Kilz Original (oil-based). Water-based primers can re-emulsify when exposed to the solvents in some adhesive backings.
- Verify Flatness: Use a 4-foot level. Adhesive veneers cannot bridge gaps larger than 1/16 inch. Sand down high spots on drywall seams and fill low spots with setting-type joint compound (e.g., DuraBond 90).
- Layout and Dry-Fit: Peel and stick panels cannot be easily repositioned once full pressure is applied. Map out your cuts and dry-fit the panels without peeling the backing.
Environmental Limitations & Edge Cases
Despite marketing claims, peel and stick stone veneer is not a universal solution. You must respect the thermal and moisture limitations of the adhesive layer.
- Heat Proximity: Do not install PSA-backed stone within 8 inches of a direct heat source (like a stove burner or unshielded fireplace opening). The adhesive begins to soften and lose shear strength at 140°F (60°C).
- High Humidity / Wet Zones: These panels are water-resistant, not waterproof. Water can migrate through the microscopic gaps between panels and become trapped behind the veneer, leading to mold growth on the drywall substrate. Do not use peel and stick stone inside shower enclosures or directly behind undermount sinks where standing water occurs.
- Outgassing Interference: If you have painted the wall within the last 30 days, VOC outgassing from the paint can create microscopic bubbles under the adhesive, weakening the bond. Wait a full 30 days after painting before applying veneer.
Cutting Real Stone vs. Faux Stone
If you choose a real stone product like Aspect, standard tile snips will shatter the material. You must use a wet saw equipped with a continuous-rim diamond blade (such as the MK Diamond 10-inch blade) to achieve clean, chip-free cuts. For polyurethane faux stone, a sharp utility knife and a straight edge are sufficient for scoring and snapping.
Expert FAQ: Grouting, Sealing, and Removal
Do I need to grout peel and stick stone veneer?
Most interlocking peel and stick systems are designed with built-in shiplap or puzzle joints that create a tight, grout-free seam. However, if you are using real stone slices with square edges, you can apply a non-sanded, polymer-modified grout. Be aware that grouting adds significant weight and moisture to the wall, which can temporarily compromise the adhesive while it cures. Use painter's tape to mask the stone faces, as real stone is highly porous and will absorb grout haze.
How do I remove peel and stick veneer without destroying the drywall?
Removal is the primary drawback of high-quality acrylic adhesives. To remove the panels, apply heat using a heat gun set to 200°F, moving constantly to avoid scorching the wall. The heat softens the acrylic, allowing you to pry the panel off with a wide putty knife. Expect to perform significant drywall repair and skim-coating afterward; the adhesive will inevitably pull the top layer of drywall paper with it.
Can I install this over existing tile?
Yes, but only if the existing tile is completely flat, non-porous, and structurally sound. Glossy ceramic tiles must be scuff-sanded with 80-grit sandpaper to provide mechanical tooth for the primer. If the existing tile has deep grout lines (greater than 1/8 inch), you must fill and level the grout lines with a floor leveler before priming, otherwise the grid pattern will telegraph through the thin stone veneer panels.
Written by
David NakamuraDavid Nakamura is a licensed architect (AIA) and construction technology writer focused on sustainable building methods, mass timber engineering, and high-performance building envelopes. He holds a Master of Architecture from the University of Washington and is a certified Passive House Consultant (CPHC). David spent eight years at the Seattle firm Mithun, where he led the design of three LEED Platinum projects, before founding his own practice specializing in net-zero residential design. He serves on the editorial advisory board of GreenBuilder Magazine and has authored peer-reviewed papers on cross-laminated timber (CLT) connections for the Journal of Structural Engineering. In his spare time, David teaches woodworking at Pratt Fine Arts Center and kayaks the Puget Sound.
More from David Nakamura
View all
Construction Cost
Labor Cost to Build a Deck Per Sq Ft: 2026 Installation Guide
Discover the exact labor cost to build a deck per sq ft in 2026. This installation guide breaks down contractor rates, complexity factors, and hidden fees.
Aug 4, 2026

Construction Cost
How Much Does It Cost to Build a 3 Bedroom House? Financing Guide
Learn exactly how much it costs to build a 3 bedroom house and explore 2026 financing options, construction loan types, and budget frameworks for your build.
Aug 4, 2026

Construction Cost
Cost to Build a Tennis Court: 2026 Guide
How much does it cost to build a tennis court in 2026? Breakdowns for asphalt, concrete, and synthetic surfaces plus fencing and lighting.
Jul 30, 2026