Stone Veneer Backsplash Cost Breakdown: 2026 Pricing & Installation
Discover the true cost of a stone veneer backsplash in 2026. Get detailed pricing for materials, labor, and hidden expenses to budget your kitchen remodel.

The True Cost of a Stone Veneer Backsplash in 2026
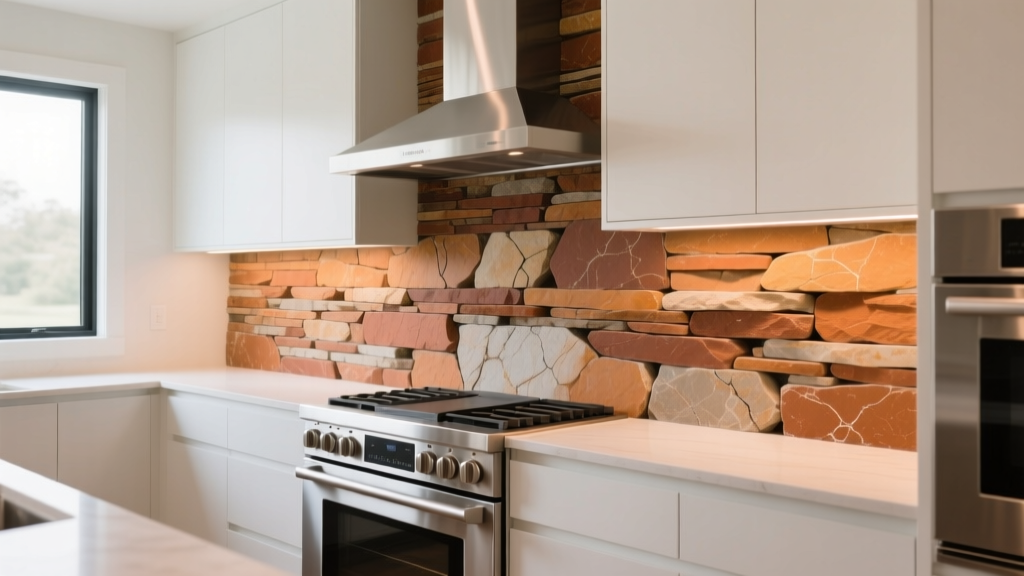
Upgrading a kitchen with a stone veneer backsplash bridges the gap between high-end natural masonry and budget-friendly ceramic tile. However, calculating the final project cost requires looking beyond the per-square-foot price tag on the showroom sample. In 2026, the national average for a complete stone veneer backsplash installation ranges from $18 to $42 per square foot, encompassing materials, substrate preparation, and professional masonry labor.
Unlike standard subway tile, stone veneer introduces unique variables: varying material thicknesses, specialized mortar requirements, and critical electrical code adjustments. According to the National Kitchen and Bath Association (NKBA), textured and natural material finishes remain a dominant design trend, but homeowners frequently underestimate the prep work required to support the sheer weight of stone products. This guide dissects the exact material costs, labor rates, and hidden structural expenses you need to build an accurate 2026 remodeling budget.
Material Cost Matrix: Natural vs. Manufactured Stone Veneer
The term 'stone veneer' covers a wide spectrum of products. Your primary decision will be between manufactured (cultured) stone and natural thin stone veneer. Manufactured stone is cast from molds of real stone using lightweight aggregates and iron oxide pigments, while natural thin veneer is real quarried stone sliced to a 1-inch thickness.
| Material Type | Cost Per Sq. Ft. (Material Only) | Average Weight | Best Application |
|---|---|---|---|
| Manufactured Stacked Stone | $6.50 - $11.00 | 10 - 12 lbs / sq ft | Modern kitchens, uniform ledger lines |
| Natural Thin Stone Veneer | $12.00 - $19.50 | 13 - 15 lbs / sq ft | Rustic, high-end custom remodels |
| Interlocking Ledger Panels | $8.00 - $14.00 | 9 - 11 lbs / sq ft | DIY-friendly, fast installation |
| Thin Brick Veneer (Clay) | $5.00 - $9.00 | 7 - 9 lbs / sq ft | Industrial, farmhouse aesthetics |
For a standard 30-square-foot kitchen backsplash (roughly 10 linear feet of counter space with 18-inch upper cabinets), material costs alone will range from $195 for basic thin brick up to $585 for premium natural fieldstone. Always purchase 10% to 15% overage to account for cutting waste, especially around range hoods and electrical outlets.
Labor, Substrate Prep, and Installation Expenses
Professional installation for stone veneer typically costs between $12 and $22 per square foot. Masons charge a premium over standard tile setters because stone requires a 'scratch coat' and careful blending of varied thicknesses to maintain a flush plane. However, interior backsplashes allow for a streamlined installation method compared to exterior facades.
The Substrate Requirement
You cannot apply stone veneer directly to painted drywall or existing glossy tile. The substrate must be removed or covered. Most professional installers will mandate the installation of a 1/2-inch cement backer board (such as HardieBacker or Durock) directly to the wall studs. This adds approximately $2.50 to $4.00 per square foot in materials and labor. While some manufacturers permit installation over existing tile using a specialized epoxy mortar and metal lath, tearing out the old backsplash and installing fresh cement board remains the gold standard for long-term adhesion.
Standard electrical outlet boxes are mounted flush with 1/2-inch drywall. Adding 1/2-inch cement board plus 1 to 2 inches of stone veneer and mortar will recess your outlets deeply into the wall. This violates National Electrical Code (NEC) requirements, which mandate that the box edge be within 1/4-inch of the finished surface. You must budget for electrical box extenders (like the Arlington BE1 series, roughly $3 to $5 per outlet) and the electrician's labor to pull the outlets forward and install longer cover plates.
Step-by-Step Budgeting Framework
To prevent budget overruns, use this exact framework to calculate your total project cost before signing a contractor agreement.
- Calculate Net Square Footage: Measure the length and height of the backsplash area. Subtract the square footage of large obstructions like range hoods or windows, but do not subtract standard electrical outlets.
- Add the Waste Factor: Multiply the net square footage by 1.15. Stone veneer requires significant cutting with a wet saw equipped with a continuous rim diamond blade. The irregular shapes of natural stone increase off-cuts and waste.
- Factor in Mortar and Grout: Do not use standard tile mastic. You must use a polymer-modified thin-set mortar meeting ANSI A118.4 standards. Budget $45 to $60 per 50 lb bag, which covers roughly 40 square feet of stone veneer.
- Include Sealing Costs: Natural stone and the mortar joints are highly porous. A high-quality impregnating sealer (such as 511 Impregnator Sealer) is mandatory in a kitchen environment to prevent grease and tomato sauce stains. Budget $35 to $50 per quart.
- Add Prep and Demolition: Allocate $300 to $500 for the demolition of the existing backsplash, drywall repair, and cement board installation.
Long-Term Value and Maintenance Costs
While the upfront cost of a stone veneer backsplash is higher than ceramic or glass tile, the return on investment and longevity are substantial. Stone is virtually impervious to heat, making it an ideal backdrop for gas ranges and heavy cooking zones. Unlike glass tile, which can crack under thermal shock, or melamine panels that melt, natural and manufactured stone withstands extreme kitchen temperatures.
According to the National Association of Realtors Remodeling Impact Report, kitchen upgrades that incorporate premium, natural materials consistently yield high joy scores for homeowners and recover a significant portion of their cost at resale. The primary maintenance expense is resealing the stone every 3 to 5 years. Avoid topical acrylic sealers, which create a plastic-like film that traps grease and yellows over time. Instead, specify penetrating siloxane or silane-based sealers that repel liquids while allowing the stone to breathe.
Expert Sourcing Tips
Skip the big-box store displays if you want the best pricing and selection. Visit specialized masonry supply yards or authorized dealers for premium brands like Eldorado Stone or Coronado Stone. These yards often sell 'overstock' or 'discontinued color' pallets at a 30% to 50% discount, which is perfect for the small square footage required for a backsplash.
Frequently Asked Questions
Can I install stone veneer over existing tile?
Technically, yes, but it is highly discouraged. While you can scuff the existing tile, apply a metal wire lath, and use an epoxy-based mortar, the added weight and thickness often cause issues with countertop overhangs and electrical outlets. Removing the old tile and installing 1/2-inch cement backer board provides a structurally sound, code-compliant substrate that guarantees the stone will not delaminate over time.
Does stone veneer require a grout joint?
It depends on the profile. 'Dry-stack' or 'stacked ledger' stone panels are designed to interlock tightly without any visible mortar joints, creating a clean, modern shadow-line effect. Conversely, traditional 'fieldstone' or 'ashlar' profiles require a mortar joint. For kitchen backsplashes, if you choose a profile with joints, ensure the mason uses a tightly struck (concave or flush) joint rather than a raked joint, which creates a horizontal ledge that will collect cooking grease and dust.
How do I clean a stone backsplash behind a stove?
Never use acidic cleaners (like vinegar or citrus-based degreasers) on natural stone, as they will etch the calcium carbonate in limestone, marble, or the cementitious binders in manufactured stone. Use a pH-neutral stone cleaner and a soft-bristled brush to agitate grease from the porous surface. If the stone was properly sealed with an impregnating sealer during installation, the grease will sit on the surface and wipe away easily with a microfiber cloth.
Written by
Elena RodriguezElena Rodriguez is a civil engineer and technical writer specializing in concrete technology, masonry systems, and ASTM/ACI compliance. She earned her B.S. in Civil Engineering from Texas A&M University and spent a decade at a materials testing laboratory, performing over 2,000 concrete compressive strength tests and masonry prism evaluations. Elena is an ACI-certified Field Testing Technician (Grade I) and a member of ASTM Committee C12 on Natural Building Stone. She currently consults on forensic engineering cases involving concrete failures and moisture intrusion. Based in San Antonio, TX, Elena is a proud member of the Society of Women Engineers (SWE) and coaches her daughter's FIRST Robotics team.
More from Elena Rodriguez
View all
Walls & Panels
Cost Analysis: Light Gauge Steel Framing Advantages and Disadvantages
Evaluate light gauge steel framing advantages and disadvantages through a strict cost analysis lens, comparing material, labor, and lifecycle expenses.
Aug 4, 2026

Walls & Panels
Gypsum Board Types: Exact Specifications, Thickness & Dimensions
Compare standard, Type X, and moisture-resistant gypsum board types. Get exact specifications, thicknesses, dimensions, and ASTM standards for your project.
Aug 4, 2026

Fire Resistance
Best Fire-Resistant Outdoor Decking Materials: 2026 Buyer Guide
Discover the best fire-resistant outdoor decking materials for 2026. Compare Class A PVC, aluminum, and hardwood options for WUI compliance and safety.
Aug 4, 2026