How to Evaluate Nichiha Panel Siding for Flawless Installation
Learn how to evaluate Nichiha panel siding for your next project. This installation guide covers framing, hidden clips, clearances, and fiber cement specs.

Evaluating Nichiha's Architectural Panel Lineup
When contractors and architects evaluate the building materials company Nichiha on panel siding, they are typically looking at the brand's premium architectural wall panels rather than traditional lap siding. Nichiha has carved out a distinct niche in the fiber cement market by offering thick, heavily textured panels that mimic masonry, wood, and metal. Before committing to an installation, it is critical to select the correct product line for your specific structural and aesthetic requirements.
| Product Series | Thickness | Panel Dimensions | Best Application | Material Cost (per sq ft) |
|---|---|---|---|---|
| Illumination Series | 18mm (3/4") | 16" x 10' or 4x8 | High-end residential, commercial facades | $12.00 - $18.00 |
| VintageWood / Cedar | 16mm - 18mm | 12" x 10' | Accent walls, modern farmhouse exteriors | $10.00 - $14.00 |
| Metals Series | 16mm | 16" x 10' | Contemporary commercial, mixed-use | $11.00 - $15.00 |
| Traditional Brick/Stone | 18mm - 21mm | Varies by profile | Wainscoting, full masonry replacement | $13.00 - $19.00 |
According to Nichiha's official architectural panel catalog, the 18mm Illumination series is their flagship product, featuring a high-density fiber cement core that provides superior impact resistance and a deep shadow line. When evaluating these panels, note that their weight requires specialized handling; a standard 4x8 Illumination panel can weigh upwards of 110 lbs, necessitating a two-person crew or mechanical lift for upper-story installations.
Substrate and Weather Barrier Prerequisites
Nichiha panels are heavy and rigid. They do not forgive warped framing. To ensure a flawless installation, the substrate must meet strict tolerances.
Framing and Sheathing Tolerances
- Stud Spacing: Maximum 16 inches on center (o.c.) for all residential applications. While some commercial steel-stud applications allow 24" o.c., 16" o.c. is mandatory for the 18mm panels to prevent wind-load deflection.
- Sheathing: Minimum 7/16" OSB or 1/2" CDX plywood. Foam insulating sheathing cannot be used as the primary structural nailing base for the hidden clips; solid wood sheathing or structural panels are required.
- Planar Tolerance: The framing must be plumb and flat within 1/4" over a 10-foot span. Any deviation will telegraph through the rigid fiber cement panels, causing visible seam misalignments.
Weather Resistive Barrier (WRB) Selection
Do not use standard builder's felt. Nichiha highly recommends a drainable weather barrier, such as their proprietary Nichiha WeatherBarrier DR or a high-performance commercial wrap like Benjamin Obdyke HydroGap. The drainable mat creates a 1.5mm capillary break, allowing incidental moisture behind the panels to drain freely to the starter track weep holes.
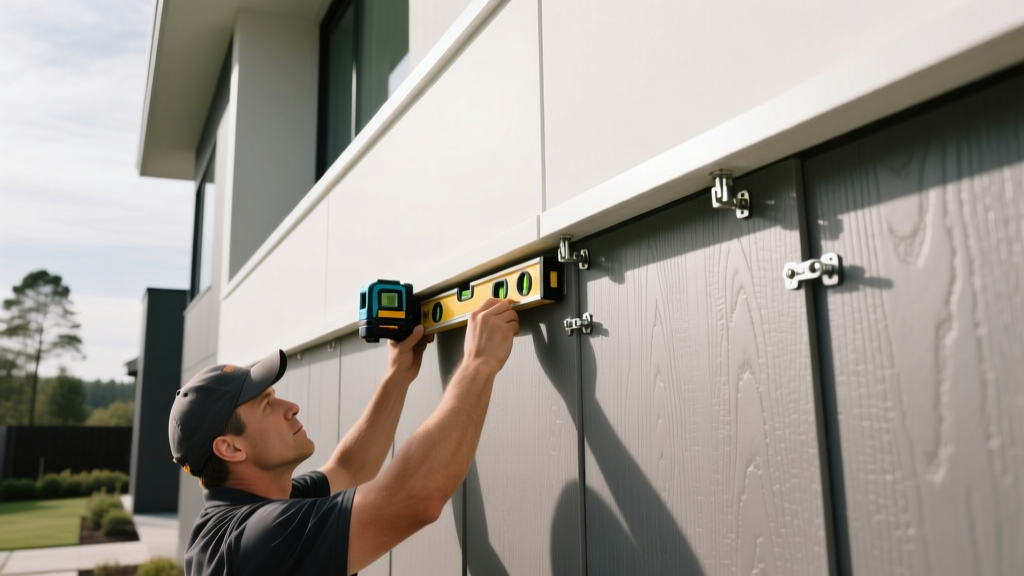
Step-by-Step: The Clip-and-Rail Hidden Fastener System
Unlike traditional fiber cement lap siding that requires face-nailing and blind-nailing, Nichiha architectural panels utilize a proprietary aluminum clip-and-rail system. This creates a ventilated rain screen and eliminates visible fasteners on the panel face.
- Install the Starter Track: Snap a perfectly level chalk line at the base of the wall. Install the Nichiha aluminum starter track using corrosion-resistant structural screws driven directly into the studs (not just the sheathing). Critical: If the starter track is out of level by even 1/8" over a 20-foot run, the misalignment will compound with every subsequent panel row.
- Apply Corner Posts and J-Channels: Install all aluminum vertical trim pieces before hanging panels. Use a laser level to ensure absolute plumb. Seal the back flanges with a continuous bead of polyurethane sealant.
- Seat the First Panel: Drop the bottom tongue of the first panel into the starter track. Ensure the weep holes in the track remain unobstructed by debris or sealant.
- Attach the Hidden Clips: Fasten the stainless steel interlocking clips to the top edge of the panel. Clips must be placed at every stud intersection (16" o.c.). Use the pre-drilled holes in the clip, driving 1-1/4" corrosion-resistant screws into the studs.
- Stack and Repeat: Slide the next panel's bottom groove over the exposed top flange of the clips. The panel's weight will lock it into place. Apply Nichiha ColorMatch sealant to the vertical shiplap joints before mating the panels together.
Cutting fiber cement generates respirable crystalline silica. According to OSHA's silica dust standards, dry cutting with high-speed grinders is strictly prohibited on job sites without specialized HEPA vacuum shrouds. Always use fiber cement shears for straight rips, or a polycrystalline diamond (PCD) blade on a track saw connected to a HEPA dust extractor for crosscuts. Never score-and-snap Nichiha 18mm panels; the thickness and density will result in jagged, unusable edges.
Critical Clearances and Joint Flashing Matrix
Improper clearances are the number one cause of fiber cement degradation. Fiber cement acts like a sponge at its unsealed cut edges. If panels wick moisture from adjacent surfaces, they will swell, delaminate, and fail prematurely.
| Adjacency Scenario | Minimum Required Clearance | Flashing / Sealant Requirement |
|---|---|---|
| Horizontal Roof Lines / Kickouts | 2 inches minimum | Z-flashing with end-dams; do not caulk the bottom edge. |
| Decks, Porches, and Steps | 2 inches minimum | Leave weep gap; install drip cap over the panel top edge. |
| Window and Door Heads | 1/4 inch gap | Head flashing integrated with WRB; backer rod and sealant. |
| Grade / Soil / Mulch | 6 inches minimum | Starter track must be above grade; ensure positive drainage. |
Troubleshooting Common Installation Failures
Even experienced siding contractors make mistakes when transitioning from vinyl or wood to heavy architectural fiber cement. Here are the most frequent failure modes observed in the field:
- Cascading Clip Misalignment: Symptom: Panels refuse to lock into the clips on the third or fourth row. Cause: The starter track was not perfectly level, or a clip was driven slightly off-center on a lower row. Fix: You must remove the affected panels and reset the track or clips. Do not force the panels, as this will fracture the fiberglass-reinforced edges.
- Sealant Smearing and Staining: Symptom: Ugly, shiny streaks on the matte finish of the Illumination panels. Cause: Using cheap silicone or acrylic caulk instead of the manufacturer-specified sealant, or applying it without a backer rod. Fix: Always use Nichiha ColorMatch polyurethane sealant. Apply painter's tape to both sides of the joint, tool the sealant with a profiling tool, and remove the tape immediately.
- Thermal Expansion Buckling: Symptom: Panels bow outward between studs in direct summer sunlight. Cause: Failing to leave the required 1/16" expansion gap at the end joints, or driving the clip screws too tight, which pins the panel and prevents lateral movement. Fix: Snug the screws, but do not over-torque them. The clip must hold the panel firmly against the wall while allowing microscopic lateral sliding.
Final Verdict: Is Nichiha Worth the Premium?
When you evaluate the building materials company Nichiha on panel siding, the conclusion heavily depends on the project's architectural intent. For standard tract housing or budget-conscious flips, Nichiha's architectural panels are overkill; standard fiber cement lap siding or engineered wood will suffice. However, for high-performance building envelopes, modern commercial facades, and luxury residential projects requiring deep shadow lines and masonry-like durability without the structural load of real stone, Nichiha is arguably the best product on the market.
As noted in BuildingGreen's comprehensive primer on fiber cement, the material's longevity is intrinsically tied to the quality of the weather barrier and flashing details. Nichiha's clip-and-rail system inherently creates a ventilated rain screen, which drastically reduces the risk of trapped moisture and wall rot compared to face-nailed, flat-applied siding. Expect to pay between $22 and $34 per square foot fully installed (materials, specialized labor, and flashing), but the resulting facade will easily outlast traditional wood or vinyl alternatives, maintaining its structural and aesthetic integrity for 50 years or more.
Written by
Sarah WhitfieldSarah Whitfield is a chartered quantity surveyor (MRICS) and construction cost analyst with 15 years of experience in material pricing, procurement strategy, and project budgeting. She earned her degree in Construction Management from the University of Reading (UK) and has worked on projects ranging from $2M custom homes to $180M mixed-use developments across North America and Europe. Sarah currently leads cost estimating for BuildMat Insight, maintaining a proprietary database of 4,000+ material price points updated quarterly. She is a frequent contributor to RSMeans cost data panels and has presented at the International Cost Engineering Council (ICEC) congress. Based in Denver, CO, Sarah is an avid trail runner and volunteer mentor for Women in Construction.
More from Sarah Whitfield
View all
Wood & Lumber
What Are the Different Types of Wood? A Builder's Guide
Compare structural softwoods, finish hardwoods, and engineered lumber. Analyze Janka ratings, MOE values, and 2026 pricing for construction.
Aug 4, 2026

Walls & Panels
Steel Framing vs Wood Framing: Corrosion and Moisture Defense
Compare steel framing vs wood framing for moisture resistance. Learn about galvanized coatings, condensation risks, and corrosion protection strategies.
Jul 21, 2026

Stone & Masonry
How to Cut Stone Veneer: Wet Saw vs Grinder Comparison
Compare the best tools for cutting stone veneer. We review wet saws, angle grinders, and chop saws to help you achieve clean, chip-free cuts.
Jul 21, 2026