Glue for Gypsum Board: Specifications, Dimensions, and Coverage
Master the specs for glue for gypsum board. Learn exact bead dimensions, coverage rates, ASTM C557 standards, and curing times for direct-bond drywall.

The Engineering Standard: ASTM C557 and Shear Strength
Direct-bond installation of gypsum board using specialized adhesives transforms a purely mechanical assembly into a composite structural system. By integrating elastomeric or polyvinyl acetate (PVA) adhesives, contractors mitigate fastener popping, increase shear wall rigidity, and improve acoustic decoupling. The foundational benchmark for these materials in North America is ASTM C557 (Standard Specification for Adhesives for Fastening Gypsum Board to Wood Framing).
Under ASTM C557, adhesives must demonstrate a minimum shear strength of 60 psi (414 kPa) after a 7-day curing period at 73°F (23°C) and 50% relative humidity. High-performance formulations, such as USG Sheetrock Brand Drywall Adhesive, frequently exceed this baseline, achieving shear strengths upward of 90 psi once fully cross-linked. This structural synergy allows the adhesive to bear the majority of the panel's dead load and resist lateral wind shear, fundamentally altering the mechanical fastener requirements.
Bead Dimensions and Application Geometry
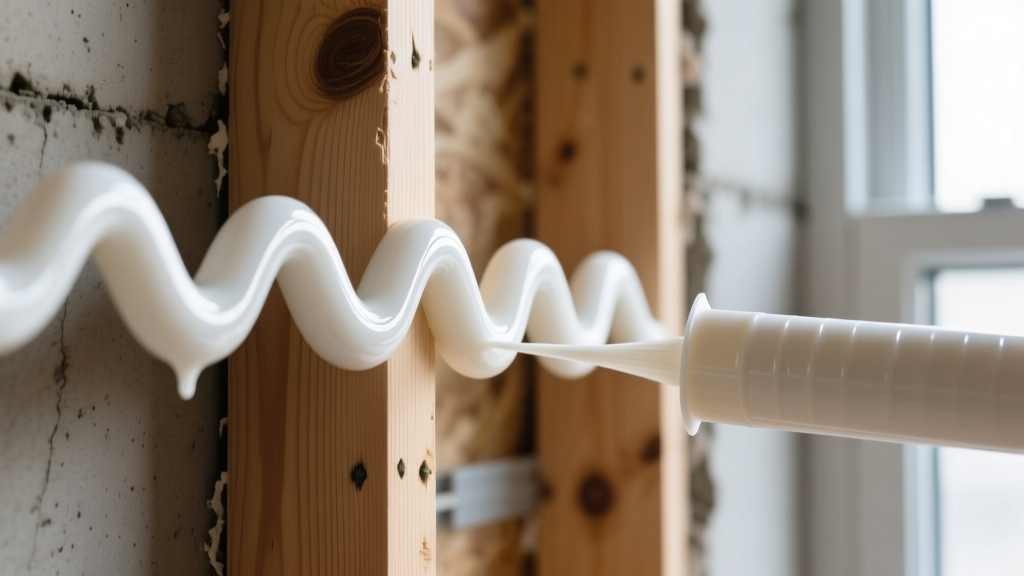
The efficacy of drywall adhesive relies entirely on precise volumetric extrusion. Under-application leads to localized delamination, while over-application causes squeeze-out that interferes with joint taping and finishing.
Application Patterns by Framing Spacing
- 16-inch (406 mm) o.c. framing: A single continuous 3/8-inch bead down the center of each stud is sufficient. At top and bottom plates, apply a continuous bead 2 inches from the edge to prevent squeeze-out onto adjacent surfaces.
- 24-inch (610 mm) o.c. framing: A single continuous bead is required, but a zigzag pattern (with a 4-inch amplitude) is highly recommended on studs wider than 3.5 inches to increase the surface bonding area and counteract potential framing twist.
- Butt Joints and Blocking: Apply a continuous bead to all horizontal blocking and edge studs where panel ends meet. Never rely on mechanical fasteners alone to hold floating butt joints in an adhesive-bound system.
Volumetric Yield and Coverage Metrics
Accurate material estimation prevents job-site delays. Coverage rates vary slightly based on the rheology of the specific product (PVA vs. synthetic rubber) and the ambient temperature during extrusion. The following metrics reflect standard 2026 formulations applied at the specified 3/8-inch diameter.
| Packaging Format | Volume | Linear Feet Yield | Approx. Board Coverage |
|---|---|---|---|
| Standard Tube (Caulk Gun) | 28 oz (828 mL) | 30 - 35 linear ft | ~1.5 panels (4x8) |
| Sausage Pack (Air Gun) | 30 oz (887 mL) | 35 - 40 linear ft | ~2 panels (4x8) |
| Bulk Pail (Trowel/Mixer) | 5 Gallons (18.9 L) | ~800 linear ft | ~400 sq ft |
Fastener Reduction and Structural Synergy
One of the primary economic drivers for specifying glue for gypsum board is the drastic reduction in mechanical fasteners. According to the Gypsum Association's GA-216 application guidelines, when a compliant adhesive is used on wood framing, the field fastener spacing can be doubled.
Mechanical Fastener Matrix: Adhesive vs. No Adhesive
| Location on Panel | Standard (No Glue) | With Direct-Bond Glue |
|---|---|---|
| Perimeter (Edges & Ends) | 12 inches (305 mm) o.c. | 12 inches (305 mm) o.c. (Mandatory) |
| Field (Interior Studs) | 12 inches (305 mm) o.c. | 24 inches (610 mm) o.c. (Wood Framing) |
| Total Screws per 4x8 Panel | ~32 to 36 screws | ~16 to 18 screws |
Substrate Tolerances and Moisture Thresholds
Adhesive bonds are only as reliable as the substrate they grip. Direct-bond applications demand rigorous substrate verification prior to panel lifting.
- Wood Moisture Content (MC): Framing lumber must have a moisture content of 19% or less. If lumber is installed at 25% MC and subsequently dries to 12%, the radial shrinkage will physically tear the adhesive bond or cause the drywall paper to delaminate from the gypsum core, resulting in severe 'nail pop' equivalents.
- Surface Contaminants: Sawdust, form-release oils (on engineered I-joists), and frost act as bond-breakers. Framing must be brushed clean. For OSB or plywood backing, ensure the surface is unsealed; PVA adhesives cannot penetrate waterproof resins.
- Gap Bridging: High-viscosity elastomeric adhesives (like OSI Drywall Adhesive) can bridge gaps up to 1/4 inch (6 mm) between twisted studs and the gypsum panel. However, if the gap exceeds 1/4 inch, the adhesive bead must be increased to a 1/2 inch diameter to ensure continuous contact without bottoming out before the panel is pressed flush.
Environmental Curing Parameters and Open Time
The chemical curing process of PVA and synthetic rubber adhesives is highly sensitive to ambient conditions. Contractors must manage the 'open time'—the window during which the adhesive remains tacky enough to form a structural bond after the panel is pressed against it.
Temperature and Humidity Thresholds
- Minimum Application Temperature: 50°F (10°C) for both the ambient air and the substrate. Below this threshold, PVA emulsions will not coalesce, resulting in a chalky, non-adhesive residue.
- Standard Open Time: At 70°F and 50% RH, standard PVA drywall adhesive has an open time of 15 to 20 minutes. This means the panel must be positioned and pressed into the adhesive within 20 minutes of the initial bead extrusion.
- High Heat / Low Humidity: In environments exceeding 85°F (29°C) or in highly ventilated areas, open time drops to 5 to 10 minutes. In these conditions, applicators must limit bead layout to one panel at a time to prevent 'skinning over' (surface drying that prevents core adhesion).
- Full Cure Time: While the panel will hold its position within 2 hours, full cross-linking and maximum shear strength (60+ psi) requires 7 days. Joint taping and finishing can proceed after 24 hours, but heavy impact or structural loading of the wall should be avoided during the first week.
Troubleshooting Adhesive Failures in Direct-Bond Systems
When direct-bond installations fail, the root cause is almost always traceable to a deviation in volumetric specs or substrate prep. Diagnose failures using the following framework:
- Symptom: Panel bows outward between studs.
Cause: Insufficient mechanical fasteners at the perimeter to hold the panel flat while the field adhesive cures, or adhesive applied to bowed studs without shimming. Fix: Adhesive does not pull warped studs straight; framing must be planed or shimmed before application. - Symptom: Adhesive transfers to the stud but tears the drywall paper face.
Cause: The adhesive bond is stronger than the gypsum-to-paper lamination (often caused by using a high-solvent elastomeric adhesive on standard board, or moisture damage to the board). Fix: Ensure the adhesive is specifically formulated for gypsum board; solvent-heavy construction adhesives can degrade the paper face. - Symptom: Squeeze-out ruins joint finishing.
Cause: Bead placed too close to the panel edge (less than 2 inches). Fix: Maintain a strict 2-inch setback from all panel edges and cut-ends to contain the hydraulic displacement of the 3/8-inch bead when pressure is applied.
Written by
David NakamuraDavid Nakamura is a licensed architect (AIA) and construction technology writer focused on sustainable building methods, mass timber engineering, and high-performance building envelopes. He holds a Master of Architecture from the University of Washington and is a certified Passive House Consultant (CPHC). David spent eight years at the Seattle firm Mithun, where he led the design of three LEED Platinum projects, before founding his own practice specializing in net-zero residential design. He serves on the editorial advisory board of GreenBuilder Magazine and has authored peer-reviewed papers on cross-laminated timber (CLT) connections for the Journal of Structural Engineering. In his spare time, David teaches woodworking at Pratt Fine Arts Center and kayaks the Puget Sound.
More from David Nakamura
View all
Construction Cost
Labor Cost to Build a Deck Per Sq Ft: 2026 Installation Guide
Discover the exact labor cost to build a deck per sq ft in 2026. This installation guide breaks down contractor rates, complexity factors, and hidden fees.
Aug 4, 2026

Construction Cost
How Much Does It Cost to Build a 3 Bedroom House? Financing Guide
Learn exactly how much it costs to build a 3 bedroom house and explore 2026 financing options, construction loan types, and budget frameworks for your build.
Aug 4, 2026

Construction Cost
Cost to Build a Tennis Court: 2026 Guide
How much does it cost to build a tennis court in 2026? Breakdowns for asphalt, concrete, and synthetic surfaces plus fencing and lighting.
Jul 30, 2026