Complete Gypsum Board Wall Installation & Product Selection Guide
Master gypsum board wall installation with our product guide. Compare Type X, moisture-resistant boards, fasteners, and 3-coat finishing protocols.

Product Selection Matrix for Wall Assemblies
Successful gypsum board wall installation begins long before the first panel is hung; it requires matching the exact core chemistry and facing material to the environmental and structural demands of the space. Standard 1/2-inch panels are sufficient for most interior residential partitions, but commercial, multi-family, and high-moisture environments demand specialized boards. According to the Gypsum Association, selecting the wrong panel type is the leading cause of premature assembly failure, mold remediation, and fire-code violations.
| Board Type | Core / Facing Specs | Primary Application | ASTM Standard | Avg Cost (4x8 Sheet) |
|---|---|---|---|---|
| Standard (Regular) | Gypsum core, manila/ivory paper face | Standard interior walls & ceilings | ASTM C1396 | $13.00 - $16.00 |
| Type X (Fire-Rated) | Glass-fiber reinforced core, 5/8" thickness | Garages, stairwells, 1-hr rated partitions | ASTM C1396 | $17.00 - $22.00 |
| Moisture/Mold Resistant | Silicone-treated core, green/purple paper | Bathroom surrounds, basement finishes | ASTM C1396 | $19.00 - $25.00 |
| Glass Mat (Shaftliner) | Water-resistant core, fiberglass mat face | Exterior soffits, elevator shafts, tile backers | ASTM C1177 | $38.00 - $48.00 |
Fastener and Framing Specifications
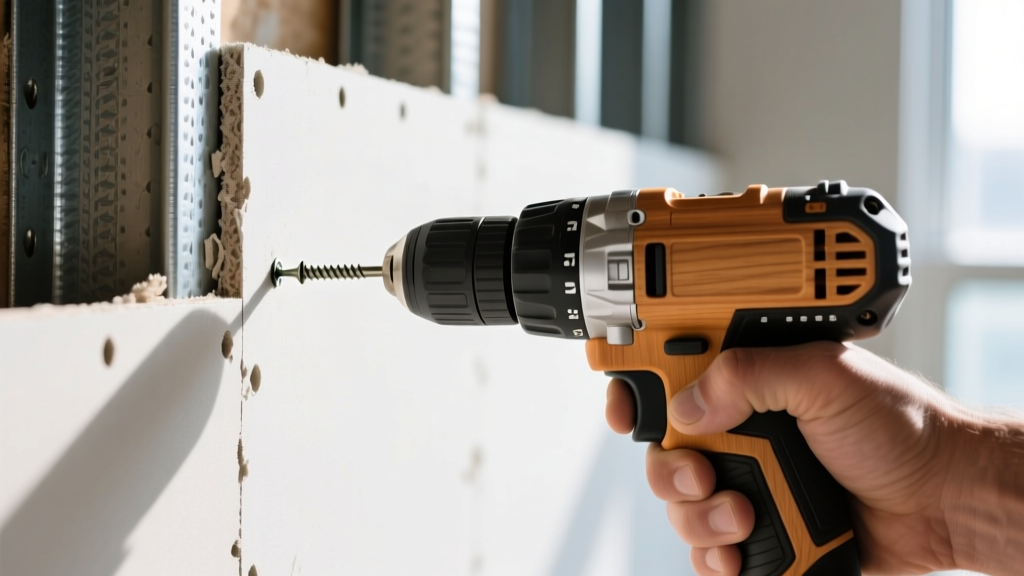
The mechanical connection between the gypsum panel and the framing substrate dictates the longevity of the wall. Fastener failure, commonly known as 'popping,' occurs when screws are over-driven (breaking the paper face) or under-driven (protruding above the surface). For optimal gypsum board wall installation, adhere to the following fastener protocols established by manufacturers like USG Corporation and National Gypsum:
- Wood Studs (Standard SPF): Use 1-1/4" or 1-5/8" Type W (coarse-thread) screws. Coarse threads prevent the screw from backing out as the wood expands and contracts with seasonal humidity changes.
- Light-Gauge Steel Studs (25ga to 20ga): Use 1" or 1-1/4" Type S (fine-thread) screws. Fine threads are designed to tap into thin metal without stripping the bore hole.
- Heavy-Gauge Steel Studs (18ga and thicker): Use 1-5/8" Type S-12 self-drilling screws with a drill-bit point to penetrate the steel without pre-drilling.
- Spacing Requirements: Fasteners must be spaced a maximum of 12 inches on center along the panel edges and 16 inches on center in the field (intermediate studs) for wall applications.
- Dimple Depth: The screw head must create a dimple exactly 1/32-inch deep. If the paper facing tears around the screw head, the fastener's withdrawal resistance drops by up to 60%, requiring an additional screw placed 2 inches away.
When installing top plates of interior non-load-bearing partition walls to floor trusses or roof joists, never rigidly fasten the top edge of the gypsum board to the ceiling framing. Trusses deflect upward in winter (when the bottom chord is warm and dry) and downward in summer. Rigidly attaching the board will cause horizontal tearing along the ceiling joint. Use a slip track or leave a 1/2-inch gap at the top of the panel, covering it with a resilient molding or flexible caulk.
The 3-Coat Taping and Finishing Protocol
Achieving a Level 4 or Level 5 finish requires a systematic approach to joint compound application. The goal is to feather the joint so gradually that the human eye cannot detect the transition between the factory beveled edge and the panel center.
- Coat 1: Bedding and Taping. Apply a setting-type compound (e.g., 45-minute or 90-minute Durabond) into the tapered joints. Setting-type compounds undergo a chemical crystallization process, making them highly resistant to shrinking and cracking. Press paper tape into the compound using a 4-inch or 6-inch taping knife, squeezing out excess mud to leave a flat, tight bond. For inside corners, pre-crease the paper tape before application.
- Coat 2: Filling and Broadening. Once the first coat is completely dry, apply a drying-type all-purpose compound. Use a 10-inch knife to spread the mud 2 to 3 inches beyond the edges of the first coat. This coat fills the taper and begins the feathering process. Cover all screw dimples with this same compound.
- Coat 3: Skimming and Feathering. Apply a lightweight topping compound using a 12-inch or 14-inch flat trowel. Topping compounds have high vinyl content, making them easy to sand. Apply firm pressure to the outside edge of the knife to feather the compound to zero thickness. For Level 5 finishes (required for high-gloss paints or critical lighting conditions), follow this with a thin skim coat of topping compound applied over the entire wall surface.
Cost Breakdown and Labor Estimates
Budgeting for a commercial or high-end residential project requires separating material costs from the specialized labor required for higher-level finishes. The following data reflects early 2026 market averages for standard 1/2-inch wall assemblies.
| Cost Component | Unit of Measure | Low Estimate | High Estimate | Variables & Notes |
|---|---|---|---|---|
| Material (Standard Board) | Per Sq. Ft. | $0.45 | $0.65 | Varies by region and bulk purchasing agreements. |
| Material (Type X / MR) | Per Sq. Ft. | $0.60 | $0.95 | Premium for fire and moisture additives. |
| Fasteners & Tape | Per Sq. Ft. | $0.05 | $0.08 | Includes screws, paper tape, and corner beads. |
| Joint Compound | Per Sq. Ft. | $0.10 | $0.18 | Higher cost for setting-type and lightweight topping. |
| Labor (Hang & Level 4) | Per Sq. Ft. | $1.20 | $2.10 | Depends on ceiling height, stair carries, and union rates. |
| Labor (Level 5 Skim) | Per Sq. Ft. | $0.80 | $1.50 | Highly labor-intensive; requires skilled plasterers. |
Troubleshooting Common Installation Failures
Even with premium materials, improper execution during gypsum board wall installation leads to visible defects post-painting. Use this diagnostic framework to identify and rectify field issues:
- Symptom: Ridging at Panel Joints.
Cause: Over-application of joint compound without sufficient feathering, or framing lumber shrinking and pulling the panels tight against each other, forcing the compound upward.
Fix: Sand the ridge flat using a 150-grit pole sander. Apply a wide, thin skim coat (minimum 16 inches wide) using a lightweight topping compound to blend the transition into the surrounding field. - Symptom: Joint Telegraphing (Visible seams under paint).
Cause: Glossy or semi-gloss paint applied over a Level 4 finish. The difference in porosity and texture between the paper face and the joint compound causes 'flashing' under angled light.
Fix: The wall must be upgraded to a Level 5 finish. Apply a full skim coat of joint compound or a high-build drywall primer (e.g., USG First Coat) to equalize the surface texture and porosity across the entire assembly. - Symptom: Cracking at Door and Window Headers.
Cause: The drywall joint was placed directly in line with the corner of the door or window frame, which acts as a natural stress concentration point for structural deflection.
Fix: Joints must always be offset from the corners of openings. If a crack has already formed, route out the crack with a utility knife to create a V-groove, fill with a flexible elastomeric caulk or setting-type compound, and tape with fiberglass mesh tape before re-mudding.
Written by
Marcus ChenMarcus Chen is a licensed structural engineer (PE) and building materials analyst with over 12 years of experience across residential, commercial, and industrial construction. He holds a Master of Science in Civil Engineering from UC Berkeley and spent six years at Thornton Tomasetti before transitioning to independent consulting and technical writing. Marcus specializes in material selection for seismic-prone regions, concrete reinforcement strategies, and lifecycle cost analysis. His work has been cited by the American Concrete Institute (ACI) and the Structural Engineers Association of California (SEAOC). When he is not on a job site or at his desk, you will find him hiking the Sierra Nevada or restoring a 1920s craftsman bungalow in Oakland, CA.
More from Marcus Chen
View all
Construction Cost
How Much Did the Eiffel Tower Cost to Build?
How much did the Eiffel Tower cost to build in 1889? We adjust for inflation and compare its budget to modern skyscraper construction.
Aug 4, 2026

Fire Resistance
What Is a Fire Resistant Material? Testing & Certification Guide
Discover what is a fire resistant material through ASTM and UL testing. Learn how fire ratings, certifications, and assemblies work in construction.
Aug 4, 2026

Construction Cost
How Much Did the Burj Khalifa Cost to Build?
How much did the Burj Khalifa cost to build? We break down the $1.5B project and extract 5 money-saving strategies for your next build.
Jul 30, 2026