How to Paint Gypsum Board: Primer and Paint Selection Guide
Learn how to paint gypsum board with our expert selection guide. Compare PVA, acrylic primers, and paint finishes for flawless drywall results.

The Porosity Mismatch: Why Primer Selection Dictates Success
Understanding how to paint gypsum board requires recognizing a fundamental material flaw: the porosity mismatch between the paper facing and the calcium carbonate-based joint compound. Unprimed drywall paper is highly absorbent, but joint compound (mud) is exponentially more porous. If you apply a topcoat directly to unfinished drywall, the mud acts as a sponge, absorbing the resin binders from the paint while leaving the pigments on the surface. This results in 'flashing'—a permanent, uneven sheen that is most visible under oblique lighting.
Hatbanding occurs when the wall edges are cut in with a brush while the field is rolled. The brushed areas dry faster and lay down a thicker mil build than the rolled areas. On unprimed or poorly primed gypsum board, this difference in texture and absorption creates a visible dark band around the perimeter of the room. Always maintain a wet edge and use a roller to immediately back-roll brushed cut lines.
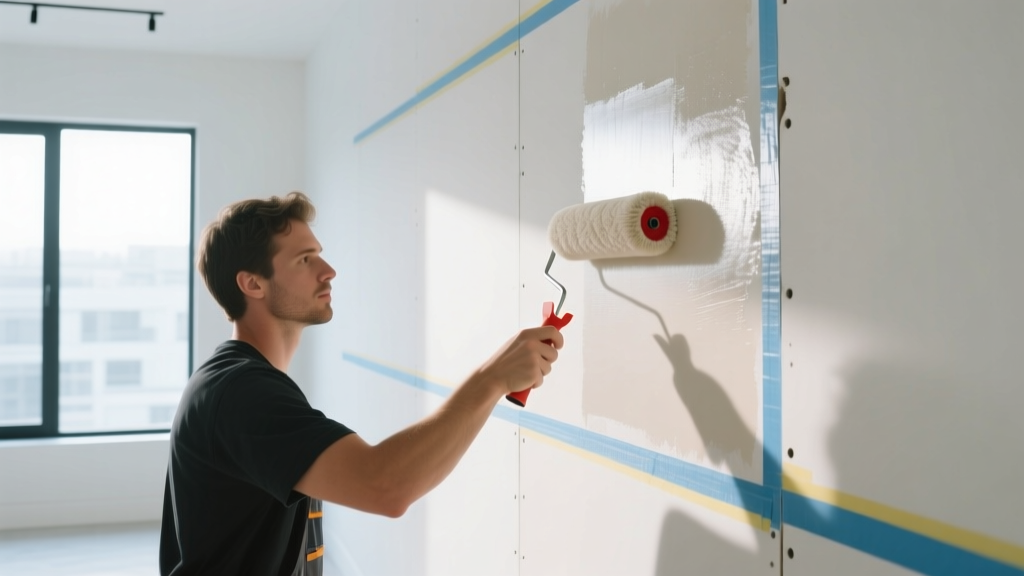
Primer Selection Matrix: PVA vs. Acrylic vs. Shellac
Selecting the correct primer is the most critical decision in the drywall painting process. The choice depends entirely on the environment, the desired finish level, and the substrate condition. Below is a technical comparison of the three primary primer categories used on gypsum board in 2026.
| Primer Type | Chemical Base | 2026 Avg Cost/Gal | Best Application Scenario | Limitations |
|---|---|---|---|---|
| PVA (Polyvinyl Acetate) | Water-based vinyl resin | $25 - $35 | Standard Level 4 finishes in climate-controlled, low-humidity interiors. | Re-emulsifies if exposed to prolonged moisture; poor stain blocking. |
| 100% Acrylic Drywall Sealer | Cross-linking acrylic polymers | $55 - $75 | Level 5 finishes, high-humidity zones, and deep-base topcoats. | Higher upfront cost; requires thorough mixing to maintain suspension. |
| Shellac-Based (e.g., BIN) | Denatured alcohol solvent | $75 - $90 | Spot-priming water stains, nicotine, or tannin bleed on damaged drywall. | Brittle over large expanses; high VOCs; not for whole-wall new drywall. |
Aligning Paint Sheen with Gypsum Association Finish Levels
The Gypsum Association's GA-214 guidelines establish six levels of drywall finish (Level 0 through Level 5). Your paint sheen selection must be mathematically aligned with the physical smoothness of the substrate. Applying high-sheen paint to a lower-level finish will amplify every microscopic defect.
Flat and Matte (Level 4 Substrates)
Flat paints (0-5% gloss) scatter light, effectively hiding the microscopic ridges left by drywall knives and the slight texture differences between paper and mud. For standard residential living spaces, bedrooms, and ceilings finished to a Level 4 standard, a high-quality scrubbable matte is the optimal choice. Modern cross-linked acrylic mattes can withstand Class 4 scrub testing without burnishing, solving the historical washability issues of traditional flat paints.
Eggshell and Satin (Level 5 Substrates)
Eggshell (10-25% gloss) and Satin (25-35% gloss) provide necessary durability for high-traffic corridors, kitchens, and children's rooms. However, the angular sheen will highlight joint tape and fastener dimples on a Level 4 wall. To use these sheens on large, unbroken wall expanses, the drywall must be upgraded to a Level 5 finish, which involves applying a thin skim coat of joint compound over the entire surface to equalize porosity and texture before priming.
Semi-Gloss and High-Gloss (Trim and Moisture Zones)
Semi-gloss (35-70% gloss) should be strictly limited to MDF trim, doors, and cabinetry. Applying semi-gloss to large gypsum board expanses is a critical error that will result in severe glare and defect amplification. In commercial bathrooms or wet areas where moisture resistance is required, specify a Level 5 finish with a specialized 100% acrylic satin or an epoxy-modified waterborne alkyd, rather than defaulting to semi-gloss drywall paint.
Before signing off on a Level 4 or Level 5 drywall prep, use a 10,000-lumen LED work light placed directly against the floor, shining upward at an acute angle. This 'raking light' will cast long shadows across the wall, revealing joint banding, pockmarks, and sanding scratches that are invisible under standard overhead lighting. Sand and spot-prime any defects revealed before applying the topcoat.
2026 Top-Tier Product Specifications
When specifying materials for a high-end residential or commercial project, avoid contractor-grade 'builder flats' and big-box store PVA primers. The following products represent the current benchmark for adhesion, hide, and leveling on gypsum substrates.
- Primer (Standard): Sherwin-Williams PrepRite Drywall Conditioner (PVA). Excellent for sealing standard Level 4 drywall. Applies at 3.5 wet mils, dries in 30 minutes, and costs approximately $32/gallon.
- Primer (Premium/Level 5): Benjamin Moore Fresh Start High-Hiding All Purpose Primer (046). A 100% acrylic formula that provides superior enamel holdout and prevents the topcoat from sinking into Level 5 skim coats. Costs ~$68/gallon.
- Topcoat (Matte/Low Traffic): Sherwin-Williams Emerald Interior Acrylic Latex (Matte). Features advanced stain-blocking technology and cross-linking polymers that allow for aggressive scrubbing without altering the sheen. Covers at 350-400 sq ft/gallon. Costs ~$95/gallon.
- Topcoat (Eggshell/High Traffic): Benjamin Moore Regal Select Interior (Eggshell). Utilizes proprietary alkyd-acrylic resin blends for exceptional flow and leveling, minimizing roller stipple on large drywall expanses. Costs ~$85/gallon.
Roller Dynamics and Nap Selection
The physical tool used to apply the paint dictates the final surface micro-texture. Gypsum board requires specific roller covers to achieve a uniform spray-like finish.
- 3/8-Inch Microfiber: The absolute standard for smooth, Level 4 and Level 5 drywall. Microfiber releases paint evenly and holds a high volume of liquid, allowing you to maintain a wet edge across a 12-foot wall without stopping. Avoid traditional woven polyester or cotton blends, which shed lint and create a heavy stipple.
- 1/2-Inch Microfiber or Woven Poly: Reserved exclusively for drywall that has been intentionally textured (e.g., orange peel or knockdown finishes). The longer nap pushes paint into the valleys of the texture.
- Extension Pole Mechanics: Always use a rigid, locking extension pole. Rolling from the floor to the ceiling in a single, continuous stroke prevents the 'stop-and-start' horizontal lap marks that occur when painters work from a ladder and only roll 4-foot sections at a time.
Step-by-Step Execution Framework
Adhering to the Painting Contractors Association (PCA) standards for drywall finishing ensures a defect-free result. Follow this exact sequence:
- Substrate Preparation: Vacuum the entire drywall surface using a brush attachment to remove silica dust from sanding. Wipe down with a damp (not wet) microfiber tack cloth. Painting over drywall dust creates a gritty finish and destroys roller covers.
- Prime Application: Apply your selected PVA or Acrylic primer using a 3/8-inch microfiber roller. Maintain a wet edge. Immediately 'back-roll' the primer—rolling back over the wet area with light pressure and no additional paint—to force the primer deep into the pores of the joint compound.
- Defect Identification and Spot-Priming: Once the primer is dry (typically 1-2 hours), perform the raking light inspection. Sand any raised joint compound ridges with 220-grit sandpaper. Spot-prime these sanded areas with the same primer to prevent them from flashing under the topcoat.
- First Topcoat Application: Cut in the edges, corners, and ceiling line with a high-quality angled sash brush. Immediately follow the brush cut-in with the roller to blend the texture before the brushed paint dries. Apply the topcoat at a uniform 3.5 to 4.0 wet mil thickness.
- Second Topcoat and Final Cure: Wait a minimum of 4 hours (or per manufacturer specifications) before applying the second coat. The second coat provides the true color depth and uniform sheen. Allow 7 to 14 days for full chemical cure before subjecting the walls to washing or heavy abrasion.
Written by
Elena RodriguezElena Rodriguez is a civil engineer and technical writer specializing in concrete technology, masonry systems, and ASTM/ACI compliance. She earned her B.S. in Civil Engineering from Texas A&M University and spent a decade at a materials testing laboratory, performing over 2,000 concrete compressive strength tests and masonry prism evaluations. Elena is an ACI-certified Field Testing Technician (Grade I) and a member of ASTM Committee C12 on Natural Building Stone. She currently consults on forensic engineering cases involving concrete failures and moisture intrusion. Based in San Antonio, TX, Elena is a proud member of the Society of Women Engineers (SWE) and coaches her daughter's FIRST Robotics team.
More from Elena Rodriguez
View all
Walls & Panels
Cost Analysis: Light Gauge Steel Framing Advantages and Disadvantages
Evaluate light gauge steel framing advantages and disadvantages through a strict cost analysis lens, comparing material, labor, and lifecycle expenses.
Aug 4, 2026

Walls & Panels
Gypsum Board Types: Exact Specifications, Thickness & Dimensions
Compare standard, Type X, and moisture-resistant gypsum board types. Get exact specifications, thicknesses, dimensions, and ASTM standards for your project.
Aug 4, 2026

Fire Resistance
Best Fire-Resistant Outdoor Decking Materials: 2026 Buyer Guide
Discover the best fire-resistant outdoor decking materials for 2026. Compare Class A PVC, aluminum, and hardwood options for WUI compliance and safety.
Aug 4, 2026