How to Repair Impact Resistant Gypsum Board: Dents, Holes & Cracks
Learn how to troubleshoot and repair impact resistant gypsum board. Step-by-step fixes for deep punctures, surface abrasions, and joint failures.

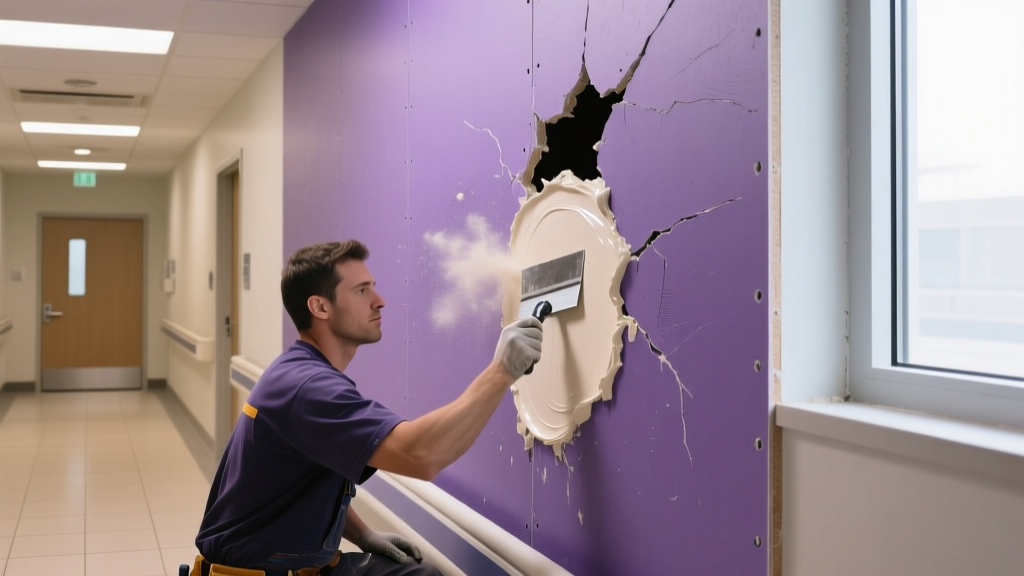
Impact resistant gypsum board—such as USG Fiberock Abuse-Resistant or National Gypsum Gold Bond XP Hi-Abuse—is engineered with a dense, fiber-reinforced core and a heavy-duty face to withstand the punishing environments of hospital corridors, school hallways, and commercial lobbies. However, when subjected to extreme point-loads like a motorized hospital bed frame or a heavy steel cart, even 5/8-inch abuse-resistant panels can suffer core fractures. Repairing these panels requires fundamentally different techniques than standard drywall, as standard patching compounds and butterfly patches will inevitably fail against the board's high density and structural deflection.
Diagnostic Matrix: Identifying Impact Damage
Before selecting a repair protocol, you must accurately diagnose the failure mode. Impact board damage typically falls into four distinct categories based on core integrity and structural deflection.
| Damage Type | Visual Indicator | Core Integrity | Repair Protocol |
|---|---|---|---|
| Surface Scuff | Face paper torn or abraded, no depression | Intact | Level 1: Sealer and Skim Coat |
| Point Puncture | Crater < 3 inches, crushed core edges | Compromised locally | Level 2: Routing and Setting Compound |
| Core Blowout | Hole > 4 inches, shattered core, broken mesh | Structurally breached | Level 3: Cutout, Backer, and Patch |
| Joint Deflection | Linear crack at panel edge or fastener pop | Intact, framing issue | Level 4: Structural Tape and Floating |
Why Standard Drywall Patches Fail on Abuse-Resistant Panels
The most common mistake maintenance teams make is treating impact resistant gypsum board like standard 1/2-inch wallboard. Standard lightweight drywall has a core density of roughly 1.6 lbs per square foot. In contrast, abuse-resistant panels feature a dense, fiberglass-mesh-reinforced core weighing up to 2.2 lbs per square foot.
When you use standard premixed joint compound (which relies on evaporation to cure) to fill a deep puncture in impact board, the compound shrinks significantly as the water escapes. Furthermore, the rigid, dense edges of the impact board do not flex, meaning any slight vibration in the corridor will cause a rigid, dried-out lightweight patch to crack and pop out. You must use chemical-setting compounds that cure via hydration, creating a rigid, shrink-free fill that matches the density of the surrounding abuse-resistant core.
Protocol 1: Repairing Deep Punctures and Core Breaches
For point punctures (Level 2) caused by bed rails or cart corners, the goal is to create a mechanical lock using a setting-type compound. According to technical guidelines from the Gypsum Association, deep voids require sequential filling to prevent air pockets and ensure structural rigidity.
Step-by-Step Puncture Repair
- Route the Crater: Use a drywall rasp or a rotary tool with a burr bit to carve out the crushed, powdery edges of the puncture. Create a slight undercut (a dovetail shape) so the hole is wider inside the wall cavity than at the surface. This creates a mechanical lock for the patching material.
- Prime the Cavity: Brush a diluted PVA bonding agent or a specialized drywall primer into the exposed gypsum core. Impact board cores are highly absorbent and will flash-set your compound if not sealed.
- Base Fill with Durabond: Mix a high-strength setting compound like USG Durabond 90. Press it firmly into the undercut cavity, leaving it 1/8-inch below the surface face. Durabond 90 cures rock-hard in 90 minutes and provides the structural impact resistance needed to match the surrounding USG Fiberock panel.
- Surface Reinforcement: Once the base fill is set, apply a layer of 45-minute setting compound (like Easy Sand 45) and embed a 2-inch square of high-tensile fiberglass mesh tape over the patch.
- Final Skim: Finish with a lightweight topping compound to blend the texture. Sand with 150-grit sandpaper; note that abuse-resistant face papers are tougher and require more effort to feather than standard paper.
Protocol 2: Fixing Deflection Cracks at Panel Joints
In high-traffic corridors, floor vibrations from heavy carts and foot traffic cause micro-deflections in the wall framing. If the framing is not isolated with acoustic separation clips, this vibration transfers directly to the panel joints, causing the compound to fracture. If a joint on an impact-resistant wall is cracking repeatedly, simply re-mudding it will not solve the problem.
To repair a deflection crack:
- Use a utility knife to V-out the crack, removing all loose compound and torn face paper.
- Check the fasteners within 12 inches of the crack. If the screws have pulled through the dense core (a common issue if the installer did not use coarse-thread, bugle-head screws specifically designed for 5/8-inch abuse board), drive new 1-5/8-inch coarse-thread drywall screws into the stud, dimpling the surface without breaking the face paper.
- Fill the V-groove with a flexible, elastomeric joint compound or a setting compound embedded with structural mesh tape.
- If the wall is subject to continuous heavy impacts at this specific joint, surface-mount a commercial wall protection system (such as an Inpro IPC corner guard or wall rail) to absorb the kinetic energy before it reaches the gypsum joint.
Protocol 3: Surface Scuffs and Face-Paper Delamination
When heavy objects scrape against the wall, the heavy-duty face paper of National Gypsum Gold Bond XP Hi-Abuse can tear or delaminate without breaching the dense core. Sanding the torn paper will only create a larger, fuzzier blemish.
Instead, use a sharp drywall knife to cleanly slice away the delaminated paper down to the solid gypsum core. Seal the exposed brown core paper with an oil-based or shellac-based primer (like Zinsser B-I-N) to prevent the moisture in your joint compound from causing the surrounding face paper to blister. Once sealed, apply two thin coats of topping compound, sanding lightly between coats to restore a Level 4 or Level 5 finish.
Material and Cost Breakdown for Impact Board Repairs
Maintaining an inventory of the correct materials is critical for facility maintenance teams. Standard drywall supplies are insufficient for impact board repairs. Below is the estimated material cost breakdown for a commercial maintenance kit in 2026.
| Material | Specific Product Recommendation | Estimated Cost (2026) | Purpose |
|---|---|---|---|
| 5/8" Abuse-Resistant Panel | USG Fiberock or GP ToughRock Abuse Guard | $24.00 - $32.00 / sheet | Level 3 cutout replacements |
| High-Strength Base Compound | USG Durabond 90 Setting-Type | $22.00 / 25lb bag | Deep cavity structural fills |
| Fast-Set Skim Compound | USG Easy Sand 45 | $28.00 / 25lb bag | Embedding tape and surface leveling |
| Structural Joint Tape | FibaTape Extra Strength 2-3/8" | $9.50 / roll | Reinforcing deflection cracks |
| Sealer / Primer | Zinsser B-I-N Shellac Base | $18.00 / quart | Sealing exposed core paper |
By utilizing setting-type chemistry, mechanical undercuts, and structural reinforcement tapes, facility managers can execute permanent repairs on impact resistant gypsum board that withstand the rigorous demands of commercial environments without recurring callbacks.
Written by
David NakamuraDavid Nakamura is a licensed architect (AIA) and construction technology writer focused on sustainable building methods, mass timber engineering, and high-performance building envelopes. He holds a Master of Architecture from the University of Washington and is a certified Passive House Consultant (CPHC). David spent eight years at the Seattle firm Mithun, where he led the design of three LEED Platinum projects, before founding his own practice specializing in net-zero residential design. He serves on the editorial advisory board of GreenBuilder Magazine and has authored peer-reviewed papers on cross-laminated timber (CLT) connections for the Journal of Structural Engineering. In his spare time, David teaches woodworking at Pratt Fine Arts Center and kayaks the Puget Sound.
More from David Nakamura
View all
Construction Cost
Labor Cost to Build a Deck Per Sq Ft: 2026 Installation Guide
Discover the exact labor cost to build a deck per sq ft in 2026. This installation guide breaks down contractor rates, complexity factors, and hidden fees.
Aug 4, 2026

Construction Cost
How Much Does It Cost to Build a 3 Bedroom House? Financing Guide
Learn exactly how much it costs to build a 3 bedroom house and explore 2026 financing options, construction loan types, and budget frameworks for your build.
Aug 4, 2026

Construction Cost
Cost to Build a Tennis Court: 2026 Guide
How much does it cost to build a tennis court in 2026? Breakdowns for asphalt, concrete, and synthetic surfaces plus fencing and lighting.
Jul 30, 2026