Repairing Plaster Over Gypsum Board: Troubleshoot Cracks & Blisters
Learn how to troubleshoot and repair plaster over gypsum board. Expert fixes for cracking, delamination, and blisters using veneer plaster techniques.

The Anatomy of Veneer Plaster Failures
Applying plaster over gypsum board—commonly known as veneer plastering or skim coating—creates a monolithic, impact-resistant surface that outperforms standard joint compound finishes. However, when the chemical or mechanical bond fails, the resulting defects require precise diagnostic and repair protocols. Unlike standard drywall finishing, veneer plaster relies on controlled crystalline setting and substrate suction. Failures typically manifest as map cracking, delamination, or blistering, each pointing to a specific error in substrate preparation, mixing ratios, or environmental control.
Symptom-to-Cause Diagnostic Matrix
Accurate repair begins with identifying the failure mode. Use the following matrix to diagnose the root cause before selecting a repair method. For comprehensive industry standards on substrate preparation, refer to the Gypsum Association technical resources.
| Symptom | Root Cause | Diagnostic Test | Primary Repair Strategy |
|---|---|---|---|
| Map Cracking (Spiderweb) | Application too thick; rapid moisture loss from drafts or high heat. | Visual inspection; crack depth is superficial (finish coat only). | Scrape failed finish, re-prime, apply thin diamond veneer coat. |
| Delamination (Hollow sound) | Missing PVA bonding agent; dusty substrate; structural deflection. | Tap test with a knuckle or metal trowel handle. | Cut out hollow sections, treat edges with bonder, patch with base coat. |
| Blisters and Bubbles | Trapped air; troweling finish coat before base coat achieved initial set. | Puncture blister; check for void between base and finish coats. | Remove blistered area, re-trowel with proper timing sequence. |
| Efflorescence (White powder) | Moisture intrusion from behind the gypsum board carrying soluble salts. | Moisture meter reading on substrate; visual salt deposits. | Fix water leak, remove plaster, apply efflorescence blocker, replaster. |
Step-by-Step Repair Protocols
1. Remedying Map Cracking and Shrinkage
Map cracking occurs when the plaster surface dries faster than the underlying material, or when the finish coat exceeds 1/16 inch in thickness. To repair:
- Remove the Failed Material: Use a 6-inch stiff taping knife to scrape away all loose, cracked finish plaster down to the base coat or gypsum board face paper.
- Clean and Prime: Vacuum the area to remove all crystalline dust. Apply a diluted PVA bonding agent (mixed 1 part bonder to 3 parts water) to seal the porous base coat and control suction.
- Mix the Finish Coat: Prepare a small batch of USG Diamond Veneer Finish. Use exactly 2.5 to 3 gallons of clean, potable water per 50-lb bag. Over-watering weakens the crystalline matrix and causes secondary shrinkage.
- Apply and Trowel: Apply the finish coat at a strict 1/16-inch thickness using a 12-inch stainless steel trowel held at a 15-degree angle. Do not over-trowel, as this brings excess water (laitance) to the surface, weakening the crust.
2. Resolving Delamination and Hollow Voids
Delamination is the complete separation of the plaster from the gypsum core or face paper. If the tap test yields a hollow sound, the mechanical bond is compromised.
- Delineate the Failure Zone: Tap outward from the hollow spot until the sound becomes solid. Mark this boundary with a pencil.
- Excavate the Area: Use a drywall jab saw or a multi-tool to cut out the delaminated plaster. Score the gypsum face paper at the edges to create a clean, beveled transition.
- Treat the Edges: Apply undiluted USG Plaster Bonder to the exposed gypsum core and the edges of the remaining plaster. Allow it to dry completely (typically 24 hours, or until it turns from milky white to clear/dark red).
- Patch with Base Coat: Fill the void with USG Imperial Veneer Plaster (base coat). Scratch the surface of the wet base coat with a cross-hatch pattern to provide a mechanical key for the final finish coat.
3. Eliminating Blisters and Bubbles
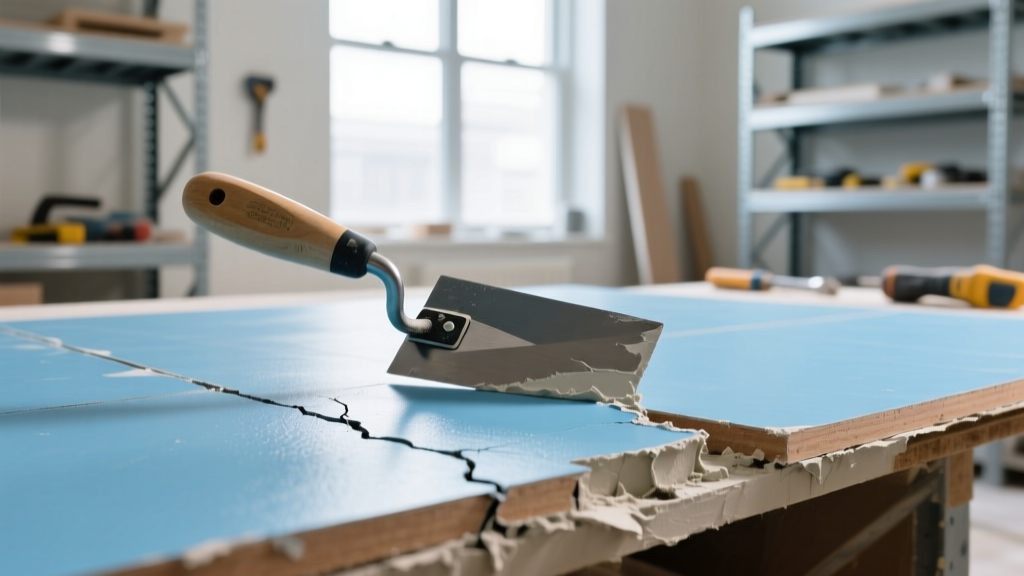
Blisters form when air is trapped between the base and finish coats, usually because the plasterer applied the finish coat while the base coat was still in its plastic (pre-set) state, pushing air into the soft underlying layer.
- The Fix: Slice the top of the blister with a utility knife. Press the area flat. If the underlying base coat is fully set and solid, inject a thin slurry of veneer plaster into the slit using a wide putty knife, forcing it into the void. Trowel flat immediately. If the base coat is soft, you must remove the entire blistered section and re-apply both coats, ensuring the base coat reaches its initial set (stiffens and resists light thumb pressure) before the finish coat is applied.
Material Selection and Mixing Ratios for 2026 Repairs
Selecting the correct plaster compound is critical for matching the hardness and setting time of the existing wall. The USG Plaster Systems guide provides the definitive specifications for these materials.
| Product Name | Type | Setting Time | Best Use Case in Repairs |
|---|---|---|---|
| USG Imperial Veneer Plaster | Base Coat | 2 to 4 hours | Deep patching, filling voids, establishing a scratch base over blue board. |
| USG Diamond Veneer Finish | Finish Coat | Variable (Job-mixed) | Final skim coating, achieving a smooth or sand-float texture. |
| USG Structo-Lite | Base Coat (Perlite) | 2 to 4 hours | Filling deep structural voids or gaps exceeding 1/2 inch before veneering. |
| USG Plaster Bonder | PVA Bonding Agent | 24 hours to dry | Mandatory primer for applying plaster over standard drywall or painted surfaces. |
Environmental Constraints and Curing
Plaster chemistry is highly sensitive to ambient conditions. Attempting repairs outside the optimal environmental envelope will result in recurring failures.
- Temperature: Maintain a minimum ambient and substrate temperature of 55°F (13°C) for 48 hours before, during, and after application.
- Airflow: Avoid direct drafts from HVAC registers, open windows, or fans. Rapid surface evaporation causes plastic shrinkage cracking before the crystalline set occurs.
- Humidity: In high-humidity environments (above 80% RH), setting times will extend significantly. Do not force-dry plaster with direct heat sources like space heaters, as this creates a weak, powdery surface crust.
Frequently Asked Questions
Can I use standard drywall joint compound to repair veneer plaster?
For minor cosmetic hairline cracks, a high-quality setting-type joint compound (like USG Durabond 45) can be used as a filler. However, standard air-drying joint compound lacks the compressive strength and impact resistance of veneer plaster. If the repair area exceeds 12 square inches, or if the wall is subject to physical abrasion, you must use a true veneer plaster system to maintain the monolithic integrity of the wall.
Why is my repaired plaster turning yellow or brown?
Discoloration (yellowing or browning) is typically caused by tannin or resin bleed-through from the underlying substrate, or by applying plaster over a water stain that was not properly sealed. To fix this, the area must be sanded, sealed with a stain-blocking oil-based primer or shellac (such as BIN), and then re-skimmed or painted. Plaster itself will not hide organic stains.
How do I match the existing sand-float texture during a repair?
Sand-float finishes are achieved by mixing USG Imperial Sand (or a similar graded silica sand) into the Diamond Veneer Finish plaster. The standard ratio is 1 to 2 pounds of sand per gallon of mixed finish plaster. Apply the mixture and use a damp sponge or a float trowel in circular motions as the plaster begins to stiffen to expose the aggregate and match the surrounding texture profile.
Written by
Sarah WhitfieldSarah Whitfield is a chartered quantity surveyor (MRICS) and construction cost analyst with 15 years of experience in material pricing, procurement strategy, and project budgeting. She earned her degree in Construction Management from the University of Reading (UK) and has worked on projects ranging from $2M custom homes to $180M mixed-use developments across North America and Europe. Sarah currently leads cost estimating for BuildMat Insight, maintaining a proprietary database of 4,000+ material price points updated quarterly. She is a frequent contributor to RSMeans cost data panels and has presented at the International Cost Engineering Council (ICEC) congress. Based in Denver, CO, Sarah is an avid trail runner and volunteer mentor for Women in Construction.
More from Sarah Whitfield
View all
Wood & Lumber
What Are the Different Types of Wood? A Builder's Guide
Compare structural softwoods, finish hardwoods, and engineered lumber. Analyze Janka ratings, MOE values, and 2026 pricing for construction.
Aug 4, 2026

Walls & Panels
Steel Framing vs Wood Framing: Corrosion and Moisture Defense
Compare steel framing vs wood framing for moisture resistance. Learn about galvanized coatings, condensation risks, and corrosion protection strategies.
Jul 21, 2026

Stone & Masonry
How to Cut Stone Veneer: Wet Saw vs Grinder Comparison
Compare the best tools for cutting stone veneer. We review wet saws, angle grinders, and chop saws to help you achieve clean, chip-free cuts.
Jul 21, 2026