Vinyl Coated Gypsum Board: Specs, Costs, and Installation Guide
Explore vinyl coated gypsum board specifications, commercial costs per square foot, and adhesive installation methods for high-traffic interiors.

Understanding Vinyl Coated Gypsum Board Architecture
Vinyl coated gypsum board (VFG) is a specialized interior wall and ceiling panel engineered for environments requiring high durability, strict hygiene standards, and minimal lifecycle maintenance. Unlike standard drywall that requires taping, mudding, and painting, VFG features a factory-applied polyvinyl chloride (PVC) laminate fused directly to the face of the gypsum core. This eliminates on-site finishing labor and provides a seamless, scrubbable surface immediately upon installation.
The anatomy of a commercial-grade VFG panel consists of three distinct layers. The core is typically formulated to meet ASTM C1396 standards, available in regular, moisture-resistant (MR), or Type X fire-rated formulations. The face is a heavy-duty vinyl laminate, typically ranging from 4 to 10 mils in thickness, often embossed with linen, stucco, or pebble textures to mask minor substrate imperfections. The back is usually a heavy kraft paper or, in high-humidity applications, a fiberglass mat to prevent moisture ingress and warping.
Material Specifications and Performance Metrics
Selecting the correct VFG panel requires matching the core type and vinyl weight to the specific environmental demands of the space. Healthcare facilities, for instance, mandate Type X cores for corridor fire ratings and thicker vinyl laminates to withstand aggressive chemical disinfectants.
| Core Type | Thickness | Fire Rating (ASTM E119) | Primary Application |
|---|---|---|---|
| Standard Gypsum | 1/2" | Non-Rated | Back-of-house offices, retail stockrooms |
| Type X (Fire-Rated) | 5/8" | 1-Hour (Single Layer) | Hospital corridors, elevator lobbies, stairwells |
| Moisture-Resistant (MR) | 1/2" or 5/8" | Varies by core | Commercial kitchens, laundry facilities, restrooms |
| Abuse-Resistant | 5/8" | 1-Hour (Type X core) | School hallways, behavioral health facilities |
According to testing protocols outlined by the Gypsum Association, properly installed VFG systems achieve a Class A fire rating per ASTM E84, meaning they exhibit a flame spread index of 25 or less and a smoke-developed index of 50 or less. This makes them compliant for nearly all commercial egress routes.
Cost Breakdown: Material and Labor in Commercial Projects
While the upfront material cost of vinyl coated gypsum board is higher than standard drywall, the total installed cost is frequently lower due to the elimination of taping, mudding, sanding, priming, and painting. Below is a detailed cost matrix based on 2026 commercial construction pricing for a standard 50,000 square foot project.
- VFG Material (5/8" Type X, 6-mil vinyl): $1.85 – $2.60 / sq. ft.
- Specialty VFG Adhesive (Mastic): $0.45 – $0.70 / sq. ft.
- Labor (Adhesive application and panel setting): $1.50 – $2.50 / sq. ft.
- Trim and Reveals (Aluminum/PVC H-molds): $0.80 – $1.20 / linear ft.
- Total Installed Cost: $4.60 – $7.00 / sq. ft.
Compare this to standard Level 4 drywall finish and paint, which typically ranges from $3.50 to $5.50 / sq. ft. installed, but requires repainting every 3-5 years in high-traffic zones.
Adhesive Installation Protocols and Substrate Prep
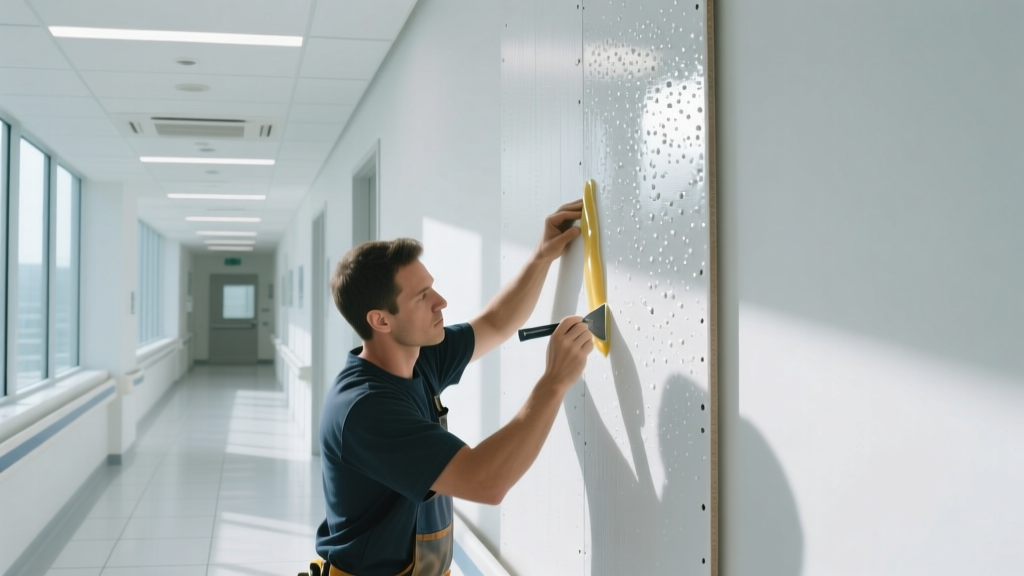
VFG is rarely installed using mechanical fasteners (screws) directly through the face, as this punctures the vinyl and creates unsealed holes. Instead, it is applied using a full-coverage or ribbon adhesive method over a code-approved substrate, such as bare standard drywall, plaster, or concrete masonry units (CMU).
Step 1: Substrate Preparation
The substrate must be structurally sound, clean, and flat to within 1/8 inch in 10 feet. Any protruding screw heads or drywall mud ridges must be sanded flush. If applying over painted surfaces, the paint must be deglossed and tested for adhesion; peeling paint must be scraped and primed. Porous substrates like bare CMU may require a block filler or masonry primer to prevent the adhesive from absorbing too quickly.
Step 2: Adhesive Application
Use only manufacturer-approved VFG mastic (e.g., water-based acrylic or specific rubber-based adhesives recommended by manufacturers like National Gypsum or USG). Apply the adhesive to the substrate using a 1/8" x 1/8" x 1/8" notched trowel. For ribbon application, apply continuous vertical beads spaced 12 inches on center. Do not apply adhesive closer than 2 inches to the perimeter edges to prevent squeeze-out.
VFG adhesives have a critical open time, typically 15 to 30 minutes depending on ambient humidity. If the adhesive skins over before the panel is set, it will not bond. Only apply adhesive for one or two panels at a time.
Step 3: Panel Setting and Roll-Out
Position the panel and press firmly against the substrate. Immediately use a 75-pound to 100-pound floor roller to apply uniform pressure across the entire face of the board. This ensures full contact and pushes out air pockets. Pay special attention to the edges and corners, which are prone to lifting.
Edge Treatments and Joint Management
Because VFG cannot be taped and mudded, joint management relies entirely on physical trim and color-matched sealants. The choice of edge treatment dictates the aesthetic and the hygienic performance of the wall.
- H-Mold (Shiplap Joint): A rigid PVC or aluminum H-channel that slips over the factory edges of two adjacent panels. This provides a clean, reveal-style look and protects the edges from impact. It is the preferred method for hospital corridors.
- Reveal Mold (Z-Trim): Creates a 1/4" or 3/8" shadow line between panels. Often used in modern office designs to break up large wall expanses.
- Butt Joints with Caulk: Panels are installed tightly together, and the seam is filled with a flexible, color-matched, mildew-resistant silicone or polyurethane sealant. This is the most hygienic option as it leaves no crevices for bacteria to accumulate, but it requires high precision during installation to ensure straight seams.
Maintenance, Cleaning, and Lifecycle Management
The primary ROI of vinyl coated gypsum board is realized in the maintenance phase. The non-porous vinyl surface resists staining from iodine, betadine, and common food dyes. However, improper cleaning can degrade the plasticizers in the PVC, leading to yellowing or embrittlement.
Facility management teams should use pH-neutral, non-abrasive cleaners. Quaternary ammonium compounds (quats) are generally safe for disinfection. Avoid harsh solvents such as acetone, methyl ethyl ketone (MEK), or undiluted bleach, which will strip the factory-applied urethane topcoat. For scuff marks, a melamine sponge used with light pressure and water is highly effective without damaging the texture.
Frequently Asked Questions
Can vinyl coated gypsum board be installed in exterior applications?
No. VFG is strictly an interior product. The gypsum core is susceptible to water degradation, and the vinyl face will degrade, chalk, and delaminate under prolonged UV exposure and exterior temperature fluctuations.
Is it possible to paint over vinyl coated gypsum board?
While technically possible, it defeats the purpose of the product. If a color change is required, the surface must be thoroughly deglossed, primed with a high-adhesion bonding primer (such as an epoxy or urethane-based primer), and then painted with a high-quality acrylic latex. Standard primers will peel off the vinyl face in sheets.
How do you handle electrical outlets and HVAC registers on VFG?
Cutouts for electrical boxes and diffusers must be routed or cut with extreme precision using a drywall router with a flush-trim bit. Because you cannot use mud to hide gaps, the cutout must be exact. After cutting, apply a bead of color-matched caulk around the perimeter of the device cover plate to seal the joint and maintain the hygienic barrier.
Written by
Sarah WhitfieldSarah Whitfield is a chartered quantity surveyor (MRICS) and construction cost analyst with 15 years of experience in material pricing, procurement strategy, and project budgeting. She earned her degree in Construction Management from the University of Reading (UK) and has worked on projects ranging from $2M custom homes to $180M mixed-use developments across North America and Europe. Sarah currently leads cost estimating for BuildMat Insight, maintaining a proprietary database of 4,000+ material price points updated quarterly. She is a frequent contributor to RSMeans cost data panels and has presented at the International Cost Engineering Council (ICEC) congress. Based in Denver, CO, Sarah is an avid trail runner and volunteer mentor for Women in Construction.
More from Sarah Whitfield
View all
Wood & Lumber
What Are the Different Types of Wood? A Builder's Guide
Compare structural softwoods, finish hardwoods, and engineered lumber. Analyze Janka ratings, MOE values, and 2026 pricing for construction.
Aug 4, 2026

Walls & Panels
Steel Framing vs Wood Framing: Corrosion and Moisture Defense
Compare steel framing vs wood framing for moisture resistance. Learn about galvanized coatings, condensation risks, and corrosion protection strategies.
Jul 21, 2026

Stone & Masonry
How to Cut Stone Veneer: Wet Saw vs Grinder Comparison
Compare the best tools for cutting stone veneer. We review wet saws, angle grinders, and chop saws to help you achieve clean, chip-free cuts.
Jul 21, 2026