Step-by-Step Guide to Framing a Basement with Steel Studs
Learn the exact steps, material costs, and pro tips for framing a basement with steel studs. Avoid moisture traps and build straight, durable walls.

Basements present a unique set of environmental challenges: high humidity, fluctuating temperatures, and direct contact with moisture-prone concrete. While traditional wood framing is susceptible to rot, warping, and mold in these conditions, light-gauge steel framing provides a dimensionally stable, inorganic alternative. This guide details the exact material specifications, structural layouts, and execution steps required for framing a basement with steel studs, eliminating the guesswork and common failure points associated with below-grade construction.
Material Matrix: Steel vs. Wood in Below-Grade Environments
Before purchasing materials, understand the physical trade-offs. Steel behaves fundamentally differently than dimensional lumber, particularly regarding thermal conductivity and moisture interaction.
| Performance Metric | Galvanized Steel Studs (20-Gauge) | Dimensional Lumber (2x4 SPF) |
|---|---|---|
| Moisture Resistance | Impervious to rot; requires capillary break at concrete | Absorbs moisture; high risk of mold and dry rot |
| Dimensional Stability | 100% straight; will not warp, twist, or crown | Prone to twisting and bowing as it dries |
| Thermal Bridging | High conductivity; requires continuous insulation | Low conductivity; natural thermal break |
| Fastening Method | Self-drilling screws; powder-actuated tools (PAT) | Nails; standard wood screws |
| Weight & Handling | Approx. 0.75 lbs/linear foot (easy solo handling) | Approx. 1.5 lbs/linear foot |
Exact Material Specifications and Sourcing
Do not buy generic "metal studs" from big-box home centers without verifying the mil thickness. Structural integrity and drywall screw retention depend on precise gauges. According to the Steel Framing Industry Alliance (SFIA), interior non-load-bearing walls require specific minimum thicknesses to prevent deflection.
The Critical Fastener List
- Concrete-to-Track: Ramset .22 caliber Yellow powder loads with 3/4" washered pins, or 3/16" x 1-1/4" Tapcon masonry screws (if drilling is preferred over PAT).
- Steel-to-Steel (Framing): #8 x 5/8" pancake-head self-drilling screws (e.g., Buildex Rock-On). The low-profile pancake head prevents drywall dimpling.
- Drywall-to-Steel: #6 x 1-1/4" fine-thread, bugle-head drywall screws. Coarse threads will strip the 33-mil steel.
- Capillary Break: 1/4" closed-cell polyethylene foam sill sealer (e.g., FoamSealR).
Budgeting: Steel Stud Basement Framing Costs
Pricing for light-gauge steel fluctuates with raw material markets, but the following breakdown reflects current market rates for a standard 100-linear-foot basement perimeter wall layout (assuming 8-foot ceiling height).
| Material Component | Quantity Required | Unit Cost | Total Cost |
|---|---|---|---|
| 3-5/8" 20-Ga Tracks (10ft lengths) | 20 pieces (Top & Bottom) | $9.50 | $190.00 |
| 3-5/8" 20-Ga Studs (8ft lengths) | 75 pieces (16" O.C. layout) | $11.20 | $840.00 |
| Concrete Fasteners & Loads | 1 Box (100 ct) + 1 Sleeve | $65.00 | $65.00 |
| #8 Pancake Screws (1 lb box) | 2 boxes | $18.50 | $37.00 |
| Foam Sill Sealer (50ft rolls) | 2 rolls | $22.00 | $44.00 |
| Total Material Cost | $1,176.00 |
Note: This equates to roughly $11.76 per linear foot of wall for raw framing materials, approximately 15-20% higher than premium SPF lumber, but offset by zero waste from warped boards and eliminated mold-remediation risks.
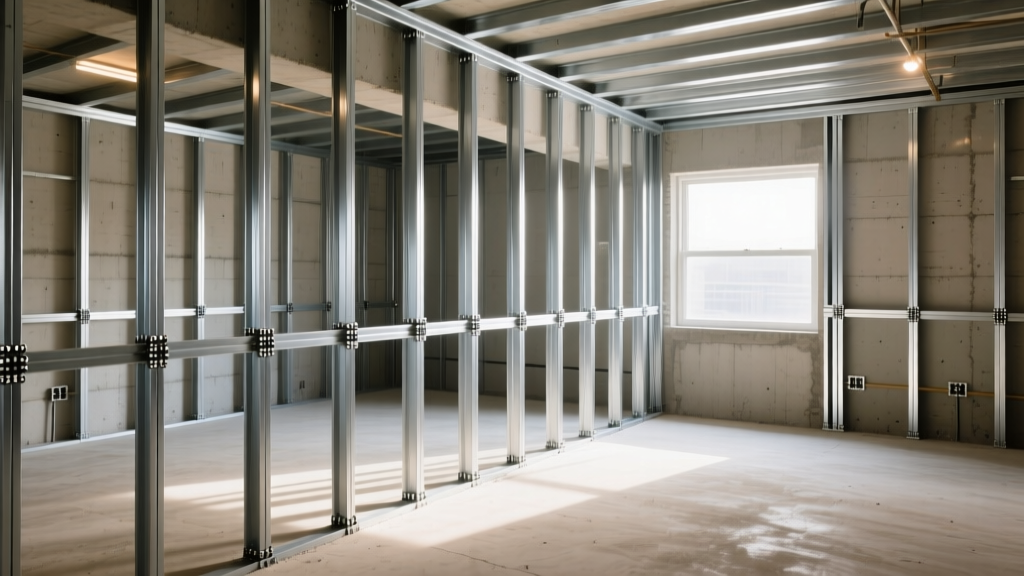
Execution: Step-by-Step Framing Sequence
1. Layout and the Capillary Break
Snap a chalk line on the concrete floor 3-5/8" away from the foundation wall (or thicker if adding rigid foam insulation). Unroll the closed-cell foam sill sealer directly over the chalk line. This foam is non-negotiable; it prevents concrete moisture from wicking up into the steel track and transferring to the bottom edge of your drywall, which is the primary cause of basement baseboard mold.
2. Securing the Bottom Track
Place the steel track over the foam. Using a powder-actuated tool (PAT) with a .22 caliber yellow load, drive 3/4" pins through the track, through the foam, and into the concrete. Space fasteners at 24 inches on center.
3. Plumbing the Top Track
Drop a plumb bob from the ceiling joists or use a rotary laser level to transfer the bottom track layout to the ceiling. Secure the top track to the wooden floor joists above using #10 x 2-1/2" structural wood screws. If the ceiling is concrete, use the same PAT method as the floor.
4. Cutting and Snapping Studs
Measure the distance between the top and bottom tracks at every single stud location. Basements rarely have perfectly level floors or flat ceilings. Cut each 20-gauge stud using aviation snips or a specialized steel-cutting chop saw (do not use an abrasive cutoff saw; the heat destroys the galvanized zinc coating, inviting rust).
Insert the stud into the tracks. For 33-mil steel, you do not need to pre-drill. Drive two #8 x 5/8" pancake screws through the track flange into the stud web on both sides. Alternatively, use a stud crimper to mechanically lock the pieces together, reserving screws only for structural nodes.
5. Blocking and Mechanical Rough-Ins
Install horizontal blocking between studs at 48 inches above the floor to support drywall seams and provide backing for heavy wall-mounted items (TVs, cabinets). According to ClarkDietrich Building Systems, utilizing pre-punched utility holes in the web of the studs allows for easy routing of electrical and plumbing. Always snap plastic grommets into the punched holes before pulling Romex wire to prevent the sharp steel edges from stripping the wire insulation and causing a short circuit.
Critical Failure Modes and Troubleshooting
Even experienced wood framers make specific errors when transitioning to steel. Avoid these common basement framing failures:
- Galvanic Corrosion from Copper Pipes: If you are running bare copper water lines through your steel studs, the dissimilar metals will cause galvanic corrosion when moisture is present, eventually eating through the copper. Fix: Always use PEX tubing in steel-framed basements, or wrap copper pipes in closed-cell foam sleeves before passing them through the steel web.
- Drywall Screw Blowout: Using standard wood-framing drywall screws (coarse thread) on 20-gauge steel will result in the screw spinning endlessly or tearing the paper facing of the drywall without biting the metal. Fix: Strictly use fine-thread, self-drilling drywall screws rated for 20 to 25-gauge metal.
- Thermal Bridging Condensation: Steel conducts heat 400 times faster than wood. In winter, the cold concrete will chill the steel track, which will chill the drywall, causing interior condensation and ghosting (dark marks on the drywall over the studs). Fix: Install a minimum of 1-inch continuous XPS or polyiso rigid foam board directly against the concrete wall before framing, or use exterior insulation to move the dew point outside the assembly.
Expert FAQ
Do I need pressure-treated lumber at the bottom of a steel stud wall?
No. Pressure-treated lumber is required for wood framing to prevent rot where the wood touches concrete. In steel framing, the bottom track is galvanized (G60 or G90 coating) and will not rot. The foam sill sealer handles the moisture and thermal break requirements.
Can I frame a load-bearing wall in a basement with steel studs?
Yes, but you must upgrade from 20-gauge (33 mil) to 16-gauge (54 mil) or 14-gauge (68 mil) structural studs, and you must engineer the top and bottom track connections to transfer the load to the concrete footing. For standard non-load-bearing partition walls enclosing a basement gym or media room, 20-gauge is perfectly adequate.
How do I hang heavy cabinets on steel stud basement walls?
Standard drywall anchors will pull out of steel studs under heavy loads. You must install 3/4" plywood blocking between the steel studs during the framing phase, secured with pancake screws, or use specialized toggle bolts rated for hollow metal cavities, such as SnapToggles, which distribute the load across the drywall and steel flange.
For further technical details on deflection limits and acoustic isolation in steel framing, refer to the USG Stud and Track Installation Guidelines. Proper execution of these details ensures your basement remains dry, straight, and structurally sound for decades.
Written by
Sarah WhitfieldSarah Whitfield is a chartered quantity surveyor (MRICS) and construction cost analyst with 15 years of experience in material pricing, procurement strategy, and project budgeting. She earned her degree in Construction Management from the University of Reading (UK) and has worked on projects ranging from $2M custom homes to $180M mixed-use developments across North America and Europe. Sarah currently leads cost estimating for BuildMat Insight, maintaining a proprietary database of 4,000+ material price points updated quarterly. She is a frequent contributor to RSMeans cost data panels and has presented at the International Cost Engineering Council (ICEC) congress. Based in Denver, CO, Sarah is an avid trail runner and volunteer mentor for Women in Construction.
More from Sarah Whitfield
View all
Wood & Lumber
What Are the Different Types of Wood? A Builder's Guide
Compare structural softwoods, finish hardwoods, and engineered lumber. Analyze Janka ratings, MOE values, and 2026 pricing for construction.
Aug 4, 2026

Walls & Panels
Steel Framing vs Wood Framing: Corrosion and Moisture Defense
Compare steel framing vs wood framing for moisture resistance. Learn about galvanized coatings, condensation risks, and corrosion protection strategies.
Jul 21, 2026

Stone & Masonry
How to Cut Stone Veneer: Wet Saw vs Grinder Comparison
Compare the best tools for cutting stone veneer. We review wet saws, angle grinders, and chop saws to help you achieve clean, chip-free cuts.
Jul 21, 2026